Table of Contents
This document provides step-by-step procedures for the use of the Data Import tool.
This document is intended for users with a clear understanding of the Tango applications as well as a base understanding of the data being loaded into Tango.
Function Dashboard
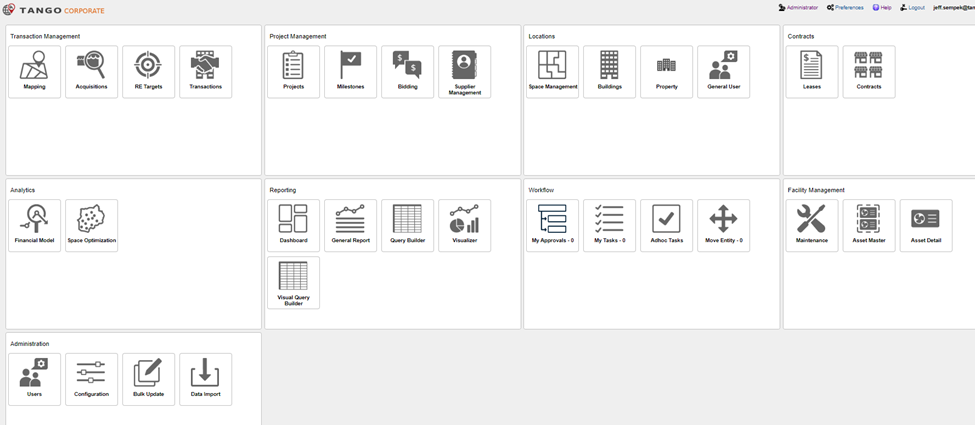
After a successful login, the main page Function Dashboard is displayed. Client security roles dictate indicate the feature groups and icons that are visible. Note the Data Import icon within the Administration group.
Data Import
This icon provides access to the Data Import functions.
| Step | Action |
|---|---|
| 1. |
Click Data Import in the Administration folder.
|
| 2. |
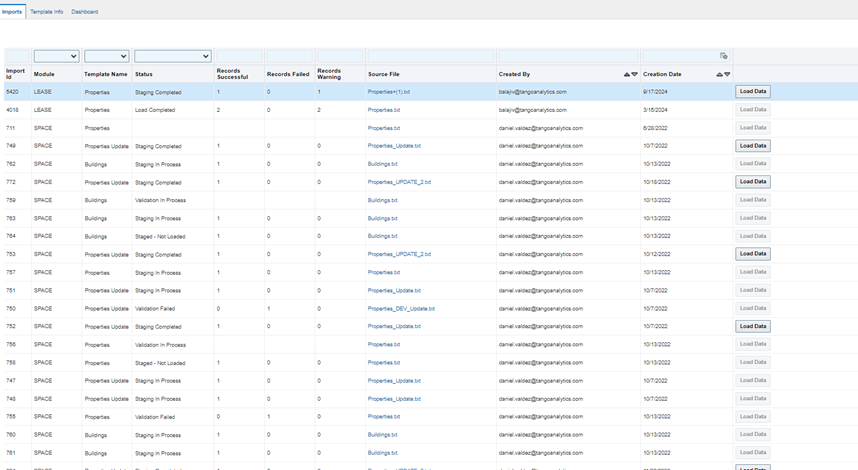
The Data Import landing page defaults to the Imports tab. The table provides a summary of the attempted imports of various data templates, and their pass or fail status during the validation process of the upload.
|
| 3. |
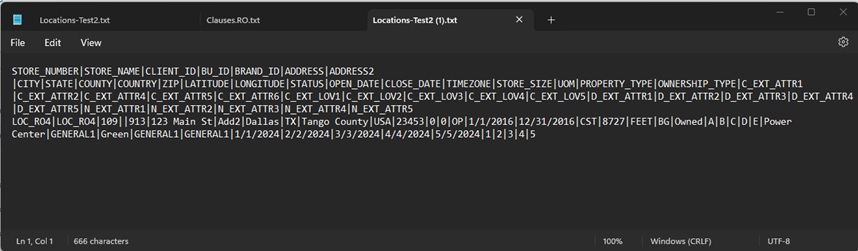
Click on the file name in the Source File column to download for viewing the pipe delimited text file used in the validation process:
|
| 4. |
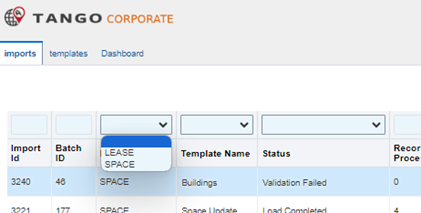
To Filter the results, click on a module you want to import data to. Currently, the modules supported for upload are Lease and Space.
|
| 5. |
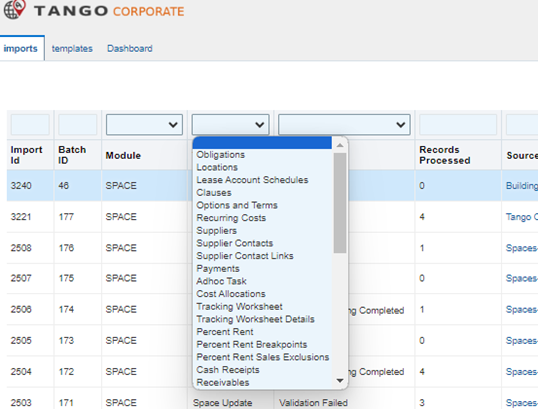
Click on a Template name in the drop-down menu.
|
| 6. |
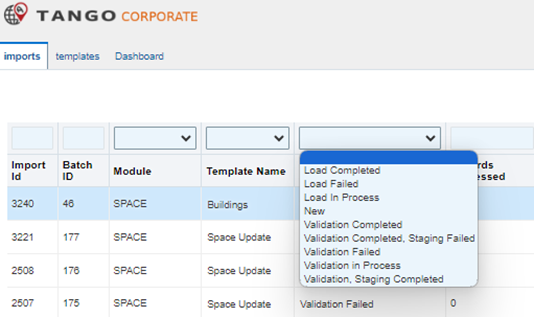
Click on a status from the drop-down menu.
|
| Click on Refresh to refresh the table. |
Importing Data
Follow the steps below to import data.
| Step | Action |
|---|---|
| 1. |
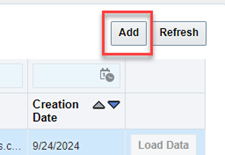
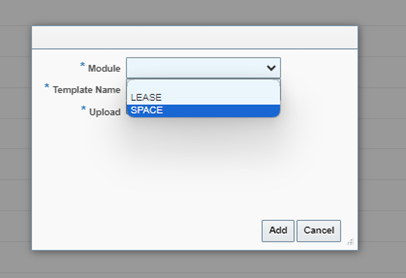
Click Add and select a Module from the drop-down in the Add dialog box:
|
| 2. |
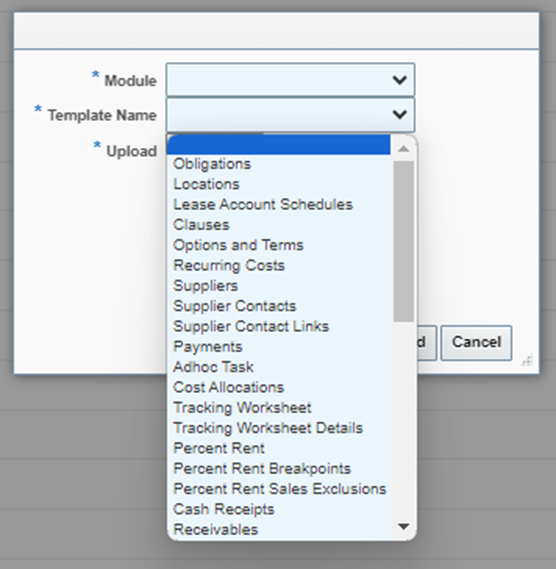
Select the data object from the Template Name field that data has been prepared for to process that data file.
|
| 3. |
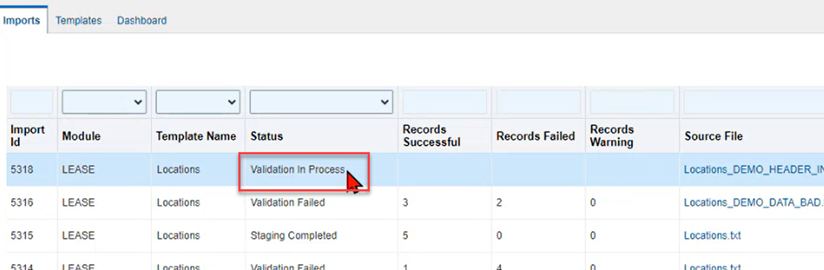
Choose a file to upload and click Add. Note: The Validation Process begins when the Add button is selected and the Imports table will display the new Import ID and display Validation in Process.
Note: There is no auto refresh after validation, you must click the Refresh button to see the results. |
4. |
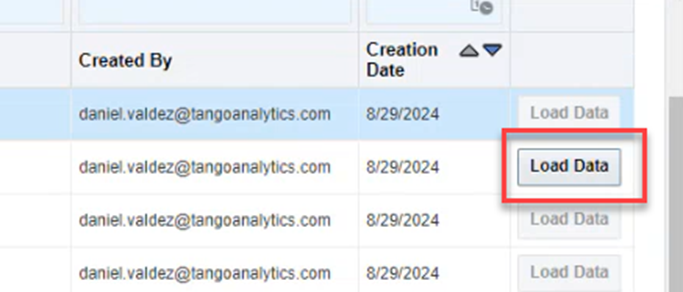
After the data has been validated, and the Status is in a “Staging Completed” state, the Load Data button will be clickable. Click the Load Data button to load the data to the core module:
|
Templates Info Tab
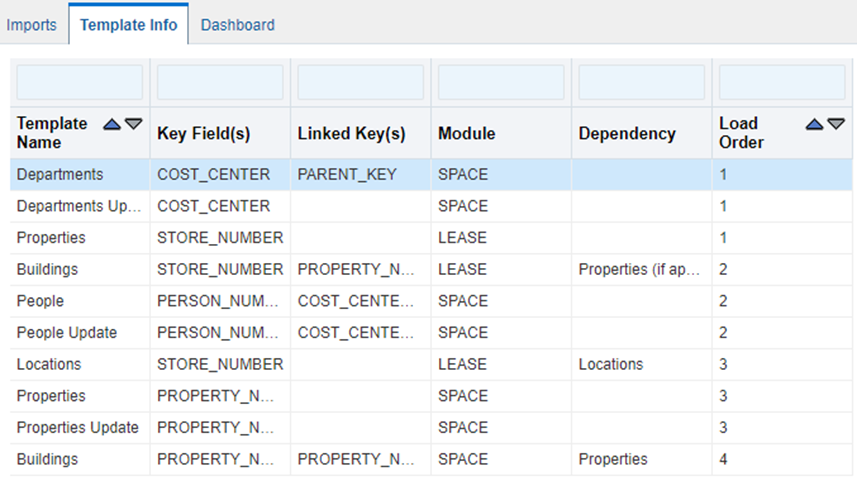
There are several templates (aka., data objects) available for populating the data that is imported using the Data Import Tool. The standard templates will need to be converted to pipe delimited for the verification process and upload.
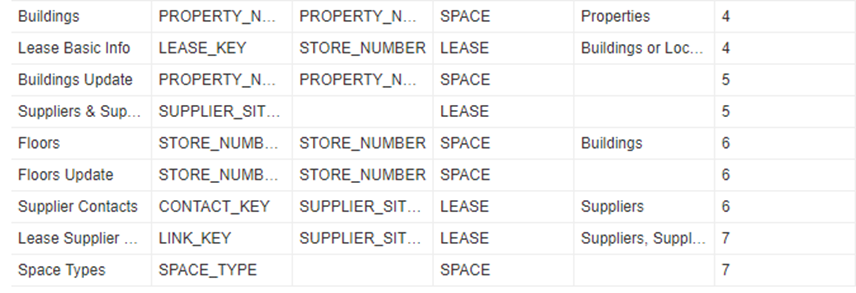
For each Data Object that data can be loaded to, there is a corresponding “template” tab in the workbook. Each Template provides a table describing the following:
Template Name – The name of the template being used. This name corresponds to the dropdown list of available objects in Step 2 of Section 3.1 of this user guide.
Key Fields – The unique data element in the that distinguishes data from any other data in the file.
Foreign Key – Data elements that links data to other data objects in another tab.
Module Name – The Lease or Space module.
Dependencies – There are dependencies in the order in which templates are uploaded (i.e. Properties before Buildings)
Load Order – The order in which templates will be uploaded once the templates have been populated with data and converted to a pipe delimited file.
| Step | Action |
|---|---|
| 1. |
Clicking on the Template Info tab displays all templates that have been uploaded:
|
| 2. | Clicking on the up/down arrows in the column heading will sort the column in ascending or descending order. |
Dashboard
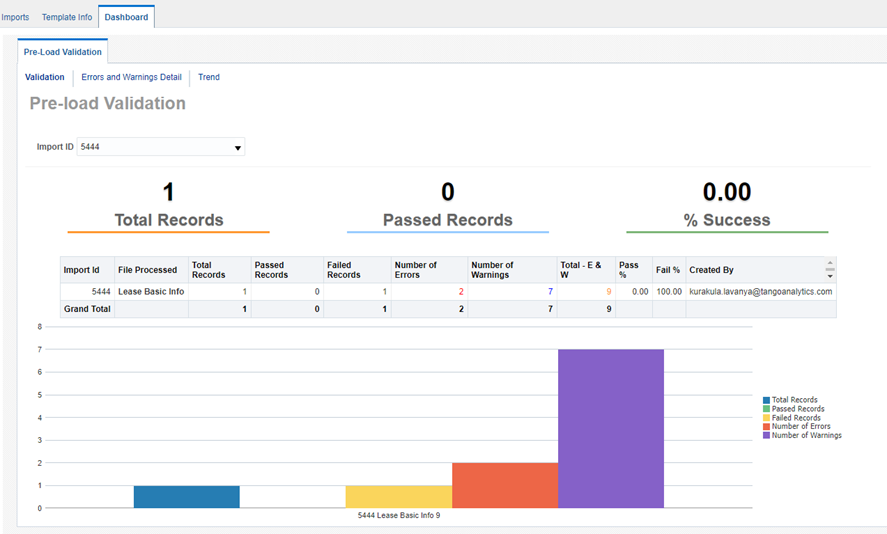
The Dashboard tab provides the status of the Pre-Load Validation, Errors and Warnings, and the trend for the file load success rate.
Validation Tab
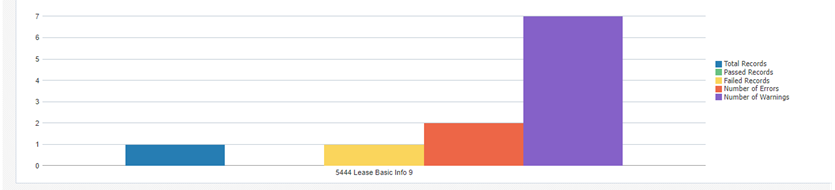
The Validation tab provides several ways to view the validation activity and results with bar graphs, popups and tables.
| Step | Action |
|---|---|
1. |
Click the Dashboard tab to display the landing page of the Dashboard:
Note: The dashboard provides a quick view of the results of the validation process. |
|
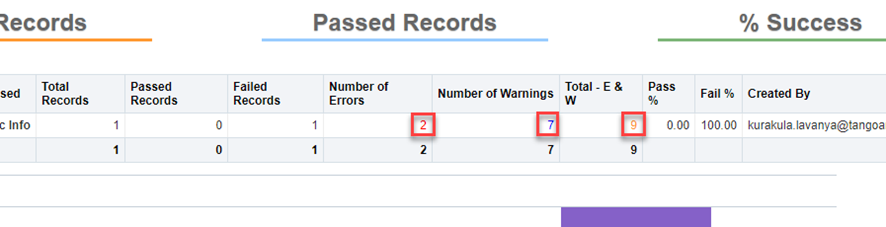
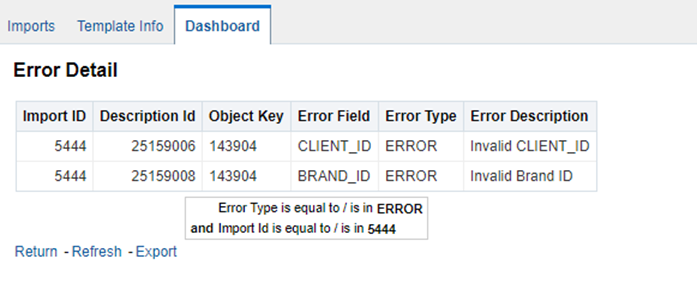
Click the number in the Number of Errors column to display details about the errors:
| |
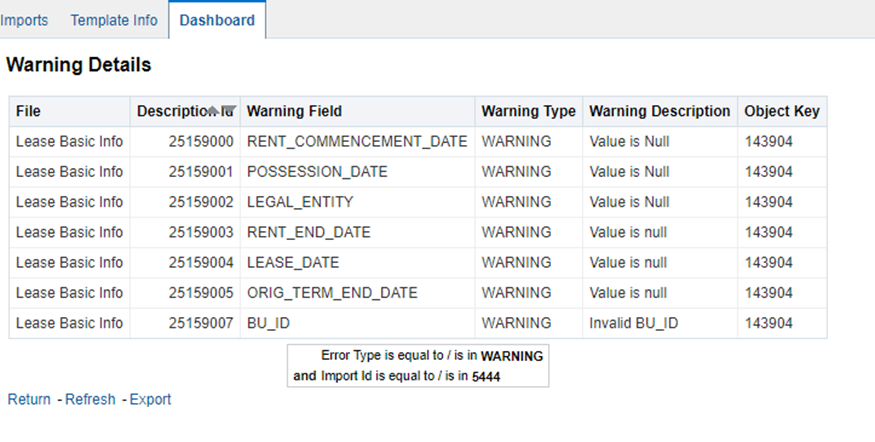
| 3. | Clicking on the number in the Number of Warnings field displays the details of the warnings. |
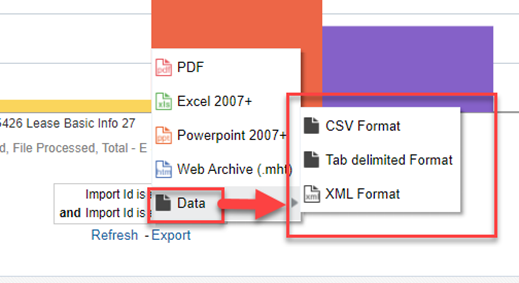
| 4. | Click on the Export button for several options to export the table data: |
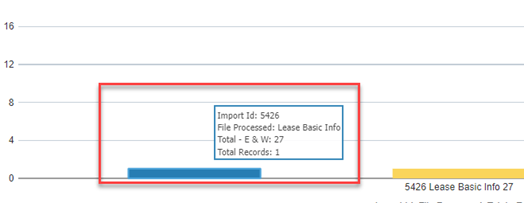
| 5. | Hovering the mouse over any of the bars in the graph displays a text block with a brief list of the results for that validation: |
| 6. |
Clicking on the bars on the dashboard displays the data in a report table. A legend is displayed to identify the data type the bar represents:
|
Errors and Warnings Detail Tab
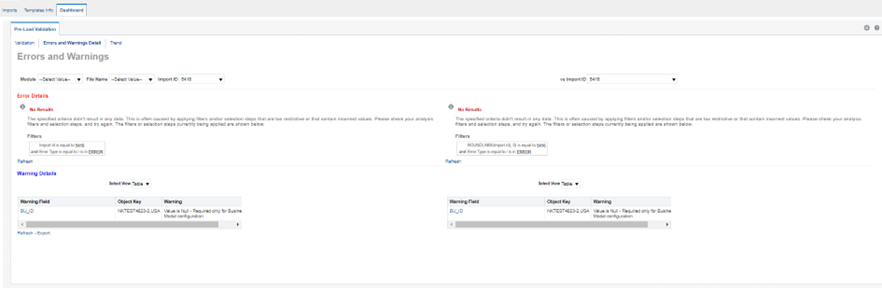
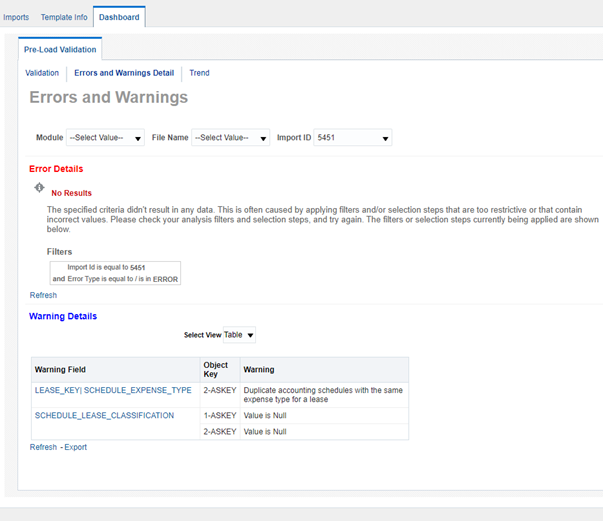
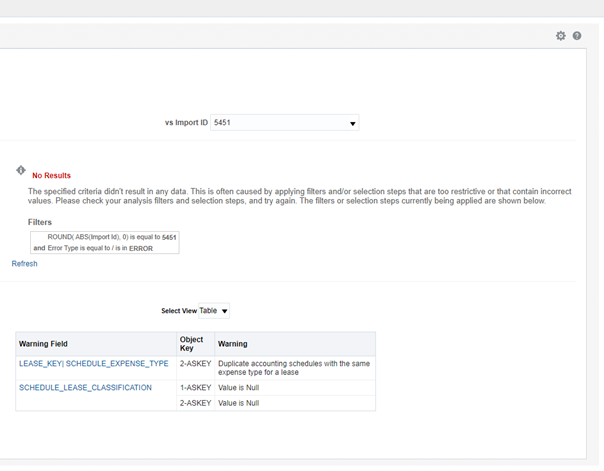
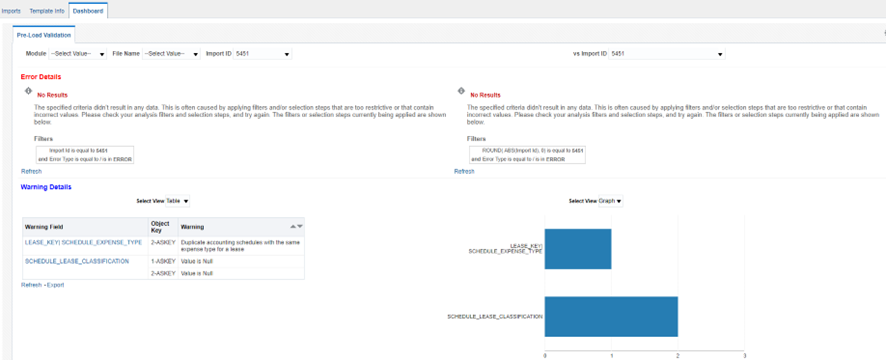
The Errors and Warnings detail provides a description of the errors or warnings identified during the validation process and provides information on what may have caused the issue. Errors prevent the file from being loaded. Warnings will still allow the file to be loaded but may result in data being load that does not satisfy all functional requirements needed by the application when loaded. Be sure to consult each template’s guidelines to ensure all considerations are understood.
| Step | Action |
|---|---|
1. |
Click the Errors and Warnings Detail tab to display the landing page. m The Error and Warnings Detail tab have been broken into two images for illustrative purposes in this document as follows: Left Side
Right Side
Together the landing page is displayed as follows:
|
| 2. |
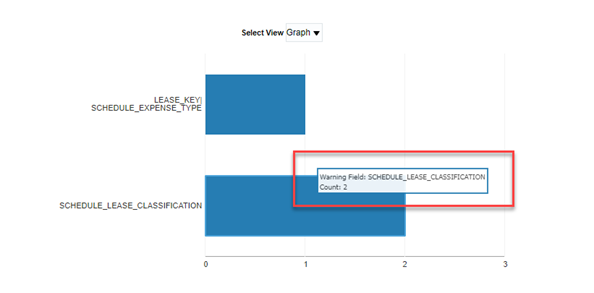
Hovering the mouse over any of the bars in the graph displays a text block with a brief list of the results for that validation:
|
Trends
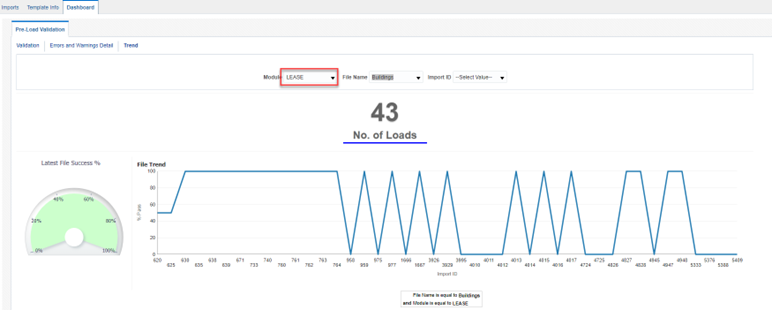
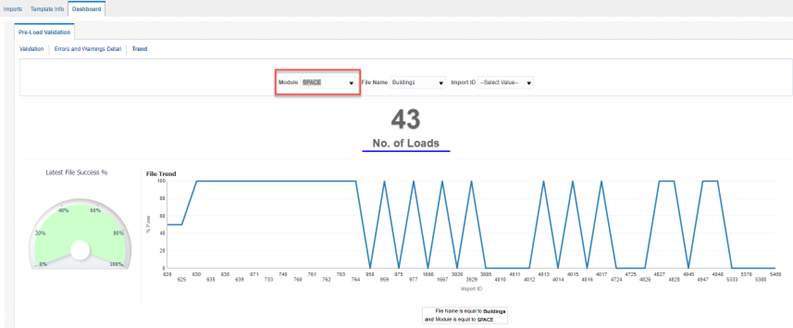
The Trends tab displays the file verification trends for a given module’s data object. The following is an example of a Lease module trend and a Space module trend:
Lease
Space
Template Management
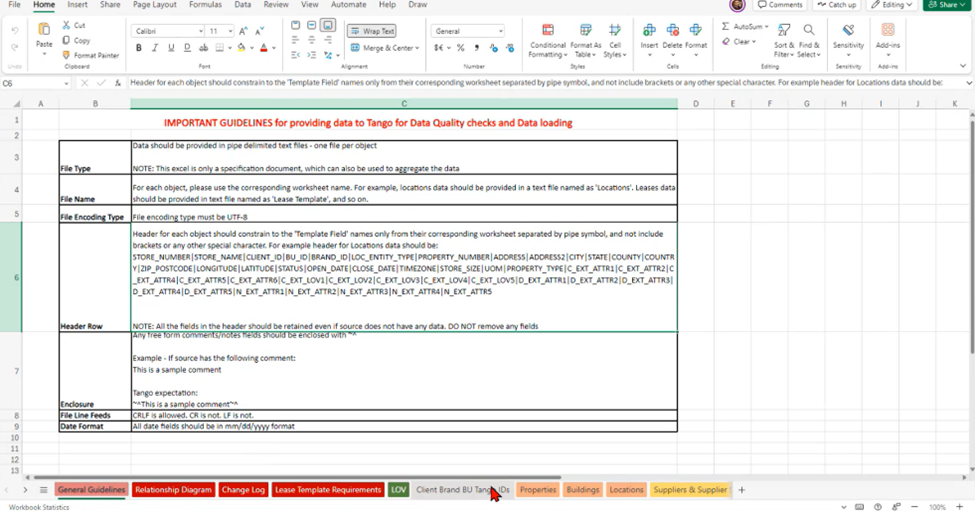
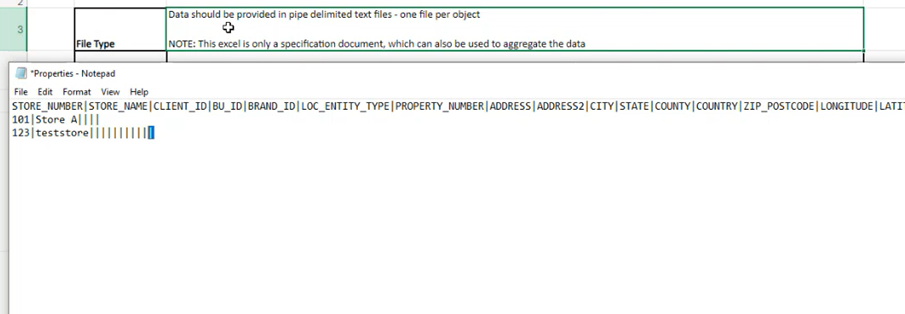
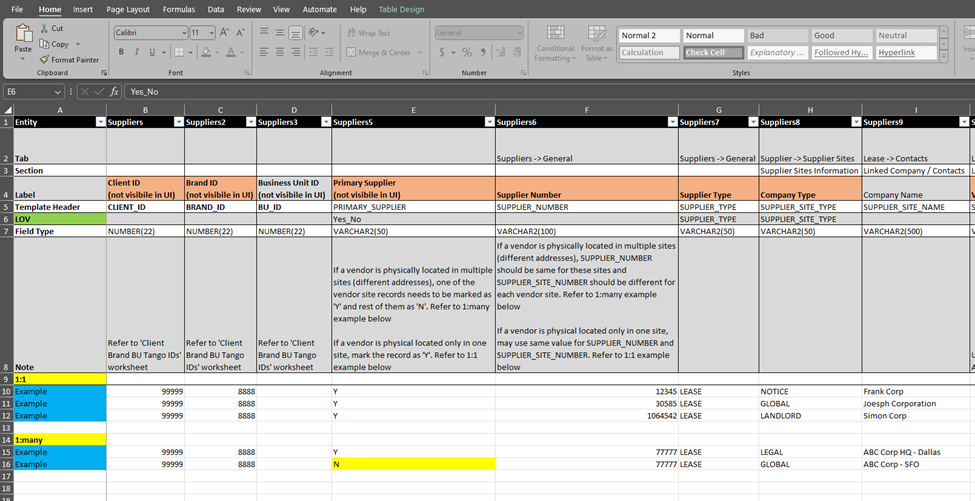
The templates are provided as an Excel Workbook and will need to be converted to a pipe delimited text file before uploading (more detailed file requirements are contained in the Excel Workbook).
The tabs in the workbook provide both instructional or requirements content, and data point information.
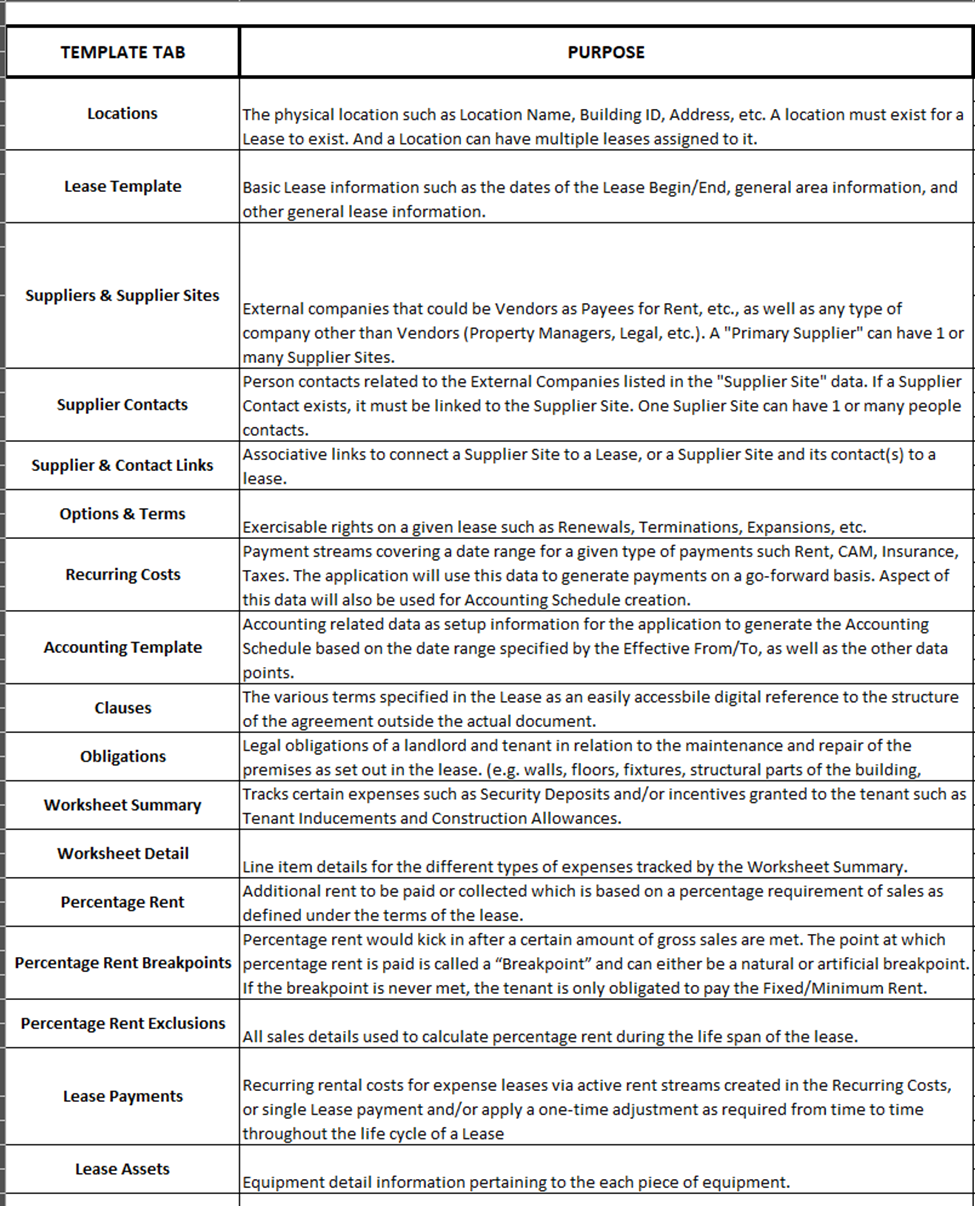
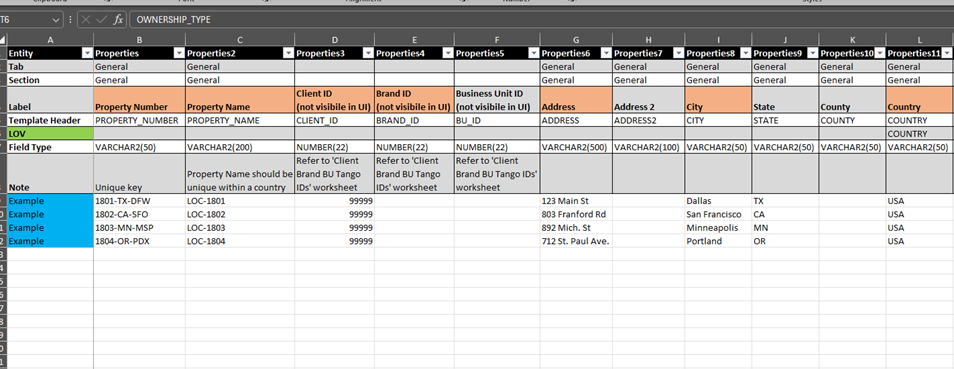
The following are examples of tabs with instructions or requirements in the template:
Guidelines
Pipe Delimited Txt File
Lease Template Requirements
Data Object (Template) Example
Appendix A: Tango Lease Data Import Details
The following table provides details regarding the categories of information that can be managed using the Data Import utility. An “X” in Create and/or Update columns indicates that type of action is supported.
| Lease Data Area | Create | Update |
|---|---|---|
| Properties | X | X |
| Locations | X | X |
| Buildings | X | X |
| Leases | X | |
| Suppliers | X | |
| Lease Accounting Schedules | X | |
| Clauses | X | |
| Obligations | X | |
| Options and Terms | X | |
| Lease Payments | X | |
| Recurring Costs | X | |
| Tracking Worksheets | X | |
| Percentage Rent | X | |
| Assets | X |
Appendix B: Tango Space Data Import Details
The following table provides details regarding the categories of information that can be managed using the Data Import utility. An “X” in Create and/or Update columns indicates that type of action is supported.
| Space Data Area | Create | Update |
|---|---|---|
| Properties | X | X |
| Buildings | X | X |
| Floors | X | X |
| Spaces | X | |
| People | X | X |
| Departments | X | X |
| Space Types | X | X |
| Space Allocations | X | X |
| Area Allocations | X | X |
| Areas | X | |
| Asset Master | X | X |
| Asset Detail | X | X |
| Building Contacts | X |
Was this article helpful?
That’s Great!
Thank you for your feedback
Sorry! We couldn't be helpful
Thank you for your feedback
Feedback sent
We appreciate your effort and will try to fix the article