Table of Contents
At initial go-live, all data is validated and correct for that moment in time. As organizations and analytical needs change, large groups of data may need to be updated to reflect the new plans. Tango enables Clients to do this for themselves quickly using the Bulk Data Updates module.
Note: best practice is to enable only those fields that are common across entities (ex: Region), some items will not be enabled for this process:
Any attributes that are updated from integration (ex: organization updates).
Attributes for multi-row tables.
Deliberate approval items or things that are unique to that entity (ex: relocation store ID, sales forecasts, traffic counts)
If the change is to a List of Values (LOV) attribute, be sure to differentiate between a name change (no data change) and a new value. Only new value updates would be done via this process.
The update approach is to use the query functionality to find/filter those entities that are to be updated. Note that some attributes are included for identification and filtering purposes; users should be careful NOT to update those attributes with this tool (ex: Store Number).
This section describes the steps to create and save a basic query record. An example is provided below.
Note: It is helpful for users to build and save a base query for each entity type that includes the data that they will always need (ex: Project Number). From this, they can further select the items that they need to address.
LANDING PAGE
When you log in to the Tanga Analytics platform, the landing page for your organization will be display. The following illustration is an example of the Tango Analytics landing page:
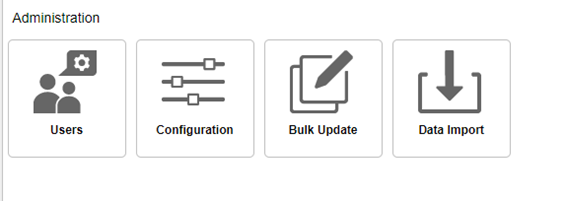
Perform the following to display the Bulk Update landing page:
| Step | Action |
| 1. |
|
| 2. |
The Bulk Update page displays the below screen if the user is logging into ‘Bulk Update’ for the first time.
|

CREATE NEW QUERY
The following steps will guide you through creating a new query.
| Step | Action |
| 1. |
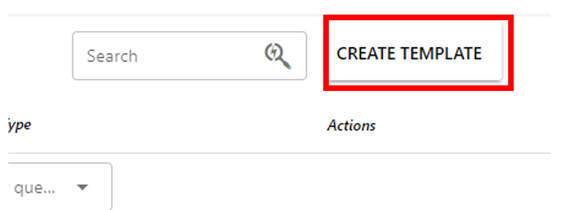
Click CREATE TEMPLATE on the Bulk Update landing page. |
| 2. |
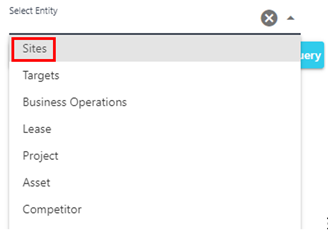
Choose Sites / applicable entity in the Select Entity drop-down.
|
| 3. |
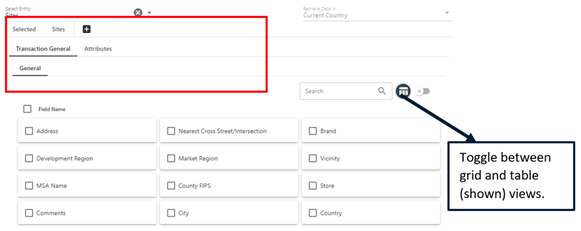
Click to view all tabs/sub-tabs prior to making selection(s). TIP: Use the Grid/Table toggle to change how the lists display.
|
| 4. |
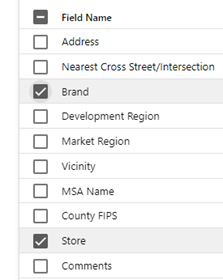
Toggle to Grid view and choose Brand, and Store / required fields to build the query.
|
| 5 |
Click Next page in the lower right to select more fields (if applicable)
|
| 6. |
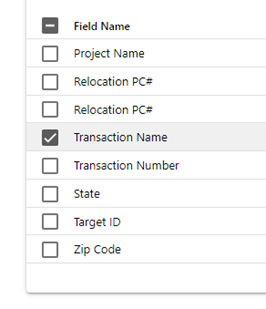
Choose Project Name
|
| 7. |
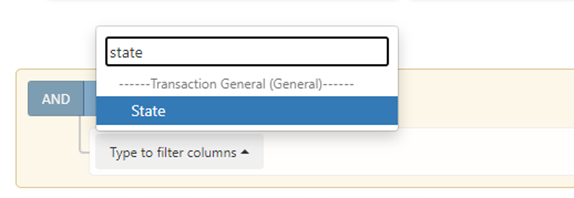
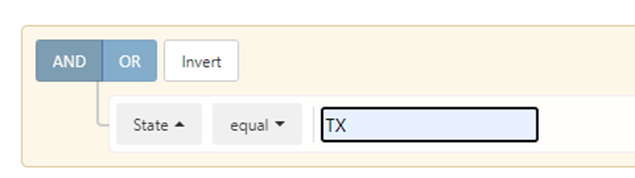
Scroll to the filter pane and create a filter as follows: IMPORTANT: This is a required step. a. Click AND (default). Click to activate Type to Filter columns field, then type State / required field. Choose operator Equal (default). Type state abbreviation in field (i.e., TX)
|
| 8. |
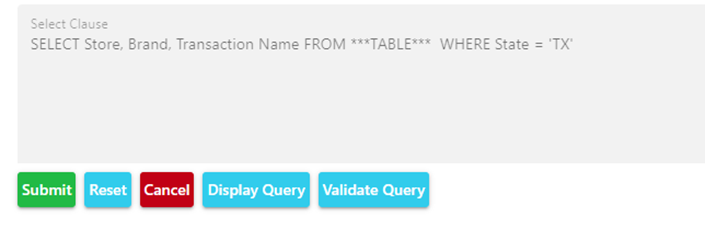
Click Display Query. Note: This feature is designed to allow technical users to view and make changes as applicable. If the OR filter is a better choice, click OR in the filter pane, then re-click Display Query. The updated query displays.
|
| 9. |
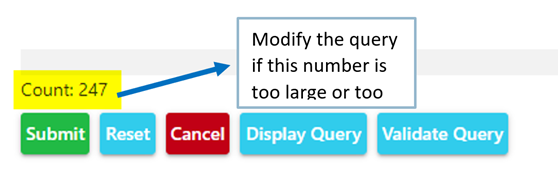
If we click on Validate Query, it will display the count of records.
|
| 10. |
Modify the query, as applicable, then click Submit.
When constructing the filter logic, remember these rules: When using AND filters, ALL elements must be true. Each condition will make your results smaller. When using OR filters, EITHER condition can be true. When using these conditions, your results will get bigger. |
| 11. |
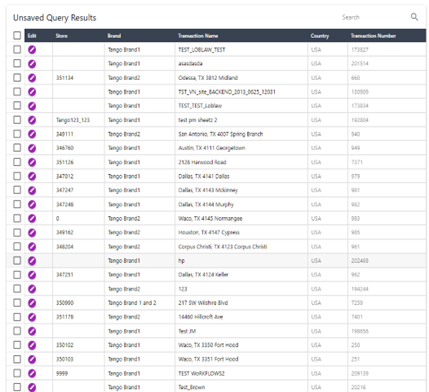
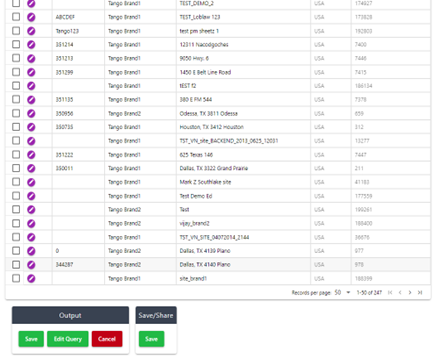
After Clicking on Submit. The records from the query results will be shown as shown below. |



SAVE/UPDATE DATA
| Step | Action |
| 1. |
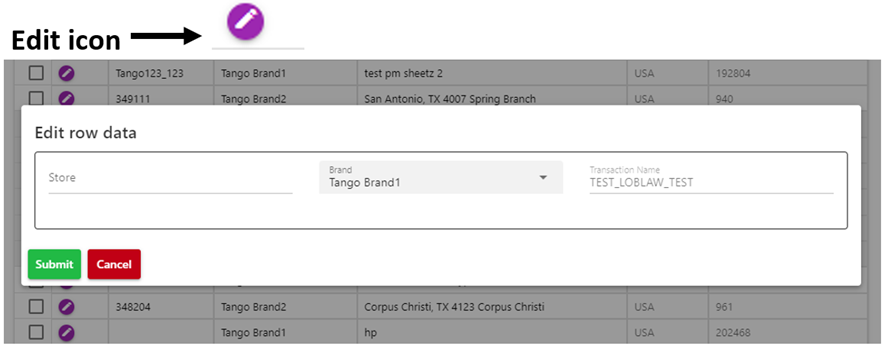
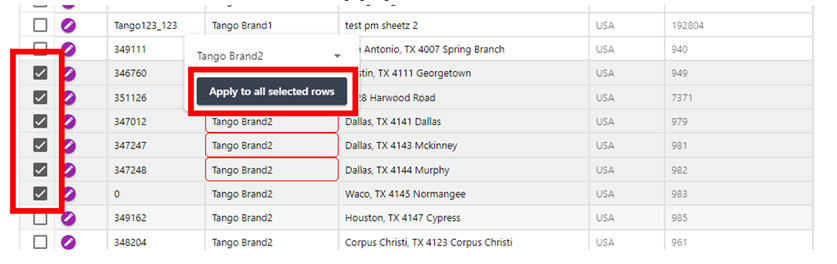
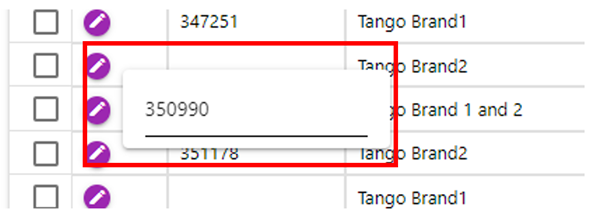
The records can be Edited in 3 ways.
After Editing, click on Submit to save the changes or Cancel to discard them.
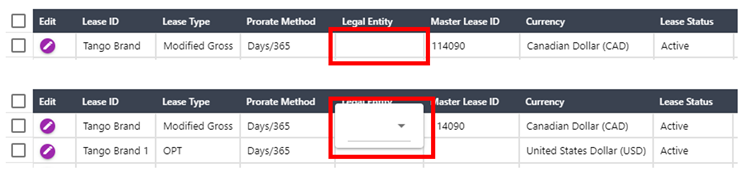
If the changes must be made to any single record in grid format, Click on the cell to edit.
For Example: In the below record, if only Legal entity needs to be updated, click on the cell to edit:
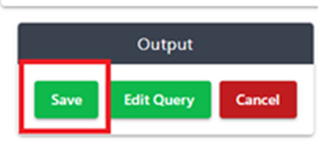
Click Next page in the lower right to navigate to the next page or click Save on the bottom of the page to save the results before navigating to the next page.
or
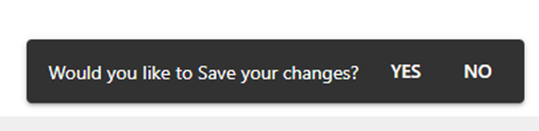
After Clicking on the Next page, the Pop-up will display asking to save the changes.
If the changes want to save Click on Yes otherwise click on No. After Clicking either of the option, another Pop-Up will display asking to load the next page.
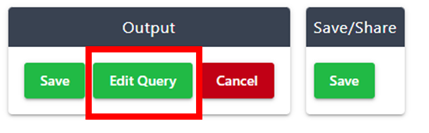
To load the new page, Click on Yes otherwise Click on No. Click on Edit Query to make any modifications to the existing query.
|


SAVE QUERY
This section describes how to share a query so that it can be accessed later or shared with another user.
| Step | Action |
| 1. |
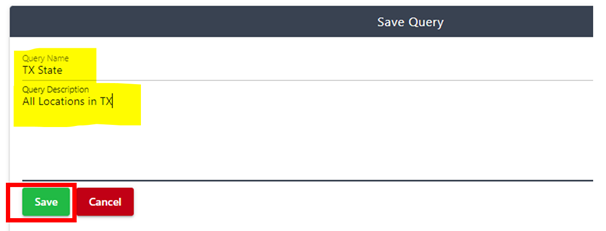
Click on Save to save the query.
Type a name and description in the pop-up window. Click Save.
|
| 2. |
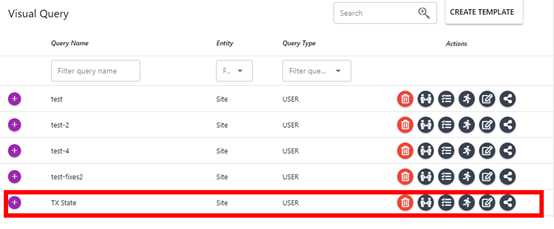
The query will display in the landing page.
|
| 3. |
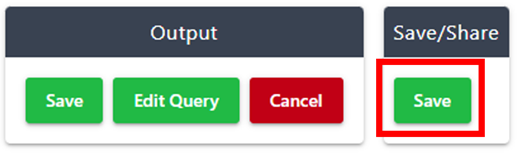
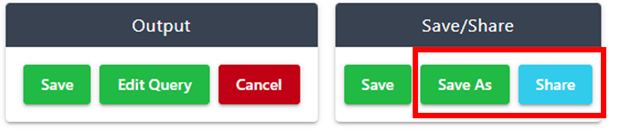
After saving the query, the Share and Save As will be displayed as illustrated below:
|
SHARE QUERY
This section describes how to share a query with another user in another country.
| Step | Action |
| 1. |
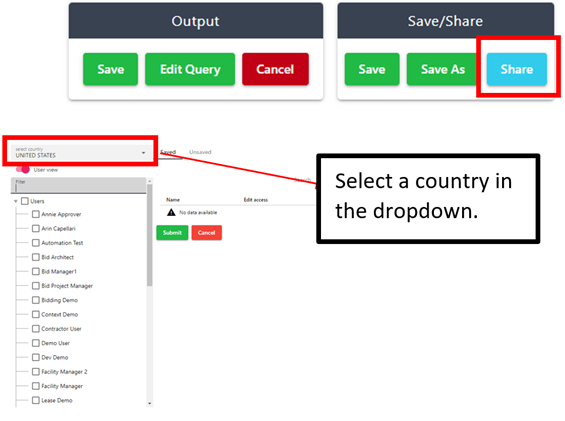
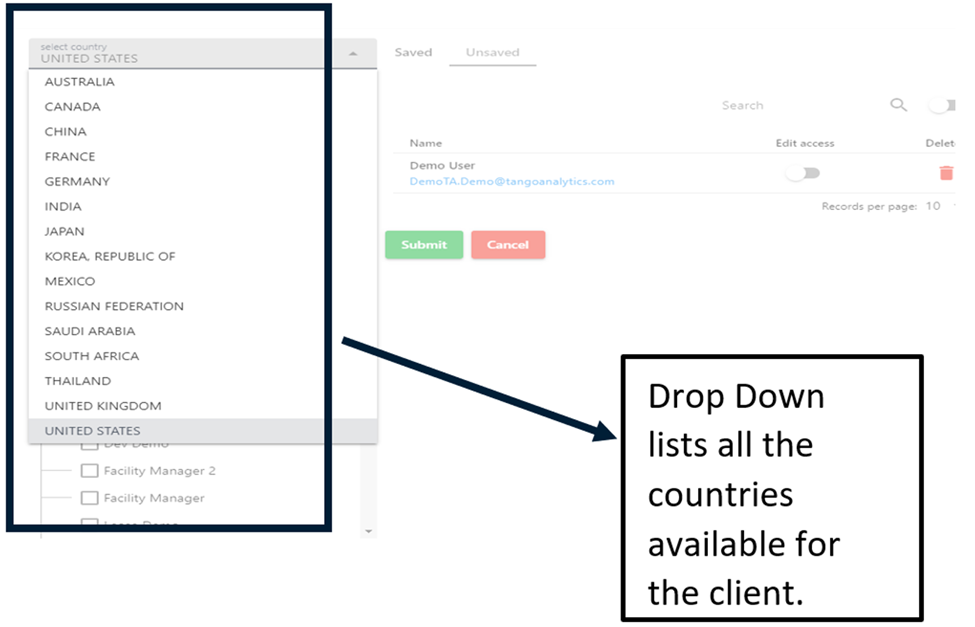
Click on Share to share the query to any user in any Country.
|
| 2. |
If after selecting the user from the list, and without Clicking on the Submit button, if you try to change the Country from the drop down a Pop-Up window will display at the bottom of the page asking you to Submit the changes or to ignore.
|

QUERY OPTIONS ON LANDING PAGE
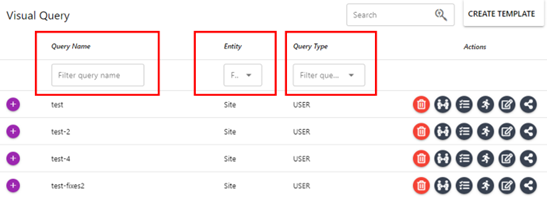
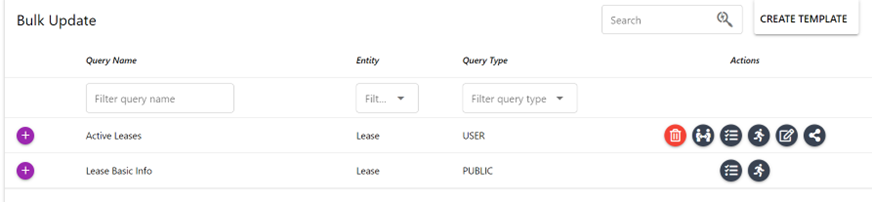
There are several query options located on the landing page.
You will be able to filter the queries either by Query Name, Entity or Query Type if there are multiple queries saved.
Each Query will have the following options based on roles/access levels.
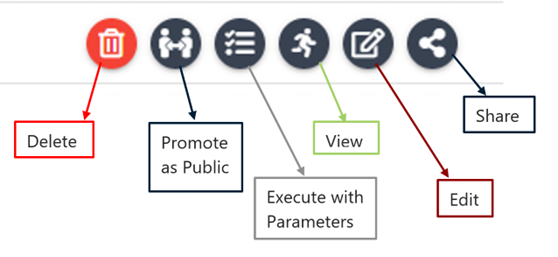
Delete Query – Clicking the delete option  will delete the saved query.
Promote as Public – Clicking this promote as public button  will mark the query as Public and anyone with the required roles to view Bulk Update for the client can view the query. This will remove the option to Delete, Edit & Share the query.
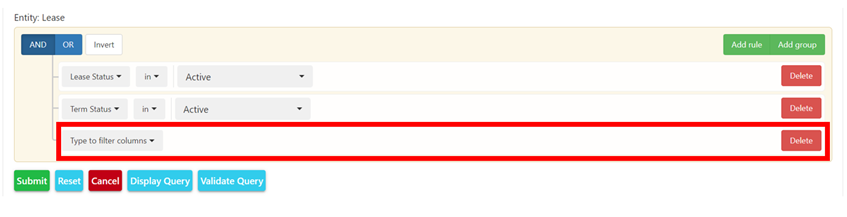
Execute with Params – Clicking this  will open the option Add rule or group to the existing query as shown below:

By clicking Add rule, a new condition can be added to the existing rule.
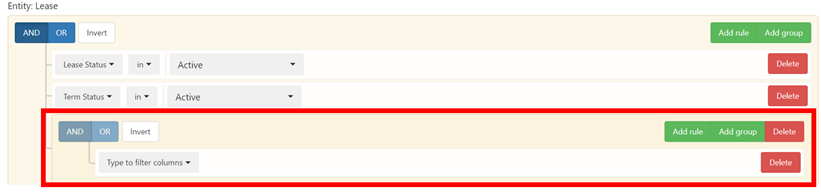
By clicking Add group, a new AND / OR rule can be added.
Adding AND clauses will cause the results to be smaller.
Adding OR clauses will cause the results to be larger.
Changes can be saved, reset, canceled. Also, the query can be validated / displayed.
View Results – by clicking this
 , anytime the query results can be viewed
Edit Query – If any modification is needed (add / delete fields) to be done to the saved query click Edit Query

Share Query – clicking this will allow the user to share the query with any user in any Country as explained in SHARE QUERY.
BEST PRACTICES
All the things that make this tool very helpful also create the potential for large errors. Suggested practices to ensure unintended items don’t get updated include:
Have a base query for each entity that you KNOW is correct and has data you will always want in your view. You will then only need to edit it and save with a new name. Touching fewer items lessens the chance of an error.
Always include the Entity ID/Number/Name in your query (part of base query) – this will help validate the list of items being changed.
Export the initial results of the query before updating. If a mistake is made, the amounts can be restored from this view.
Be careful about selecting “all” entities; no matter how certain you are of your filters, the data on the entities may not be as perfect as imagined.
Was this article helpful?
That’s Great!
Thank you for your feedback
Sorry! We couldn't be helpful
Thank you for your feedback
Feedback sent
We appreciate your effort and will try to fix the article