Table of Contents
The purpose of this document is to provide detailed instructions on how to update/manage Lists of Values – also known as lookups, picklists, “drop downs”.
This document is designed to be used by application administrators and power users as a reference to manage these features.
Access to administrative features is controlled through role-based security. The features reflected in this guide assume the appropriate feature icons and security roles have been previously configured to provide access.
Functional dashboard
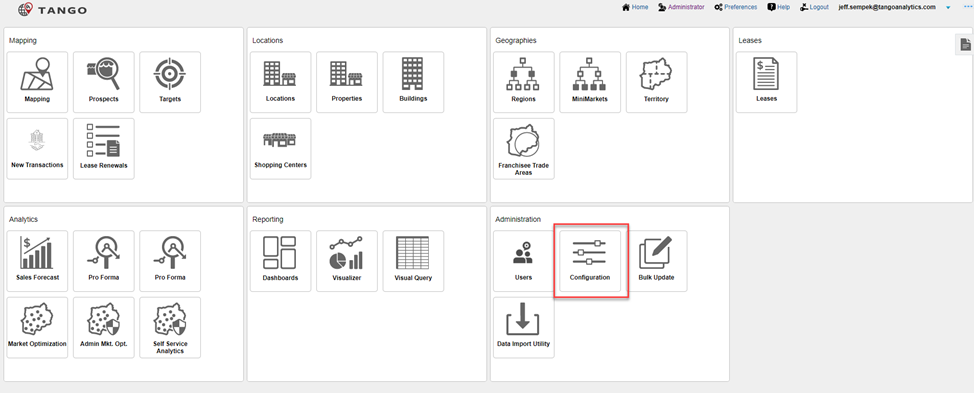
Upon login, the landing page for the system is the Functional Dashboard. The user will be able to navigate to the various modules of the Tango System. Selecting an application and single-clicking will open it. A user will see different applications based on their security setup.
All elements in the Configuration Module must be aligned in the Dev, Test, and Production environments. There can be only one access point of change. All changes must be made in the Test environment, validated, then migrated to Production, and back to Development.
NOTE: This functionality will not be available in the production environment.
Configuration
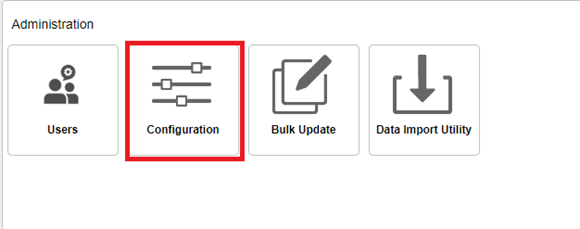
The Configuration icon will direct you to the Configuration Landing page which provides a list of topics that can be configured by the user. Perform the following to access the landing page and the topics that can be configured:
| Step | Action |
|---|---|
| 1. | From the Functional Dashboard > Administration section, click the Configuration icon. |
|
The Configuration Landing page also known as the Configuration Home page will be displayed in a new browser tab as a standalone page:
Note: The Home tab returns you to the Configuration page, not the Functional Dashboard. |

Budget and catalog
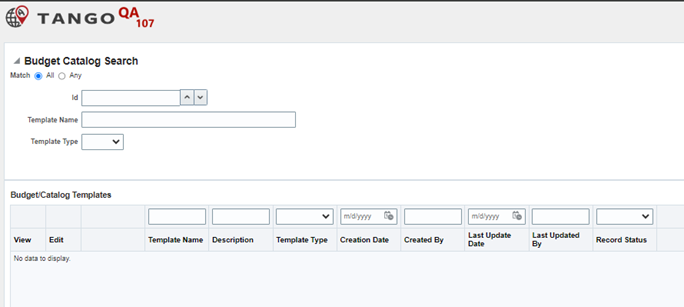
This section describes how to add templates for Budget and Catalog.

Left Side
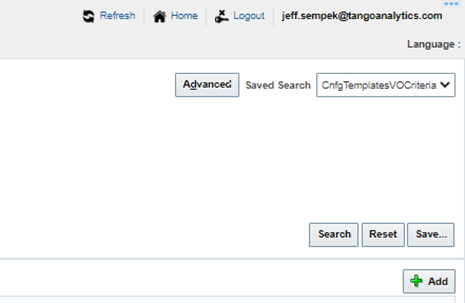
Right Side
Search Options
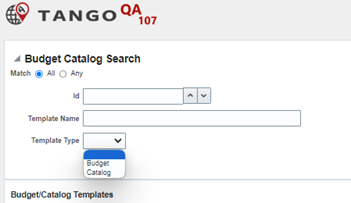
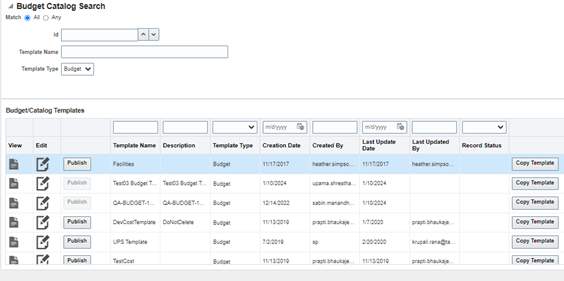
There are two search features in the Budget/Catalog Landing page, Basic and Advanced. This reduces the number of list items in the default table by only displaying the templates associated with the search parameters you choose.
| Step | Action |
|---|---|
1. |
The default search option is Basic search. The Basic search fields are shown as follows: |
2. |
Select the Template Type dropdown list to select the module where you desire to modify:
|
3. |
Click on Search
|
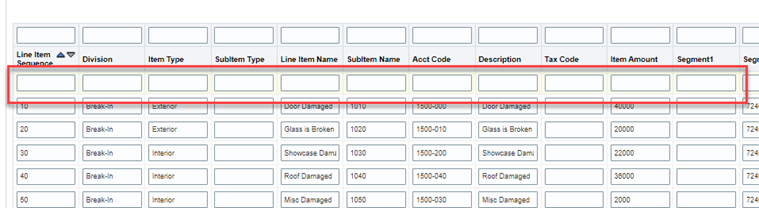
Edit
The Edit button opens the Template for edits. Some elements in the template may not be editable and will be grayed out depending on what a user’s permissions level is assigned.
| Step | Action |
|---|---|
1. |
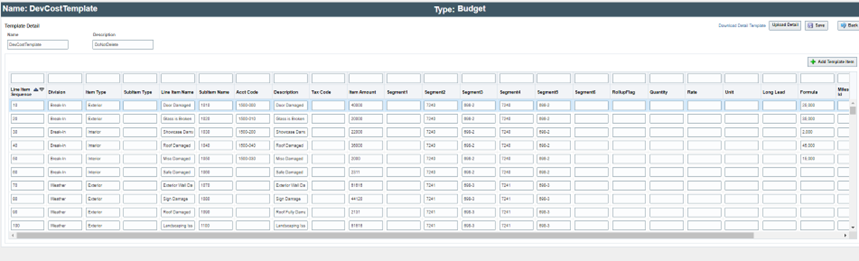
Select Edit for the template you want to configure. The configuration screen will display:
|
2. |
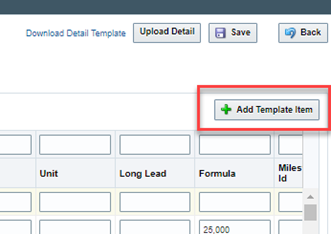
You can add a template item by clicking on Add Template Item:
|
3. |
A new row will be displayed. You can add items to the template in that row:
|
4. |
Click Save to save your changes |
Scope and punchlist
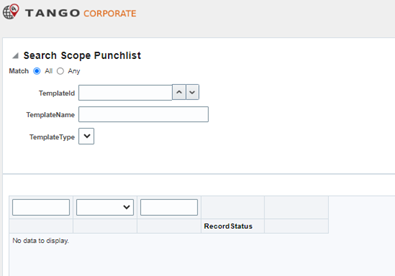
This section describes how to create, delete, and edit templates for Scope and Punchlist.

Left Side
Right Side
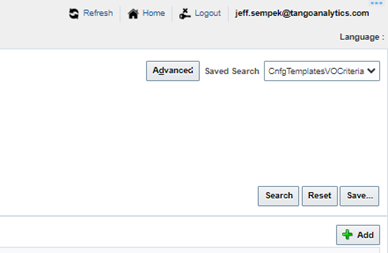
Search Options
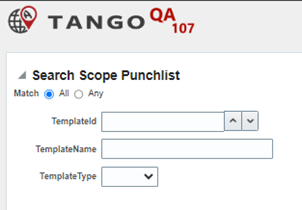
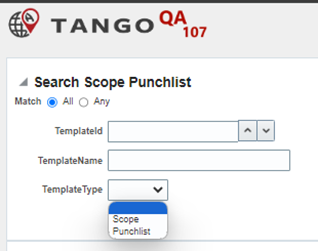
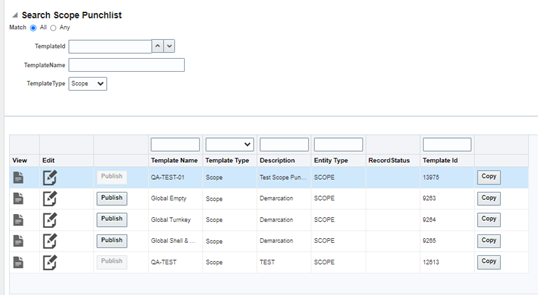
There are two search features in the Scope and Punchlist Landing page, Basic and Advanced. This reduces the number of Lookups in the default table by only displaying the templates associated with the search parameters you choose.
| Step | Action |
|---|---|
| 1. | The default search option is Basic search. The Basic search fields are shown as follows: |
| 2. | Select the Template Type dropdown list to select the module where you desire to modify: |
| 3. | Click on Search |
Edit
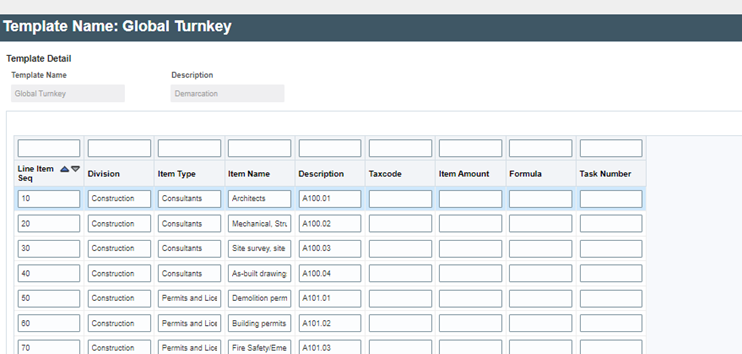
The Edit button opens the Template for edits. Some elements in the template may not be editable and will be grayed out depending on what a user’s permissions level is assigned.
| Step | Action |
|---|---|
| 1. |
Select Edit for the template you want to configure. The configuration screen will display:
|
| 2. | Click Save to save your changes |
Milestones
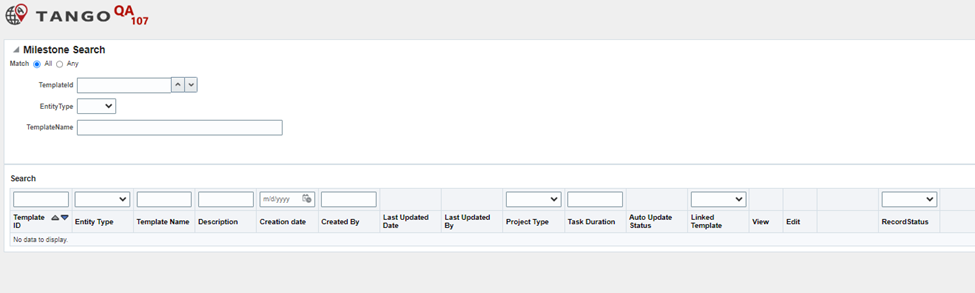
This section describes how to create, delete, and edit templates for Milestones.

Search Options
There are two search features in the Lookups Landing page, Basic and Advanced. This reduces the number of Lookups in the default table by only displaying the Lookups associated with the search parameters you choose.
| Step | Action |
|---|---|
| 1. |
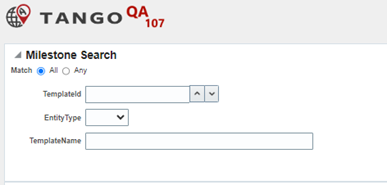
The default search option is Basic search. The Basic search fields are shown as follows:
|
| 2. |
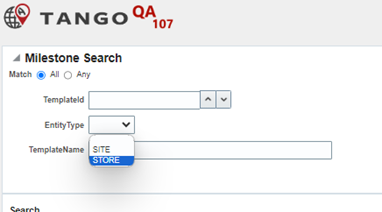
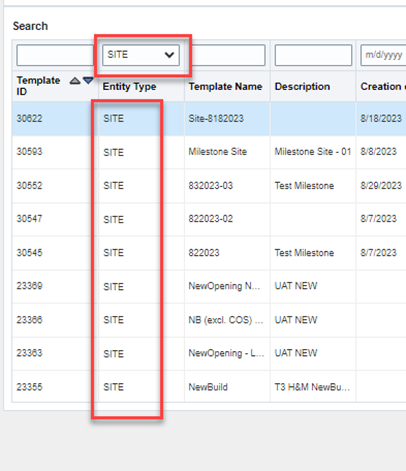
Select the Entity Type dropdown list to select whether this is a Site or a Store:
|
| 3. |
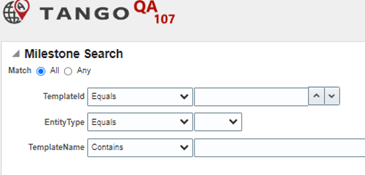
Although uncommon, in Advanced mode, the first two search boxes to left expand to allow more search options.
|
| 4. |
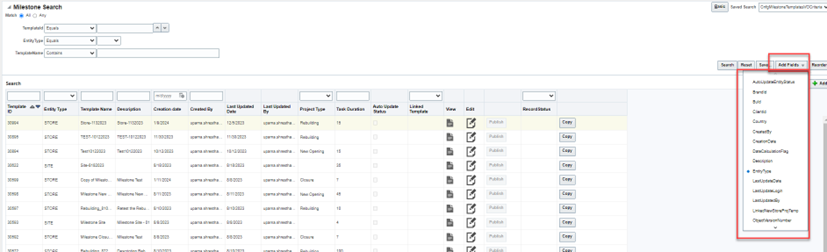
If more columns are desired, the list can be expanded by clicking the “Add Fields” button to the right.
|
| 5. |
Choose a dropdown in Entity Type and, such as site, to narrow down the list of choices and click Search:
|
Edit
The Edit button opens the template for edits. Some elements in the template may not be editable and will be grayed out depending on what a user’s permissions level is assigned.
| Step | Action |
|---|---|
| 1. |
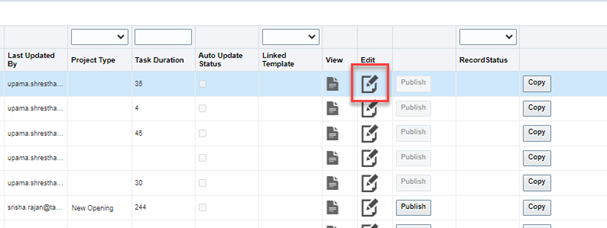
Select Edit for the Lookup that you want to configure:
|
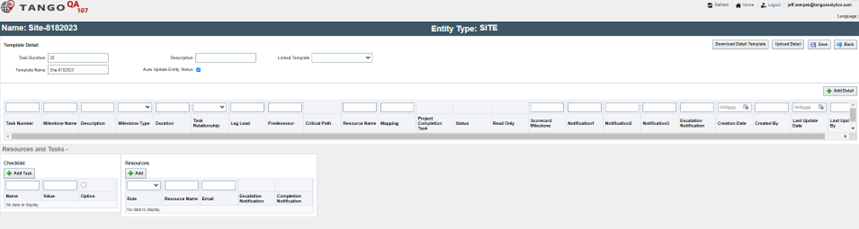
| 2. |
The configuration screen will display:
|
| 3. |
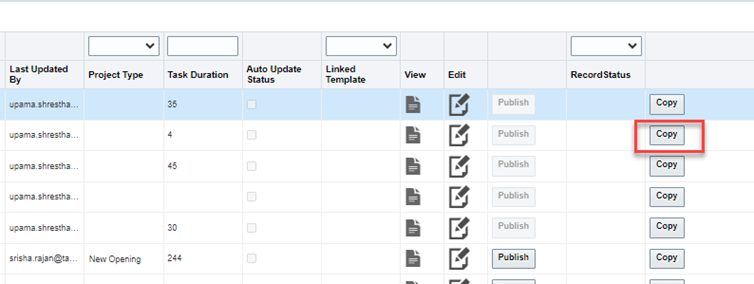
Click on the Copy button to copy an existing template:
|
| 4. |
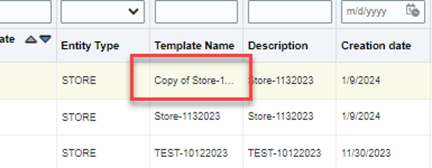
The table will populate with a new template with Copy of in the template name:
|
Folders
This section describes how to create, delete, and edit templates for Folders.

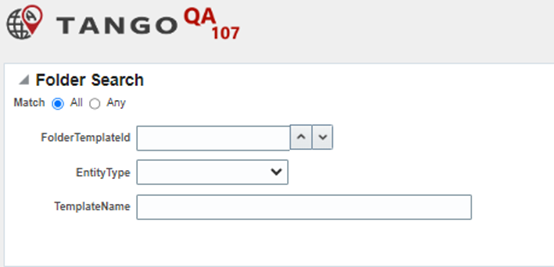
There are two search features in the Folders Landing page, Basic and Advanced. This reduces the number of folders in the default table by only displaying the folders associated with the search parameters you choose.
| Step | Action |
|---|---|
| 1. |
The default search option is Basic search. The Basic search fields are shown as follows:
|
| 2. |
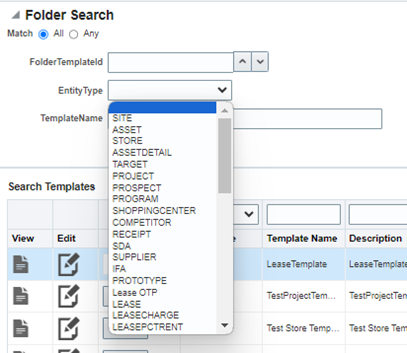
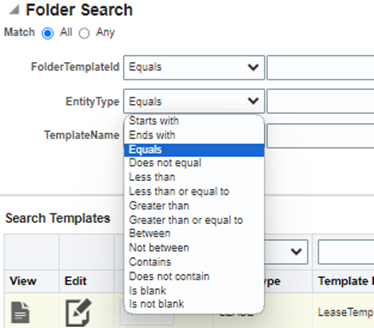
Select the Entity Type dropdown list to select the entity you desire to modify:
|
| 3. |
To change the Search option, click on the button for search options. When in Basic search, the button will have the Advanced option displayed.
|
| 4. |
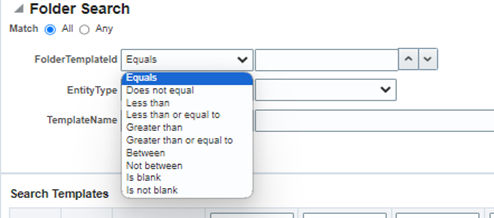
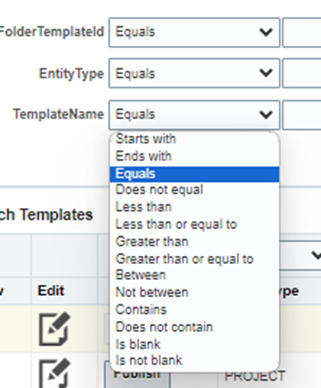
Although uncommon, in Advanced mode, the first two search boxes to left expand to allow more search options:
|
| 5. |
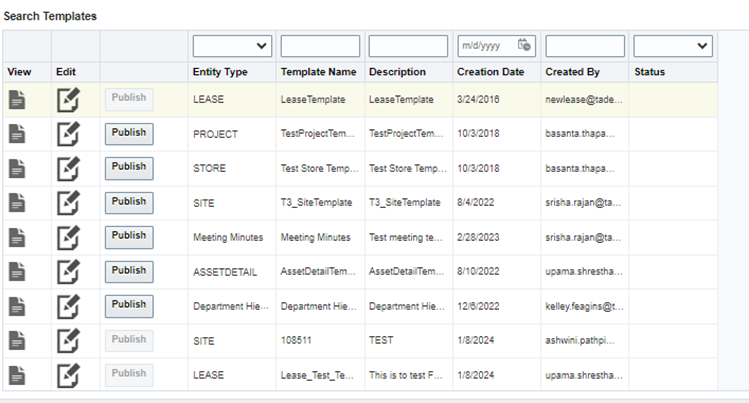
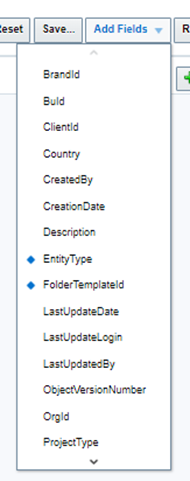
If more columns are desired, the list can be expanded by clicking the “Add Fields” button to the right.
|
Edit
The Edit button opens the template for edits. Some elements in the template may not be editable and will be grayed out depending on what a user’s permissions level is assigned.
| Step | Action |
|---|---|
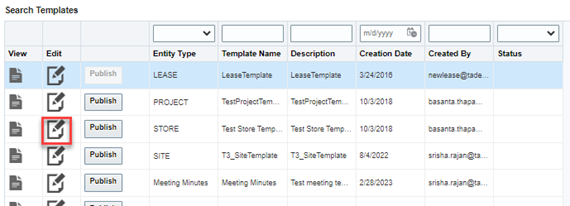
| 1. | Select Edit for the template that you want to configure. The configuration screen will display: |
| 2. | 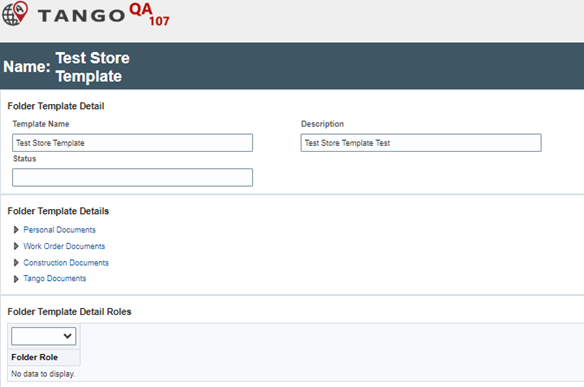 |
Lookups / Drop Downs
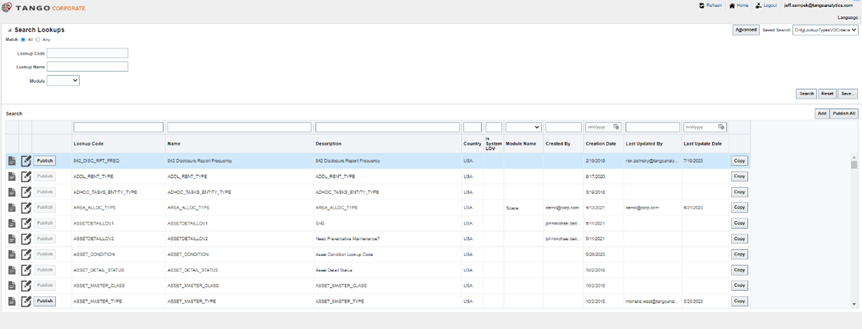
This section provides a detailed description of how to configure Lookups / Drop Downs. When you click on the Lookups / Drop Downs icon, you will be directed to the landing page.

There are many items in this list, and they can be narrowed down by selecting different filters.
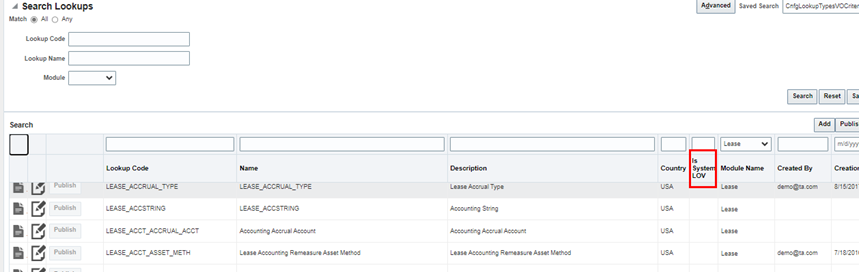
Note: Most picklists can be modified from within the Lookups configuration page; however, some Lookups drive functionality with their values, and they are not allowed to be edited. Those will have a “Y” in the column labeled “is System LOV”.
Landing Page Element Descriptions
Lookup Code – These are and the technical names for the Lookup Codes. As a guideline, these ofen start with the module's name (ex: SITELOV1).
Lookup Description – Plain English description of the intent of the lookup. It is good practice to have the attribute label name in this field to help locate the correct list.
Lookup Location(s) – Contains the tabs and subtabs where the lookup can be found.
Country – The country name for the environment you are working in. Should you have a single set of lookups across all countries, the country value will be blank.
Module – a broad filter to quickly narrow the list of Lookups.
Function Buttons
View – opens list in view-only mode.
Edit – Opens the selected Lookup to perform the configuration of the values. The editing function is based on permissions and will not be editable by every user.
Copy – Allows you to copy the configuration of your Lookups to one or more countries.
Publish – Pushes the configuration to the Dev and Test environments.
Search Options
There are two search features in the Lookups Landing page, Basic and Advanced. This reduces the number of Lookups in the default table by only displaying the Lookups associated with the search parameters you choose.
| Step | Action |
|---|---|
| 1. |
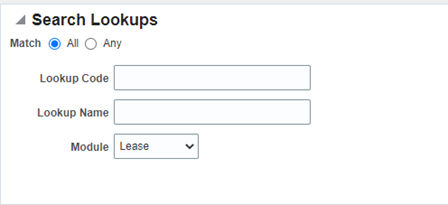
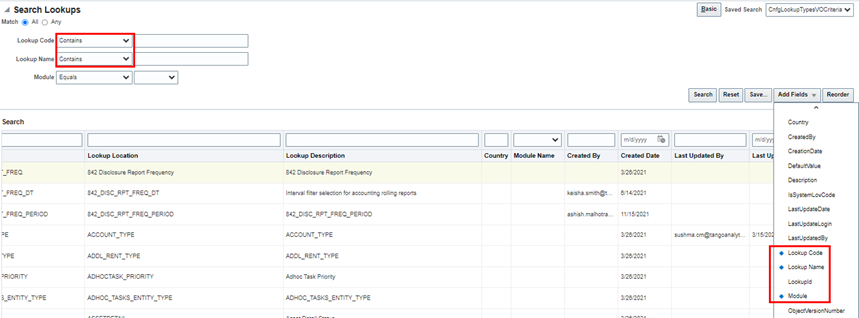
The default search option is Basic search. The Basic search fields are shown as follows:
|
| 2. |
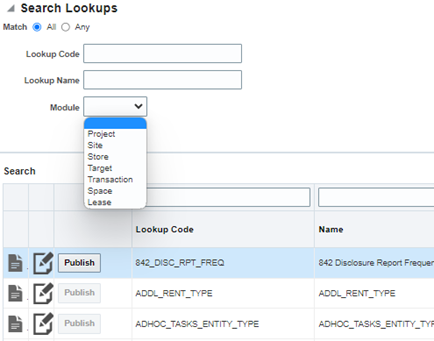
Select the Module dropdown list to select the module where you desire to modify:
|
| 3. |
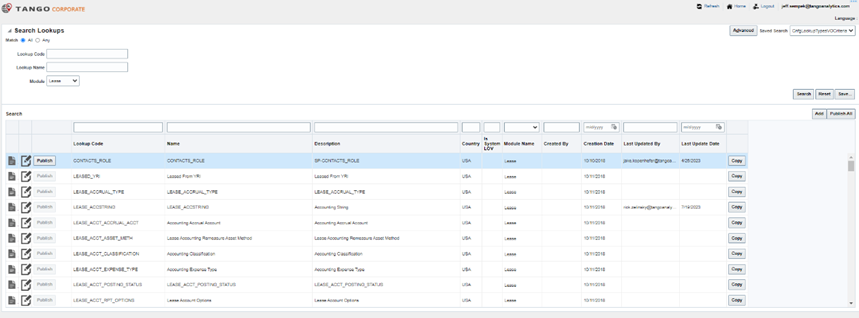
Choose a dropdown, such as lease, to narrow down the list of choices:
|
| 4. |
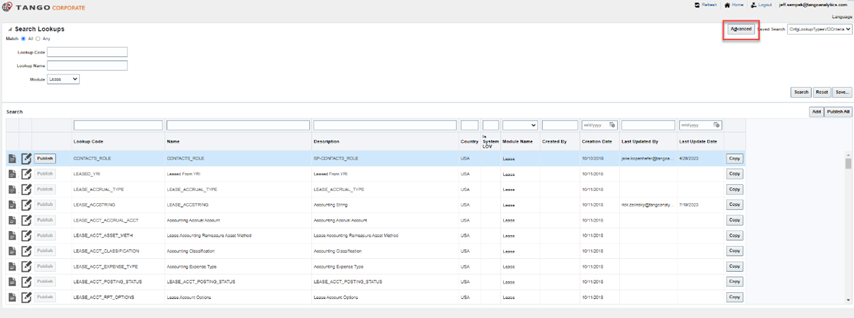
To change the Search option, click on the button for search options. When in Basic search, the button will have the Advanced option displayed. Note: using good descriptions for Lookups allows Basic search mode to suffice in nearly all situations.
|
| 5. |
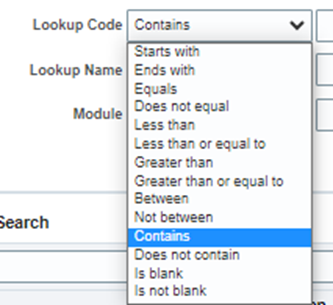
Although uncommon, in Advanced mode, the first two search boxes to left expand to allow more search options. If more columns are desired, the list can be expanded by clicking the “Add Fields” button to the right. |
Edit
The Edit button opens the Lookup for edits. Some elements in the Lookup may not be editable and will be grayed out depending on what a user’s permissions level is assigned.
| Step | Action |
|---|---|
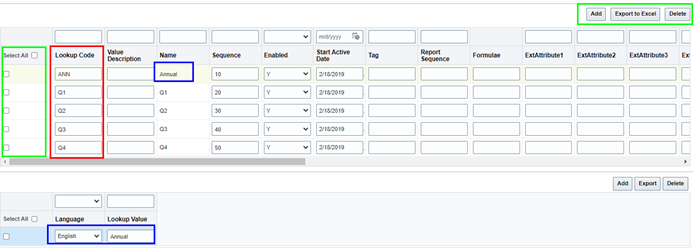
| 1. | Select Edit for the Lookup that you want to configure. The configuration screen will display: |
| 2. |
The first setup parameters that are configured are:
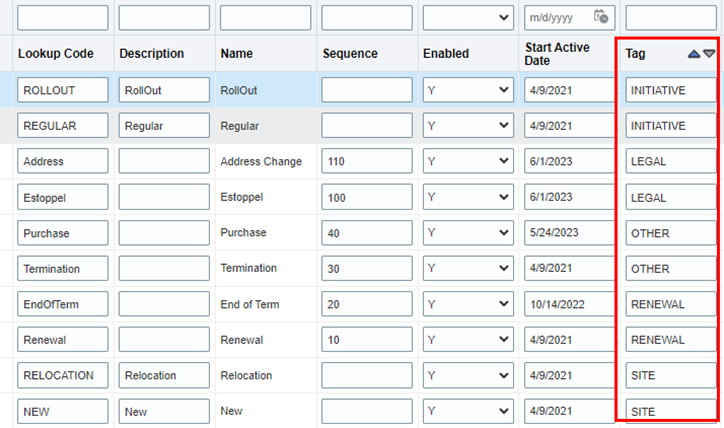
Some Lookups are “children” of a prior pick (ex: Group/Type). For those attributes, the “Tag” column on the child Lookup names the parent lookup code.
Other attributes should be updated only with the Tango Support Team as they can affect integrations and other key functionality. |
| 3. |
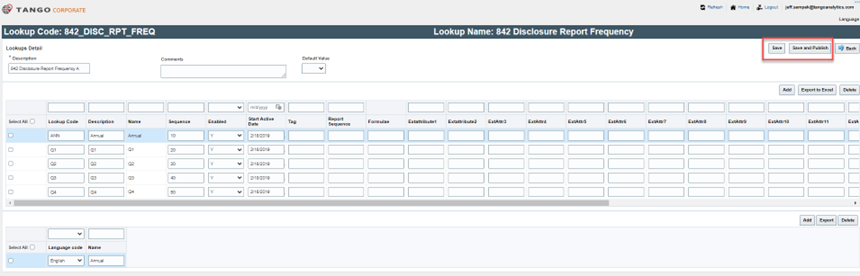
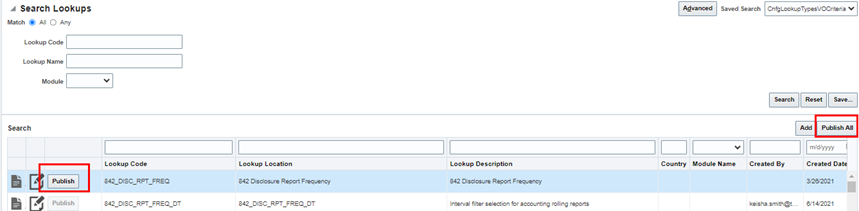
You can now configure this Lookup. When finished, click on Save to save the changes, or Save and Publish to Publish the changes. Until Lookups are “published”, they are not available for use. These buttons are located in the upper right corner of the screen.
Users can also publish from the search menu – individually or “Publish All”. |
| 4. | Click the Back button to return to the list of Lookups for the selected module. |

Copy
If your system extends to more than one country and the system allows separate Lookups for each country (ex: if accounting codes are different), the Copy function will be available to allow you to update a list in one country and copy that Lookup configuration to other countries.
| Step | Action |
|---|---|
| 1. |
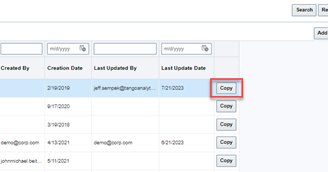
The Copy button is to the far right of the Lookup list:
|
| 2. |
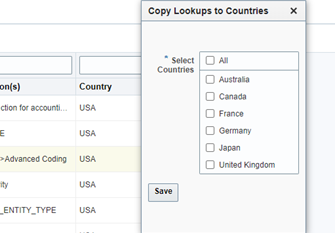
To copy a Lookup configuration to other countries, click on the copy button to display the Copy Lookups to Countries list. You may select individual countries or “All” at the top. Note: If you change a lookup in a country and save those changes, they only affect that country. You must copy that lookup to another country or countries |
User-Defined Attributes
User Defined Attributes allow you to track additional information not captured in standard fields. This section describes how to use the User Defined Attributes feature the Tango Platform Configuration. Clicking the Configuration tile under Administration will display the following tiles:

Create or delete User Defined Attributes by performing the following:
| Step | Action |
|---|---|
| 1. |
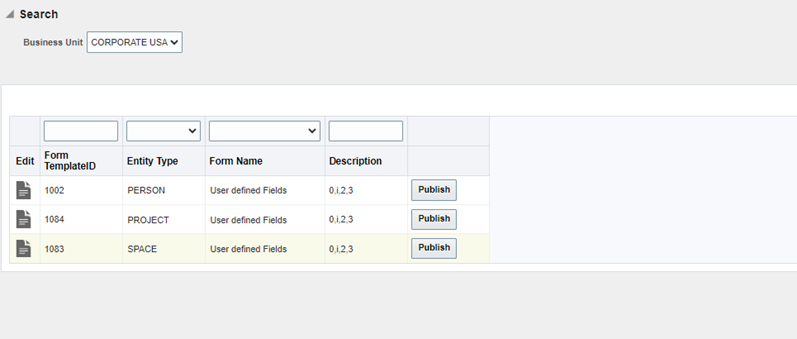
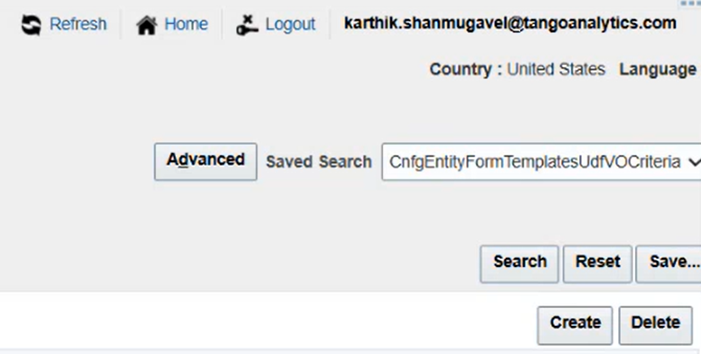
Click on the User Defined Attributes tile (UDA). The worksheet will display as follows: Left Half of the screen:
Right Half of the screen:
|
Search Options
There are two search features in the UDA Landing page, Basic and Advanced. This reduces the number of templates in the default table by only displaying the templates associated with the search parameters you choose.
| Step | Action |
|---|---|
| 1. |
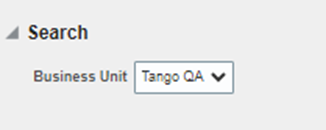
The default search option is Basic search. The Basic search fields are shown as follows:
|
| 2. | Click Advanced search to enhance the search with additional parameters: 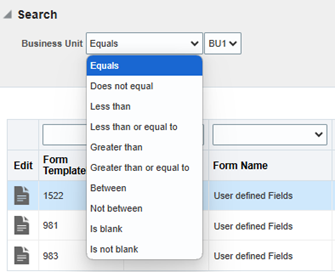
|
Creating a Template
Templates are created to add tabs and fields that allow you to track additional information not captured in standard fields, The templates are created for entities such as Projects, Buildings, Properties etc. The following section provides the procedure for Creating a UDA template.
|
Action |
|---|---|
| 1. |
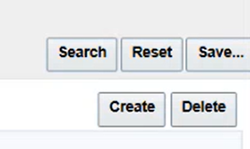
Select Create to add a template to the table and prepare to configure the template.
|
| 2. |
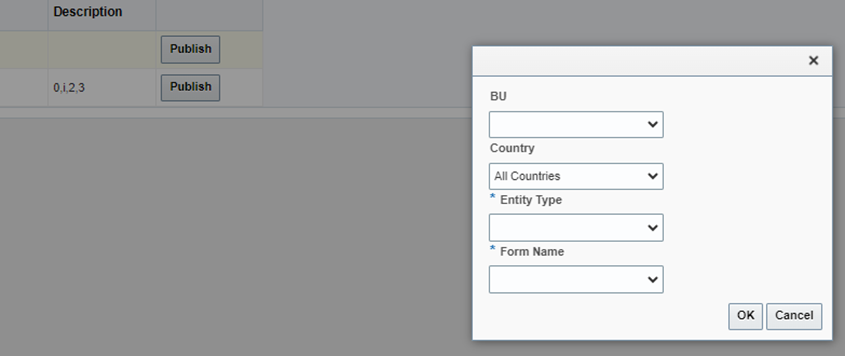
Selecting Create displays the following:
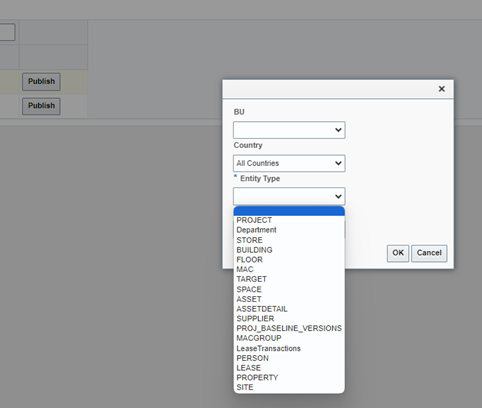
The Business Unit (BU) and all countries dropdowns will differ depending on the environment settings. The Entity type provides the following:
|
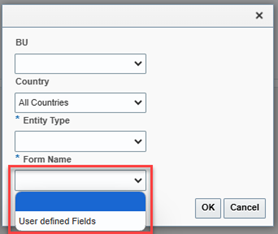
| 3. | Select the dropdown menu in the Form Name field and select User Defined Fields: |
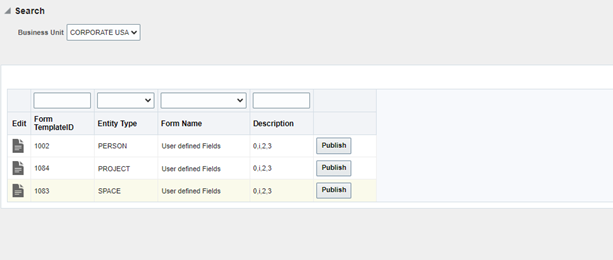
| 4. | Verify the new template has been created by viewing the list of templates: |
| 5. | Select the edit icon for the new template in the list to define the new template elements in the new template window. |
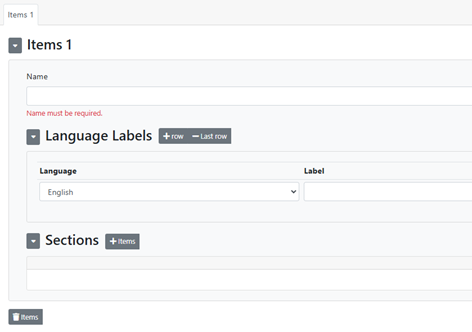
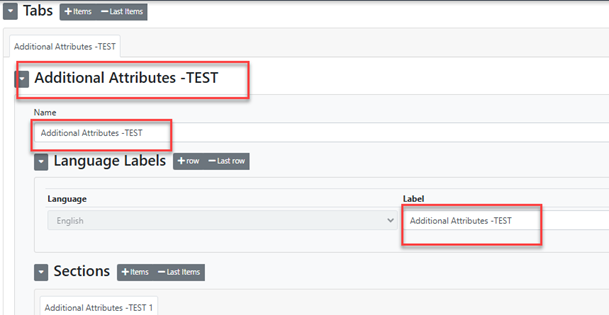
| 7. |
Type a name in the name field and Item 1 will change to the name typed in the field and the Label field will also change to the name typed:
|
| 8. |
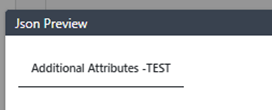
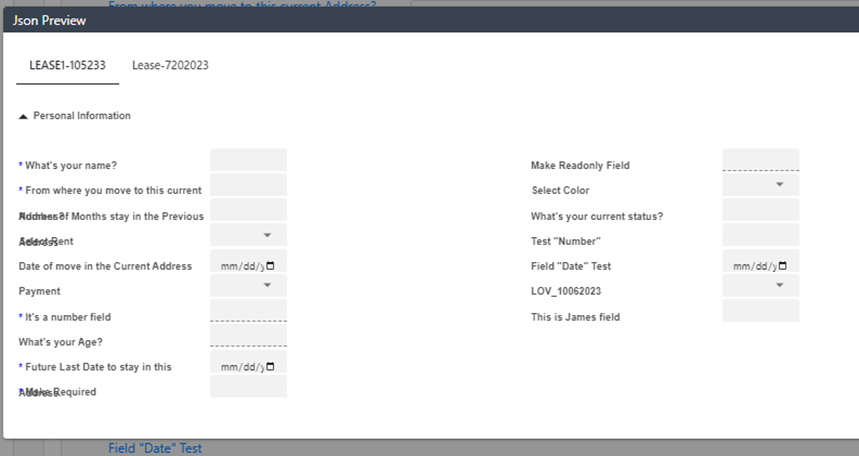
Click on Save and then Preview to display a preview of the attribute:
|
| 9. |
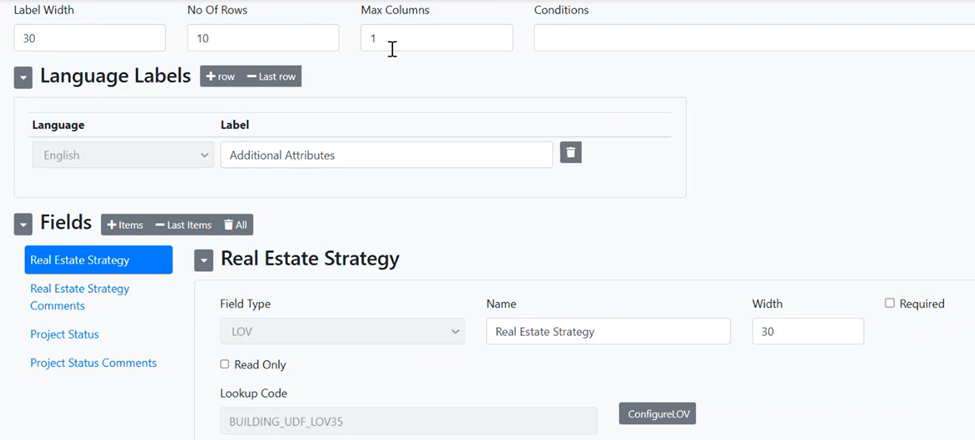
An example of a completed template in the configuration tool:
|
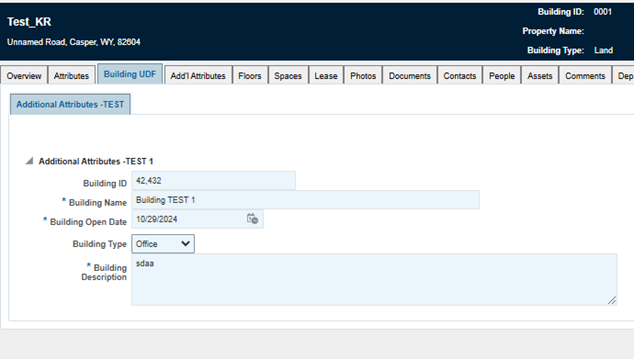
Verifying Building UDF Tab
This section describes how to verify a YDF template has been created under the Buildings icon by having you display the Building UDF tab to see a list of templates.
| Step | Action |
|---|---|
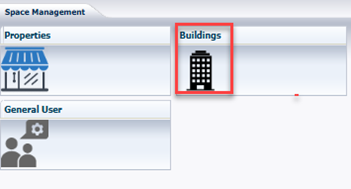
| 1. |
Click Buildings on the home page:
|
| 2. |
Click All Buildings and then click
|
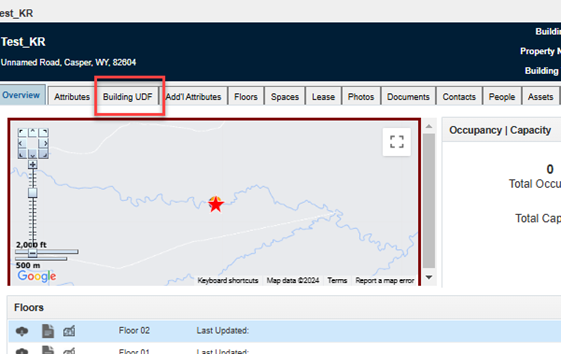
| 3. | Click the Building UDF Tab: |
| 4. | All user defined fields will be displayed as tabs and associated fields for all Buildings entity types: |
 edit on one of the buildings in the list: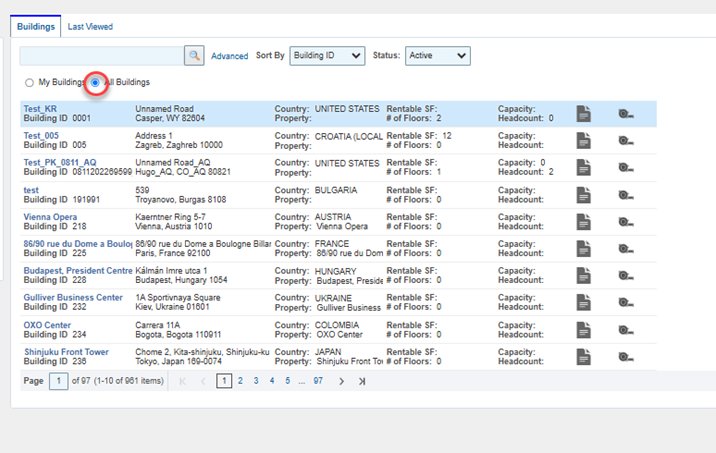
Adding a Field
The is section describes how to add afield to a new or existing template.
| Step | Action |
|---|---|
| 1. |
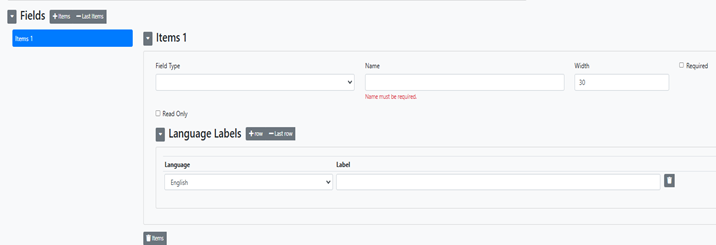
Click on Fields + Items to add a field:
|
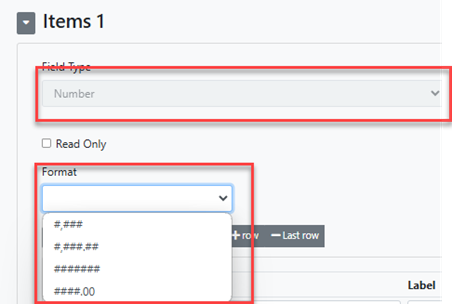
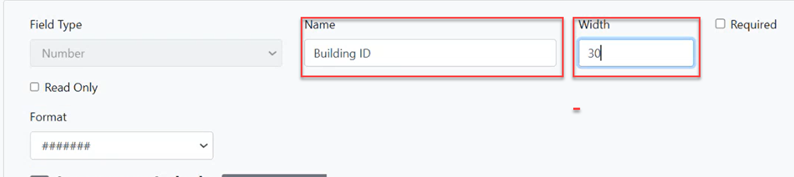
| 2. | Click the Field Type dropdown and choose number (for this example) and then select Format: |
| 3. |
Enter the field name and width:
|
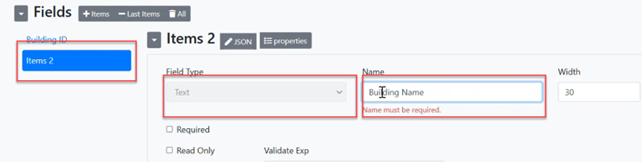
| 4. |
Create a + Items for a text field by choosing text in field type, name the field, and set a width value:
|
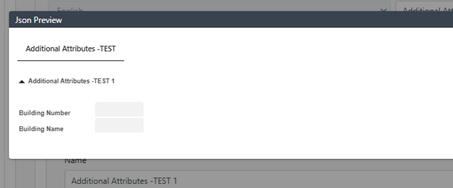
| 5. | Click Save and then Preview: |
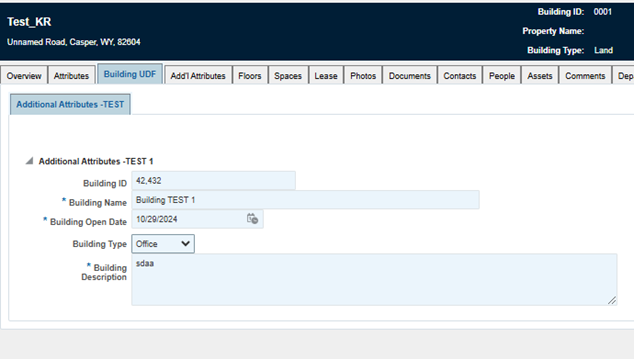
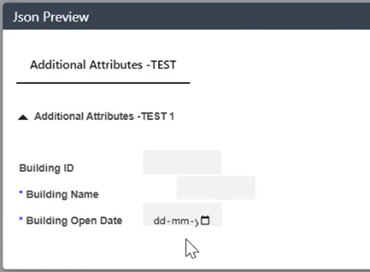
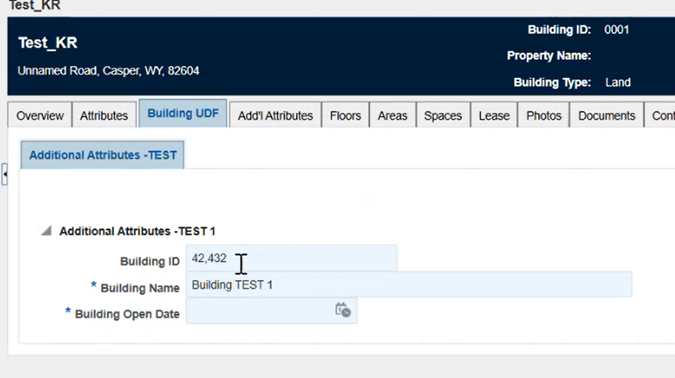
| 6. | View the new UDF under the Building UDF tab in Buildings: EXAMPLE |
| 7. | Repeat the same procedure for the Date field type: 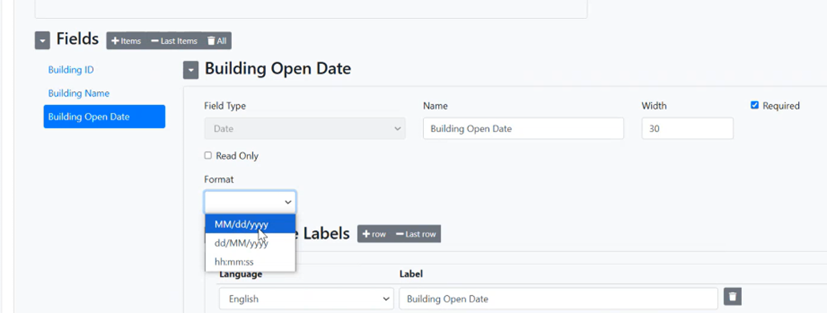
|
| 8. | Click Save and then Preview to see the results: |
| 9. | Publish the template and view the results under the Building UDF tab: |
Adding an LOV Field Type
Perform the following procedure to add the LOV Field type.
| Step | Action |
|---|---|
| 1. |
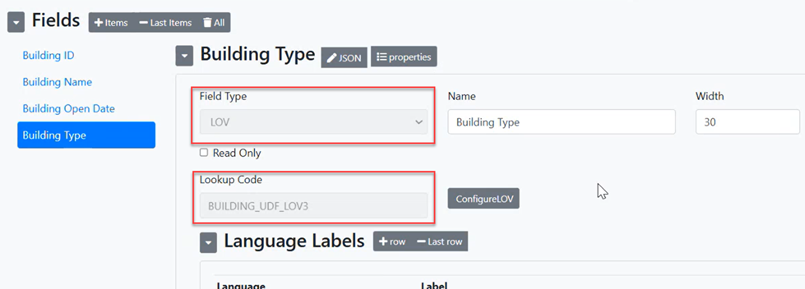
Click + Items to add the LOV field Type:
NOTE: Copy the Lookup Code from the field. |
| 2. |
Click on Lookups/Dropdowns from the configuration home screen:
|
| 3. |
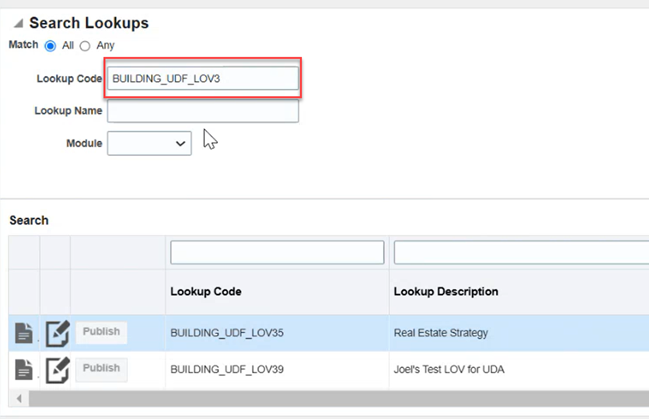
Paste the copied Lookup Code in the Lookup Code field in Search Lookups:
NOTE: If the Lookup has been created before, it will show in the list. If the Lookup Code does not show in the search results, you will need to create it. |
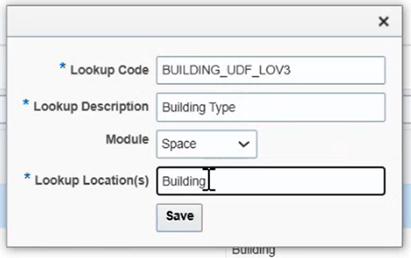
| 4. | Click Add on the Lookups home page and fill in the values by pasting in the Lookup Code, Lookup description, Module, and Lookup Locations: |
| 5. |
Click Save and the Lookup Code will be created:
|
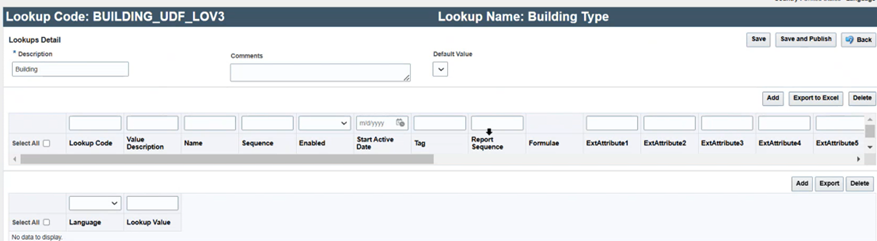
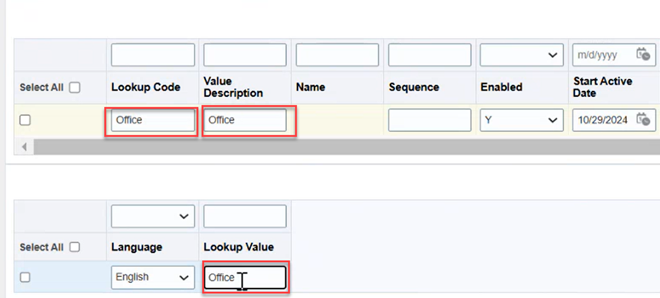
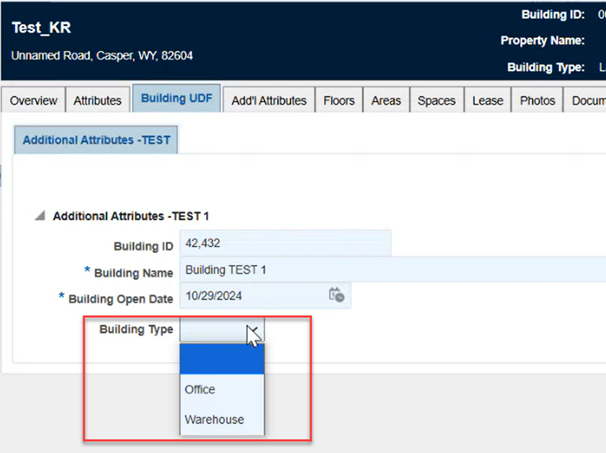
| 6. | Click Add to create Lookup values to the Lookup Code. In this example the value is Office. After typing Office in the Fields, click Save. |
| 7. | Repeat the step and add another value called Office. Click Save. |
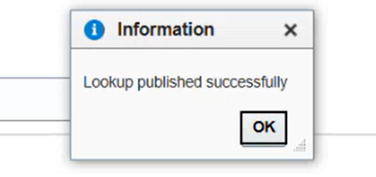
| 8. | Click Save and Publish and you will see the following verification: |
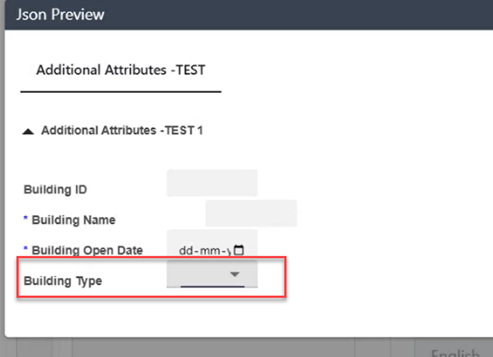
| 9. | Return to the UDF template, select building type and click Save and then Preview: |
| 10. |
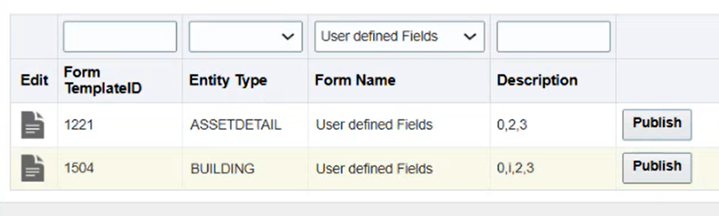
In the list of templates, click the Publish button for the template:
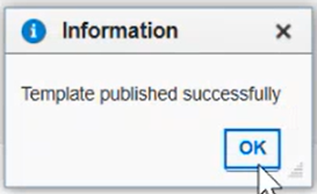
The verification dialog will be displayed:
|
| 11. |
Click edit on a building in the Buildings landing page and look for the UDF values you created under the Building UDF:
|
| 12. |
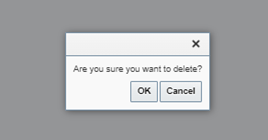
To Delete a template, select the template in the list and click on Delete. The delete verification popup will display:
|
Editing an existing template
The Edit button opens the template for edits. Some elements in the Lookup may not be editable and will be grayed out depending on what a user’s permissions level is assigned.
| Step | Action |
|---|---|
| 1. |
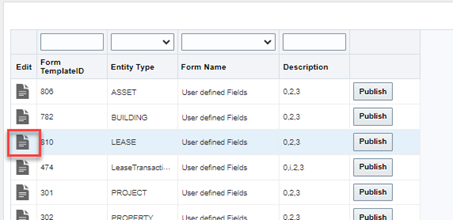
Select Edit for the UDA that you want to configure.
|
| 2. |
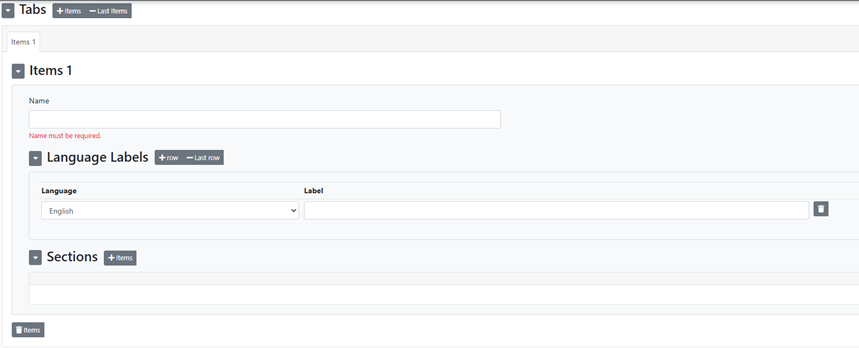
If the file has not yet been configured, clicking the edit button will display the following:
|
| 3. | Enter your desired details for the UDA for this line item in the table. |
| 4. |
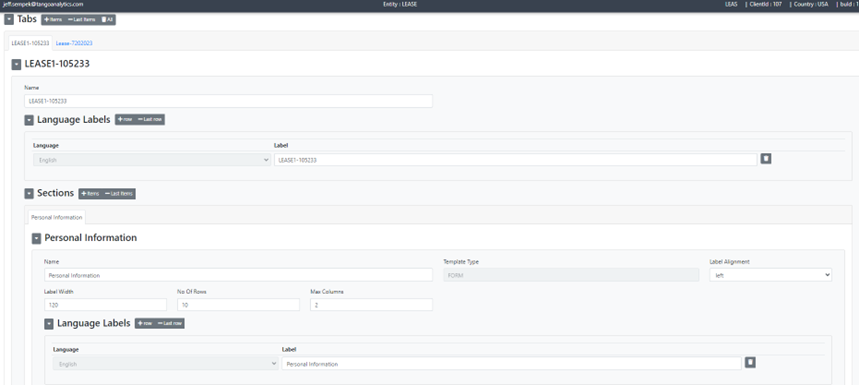
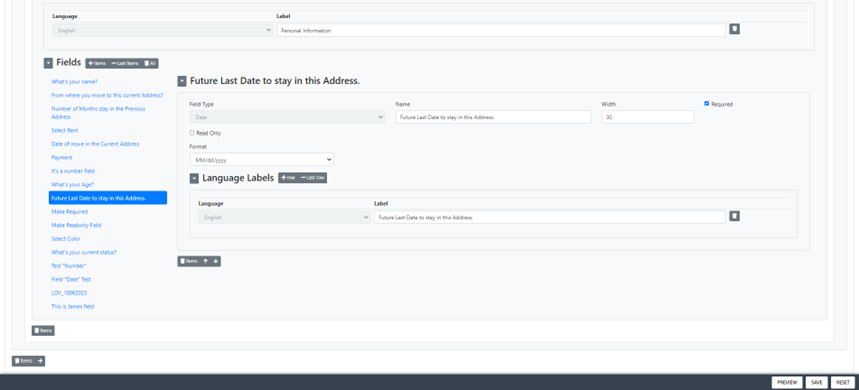
The configuration screen will display and allow you to edit the fields in the UDA. The following images represent the top and bottom parts of the editable fields:
|
| 5. |
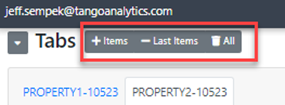
The action tabs at the top left of the page allow you to Add an Item, Delete the last Item added, or delete all items:
|
| 6. |
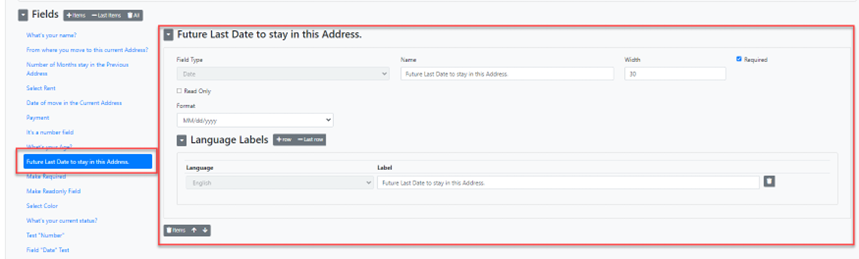
Current fields are listed under Fields and when you click on a field in the list, that fields attributes will be displayed and can be edited.
|
| 7. |
You can preview the field attributes by clicking on the Preview button at the bottom right of the screen:
|
| 8. | You can reset the fields or save your changes. |
| 9. | Click the Publish button to publish the new template. |

Was this article helpful?
That’s Great!
Thank you for your feedback
Sorry! We couldn't be helpful
Thank you for your feedback
Feedback sent
We appreciate your effort and will try to fix the article