Table of Contents
Home screen
After logging into the Tango Mobile application, the User is presented with a Home Screen displaying multiple tiles corresponding to the Tango Core modules implemented for the Client. Selecting a tile will open the designated module in the Mobile app. This document will focus on the Projects tile.
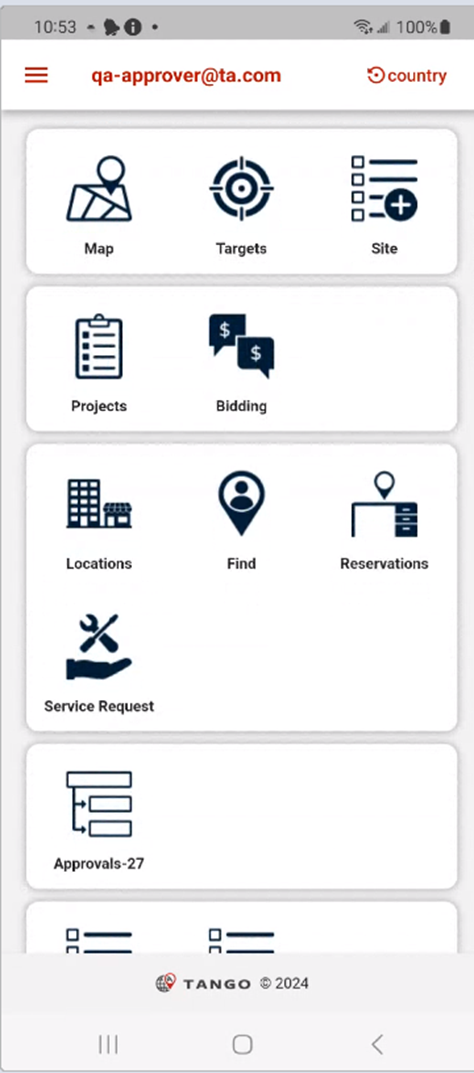
Map
Users now have more capabilities to use mapping, view sites, and targets, and plan trips on their mobile devices.
This section provides an overview of Mobile for Maps. Users now have more capabilities to use mapping, view sites, view targets, and plan trips on their mobile devices.
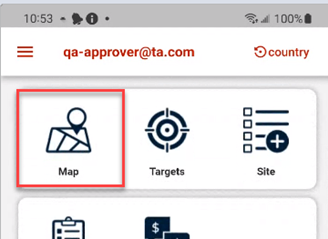
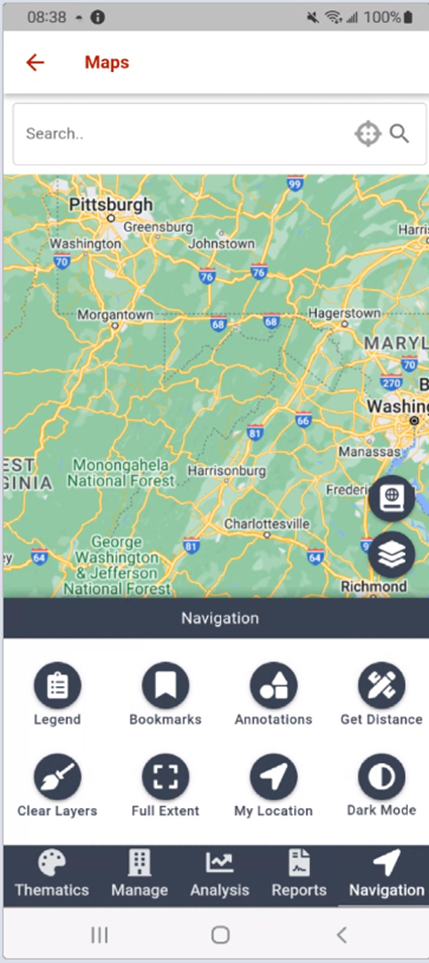
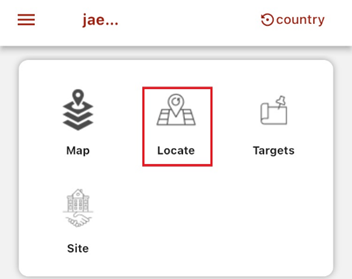
From the locate icon you can access a number of map features:
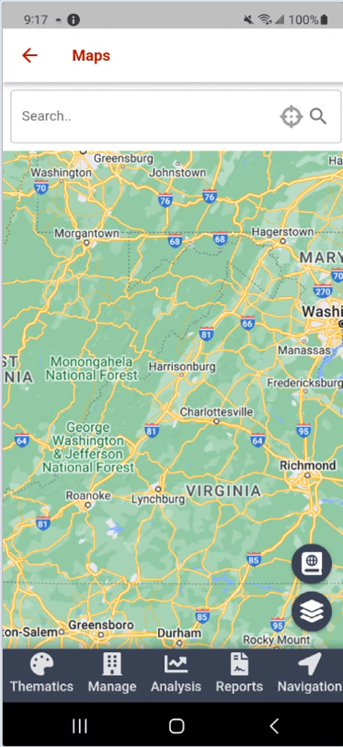
Selecting Mapping, for example, you can display the Manage Entities icons:
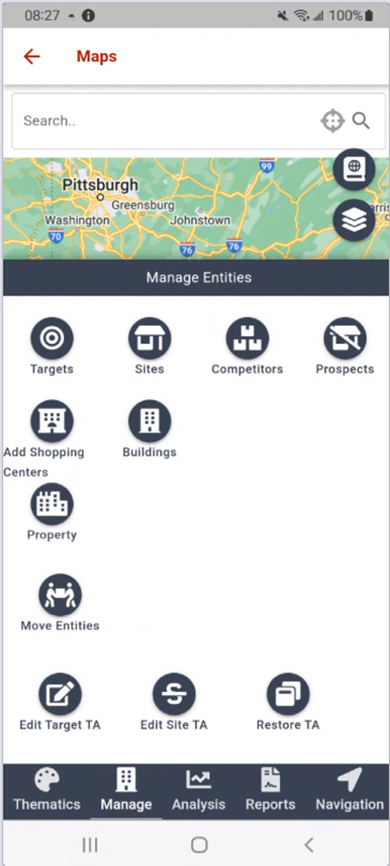
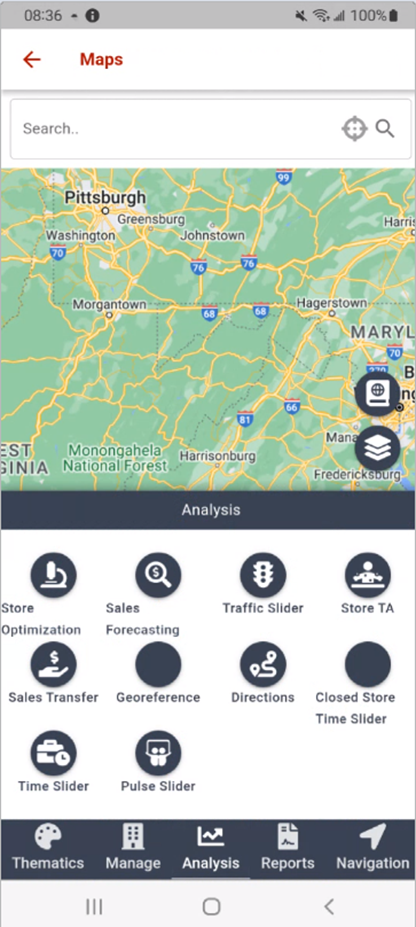
You can also select Analysis to display several analysis icons:
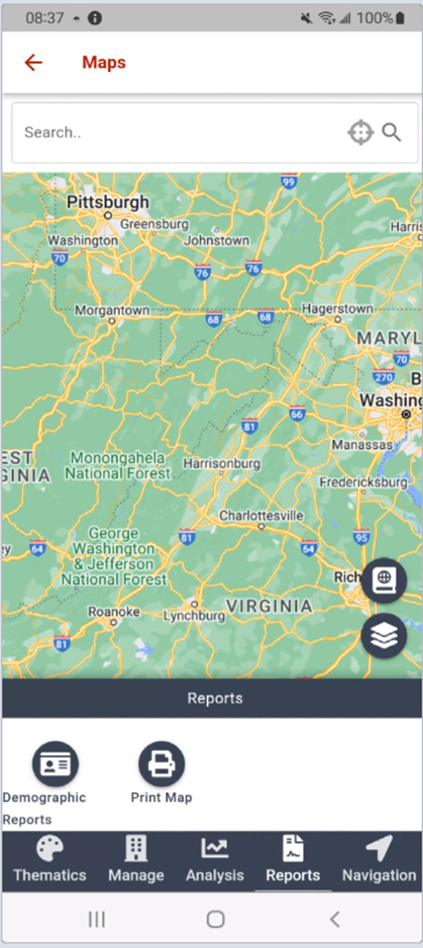
You can display several reports by selecting the reports icon:
Locate
Users can access these features from the Locate icon in the mobile app.
Mapping (Mobile)
We added mobile mapping capabilities including capturing a screenshot, completing annotations, and sending via email.
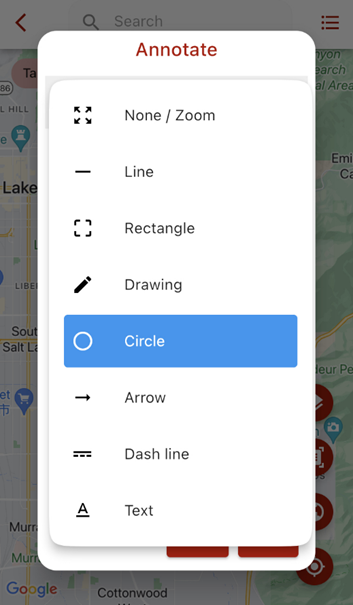
Choose from different types of annotation.
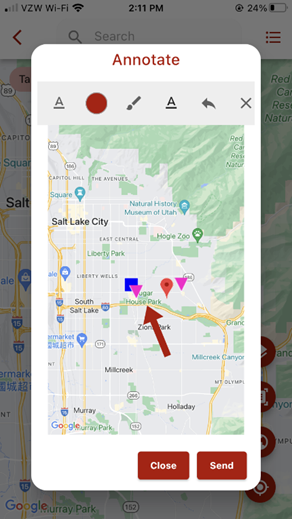
Draw and annotate on the map:
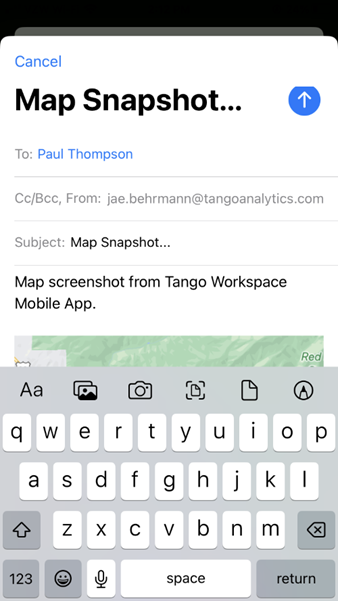
Email a screenshot of the map with the annotation:
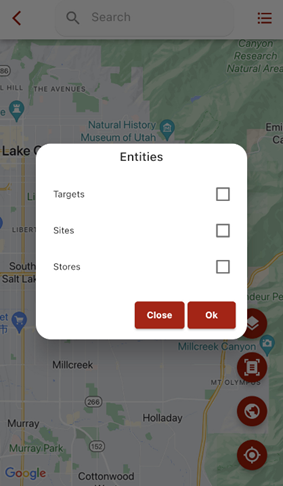
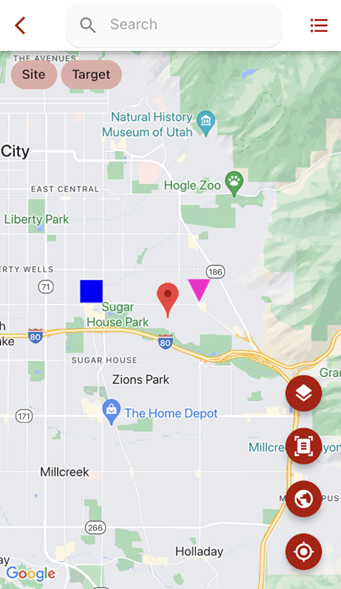
We added a new map icon, including the ability to view entities and their respective icons on the map.
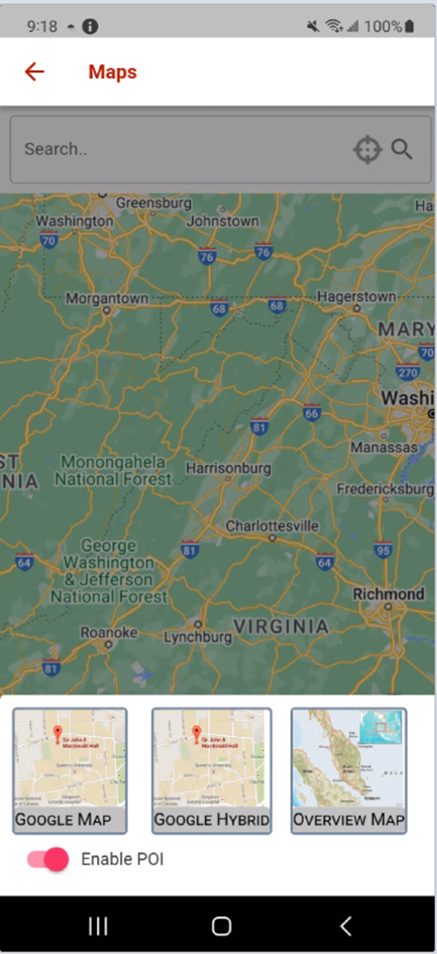
You can select which entity layers to view:
View those entities on the map:
Site Selection (Mobile)
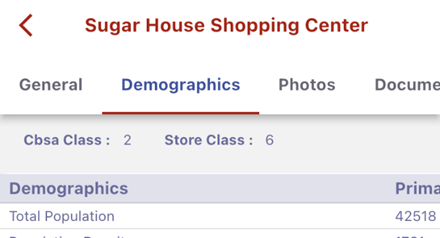
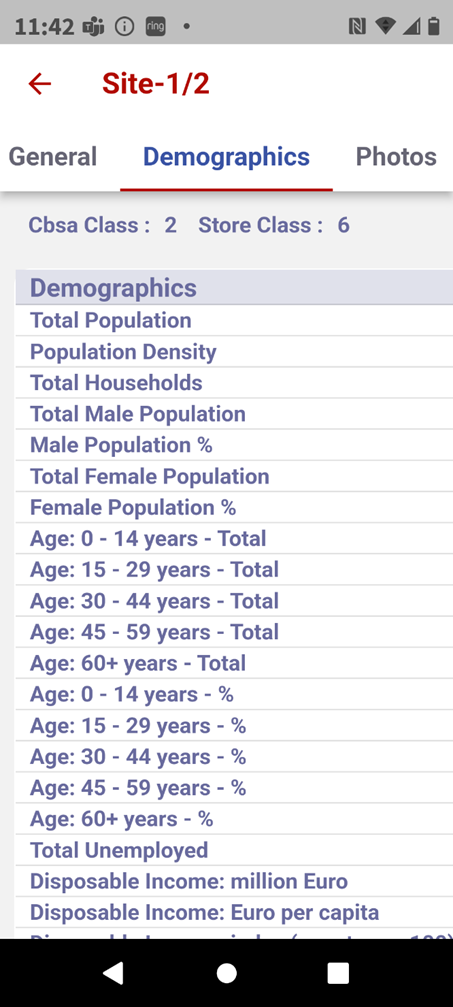
We added new features to the mobile application to support mobile site selection including the following details: General, Demographics, Photos, and Documents.
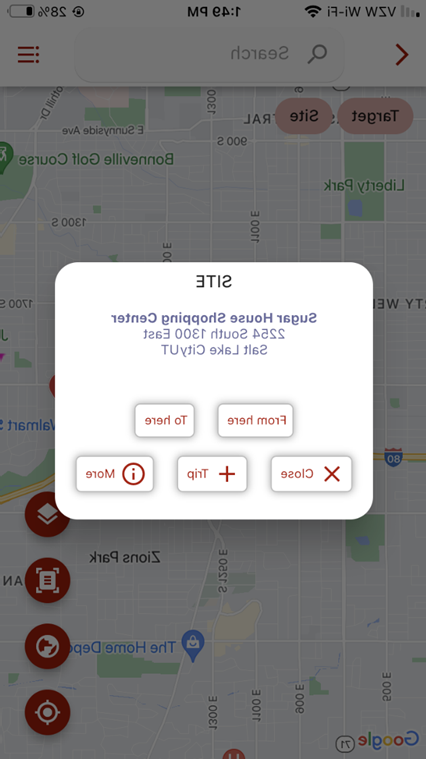
Select a site on the map to view the site record's details:
View the site's demographics:
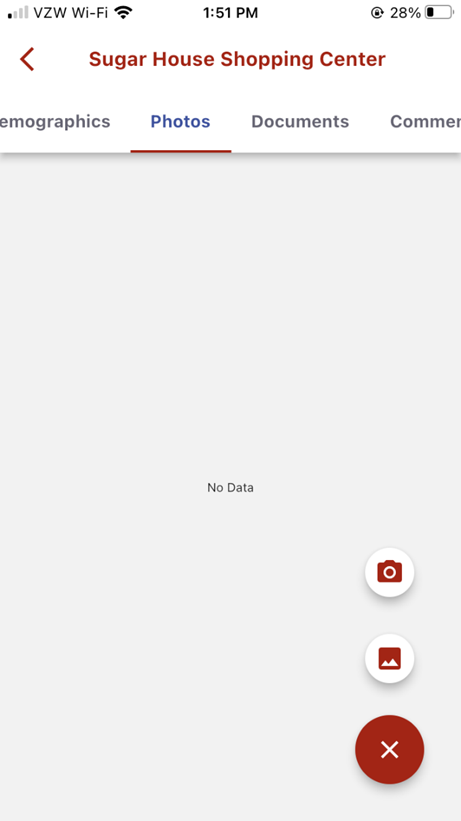
Upload photos from your phone's camera to the site record
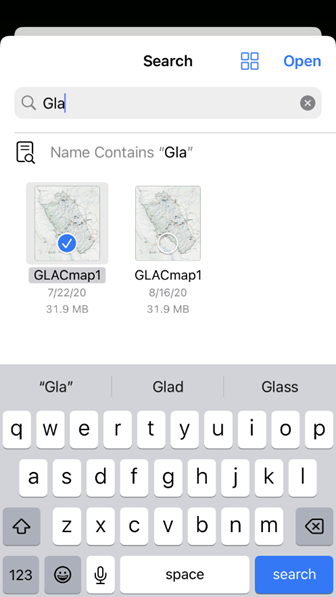
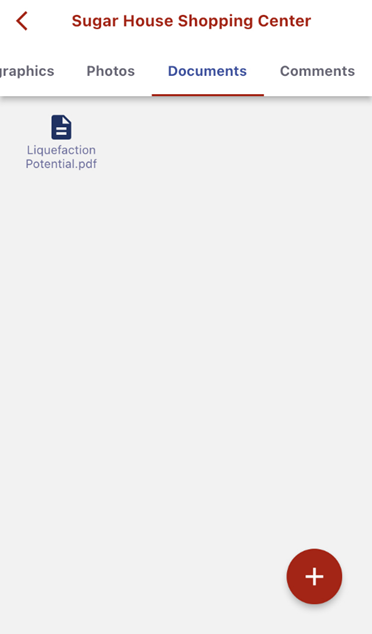
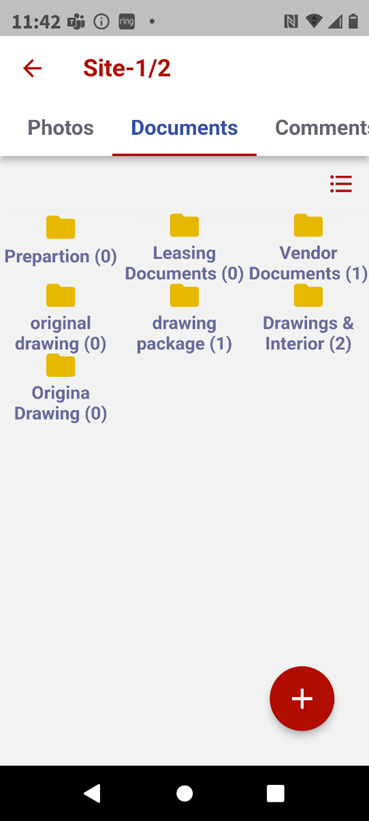
Upload documents from your phone to the site record:
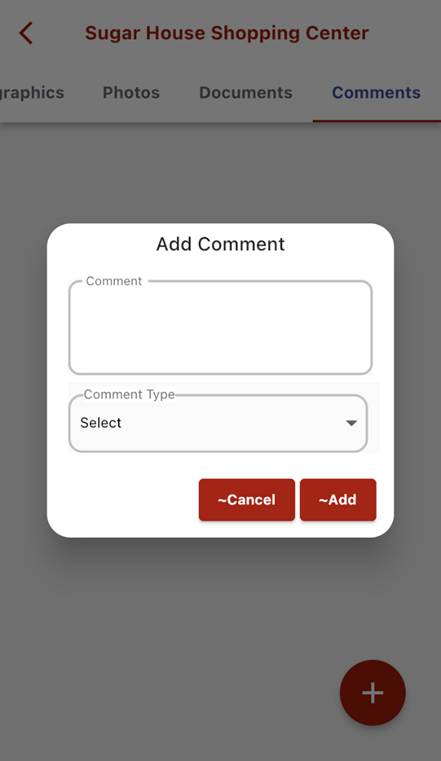
Add comments to the site record:
Targets (Mobile)
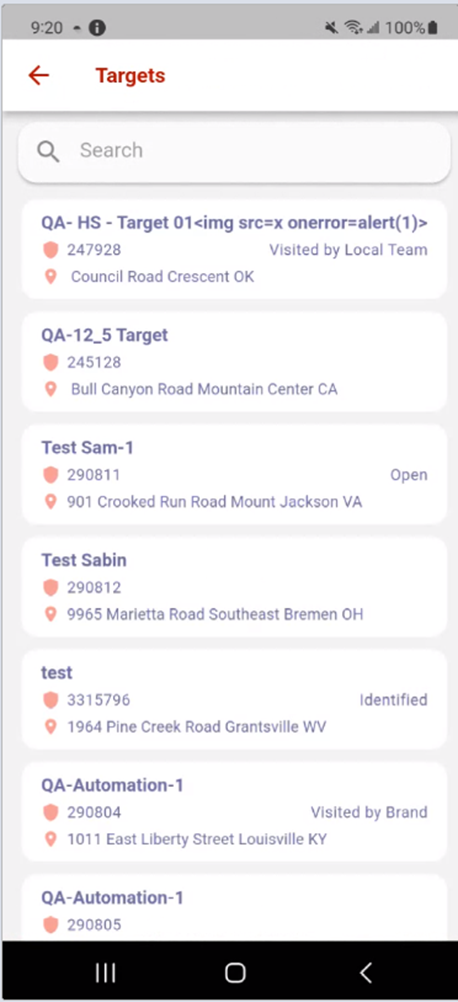
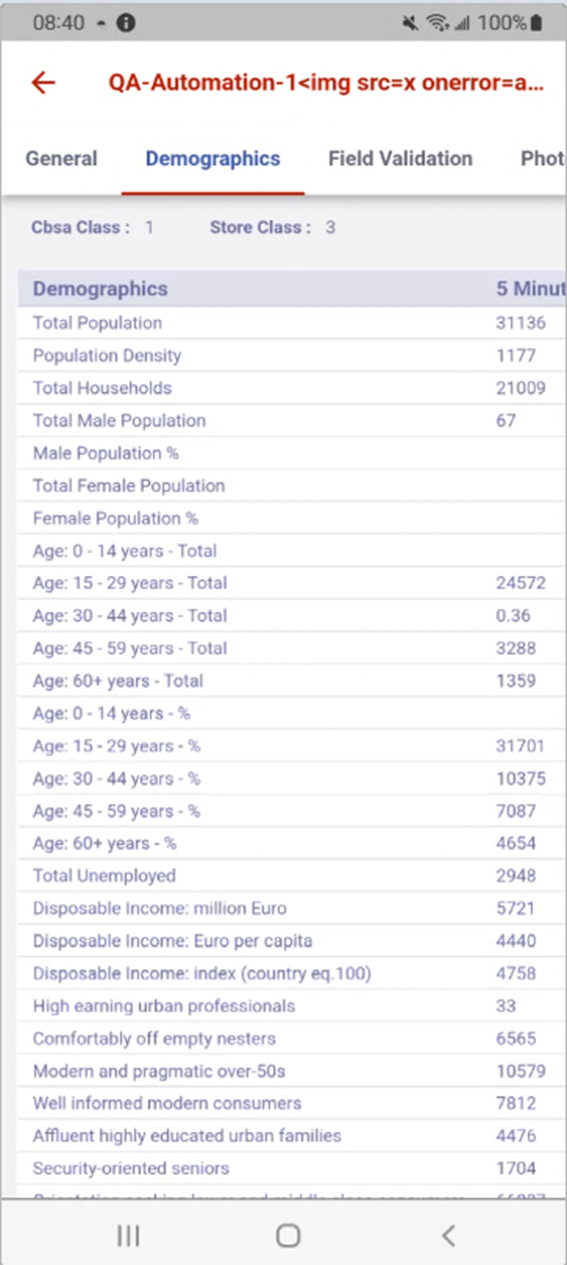
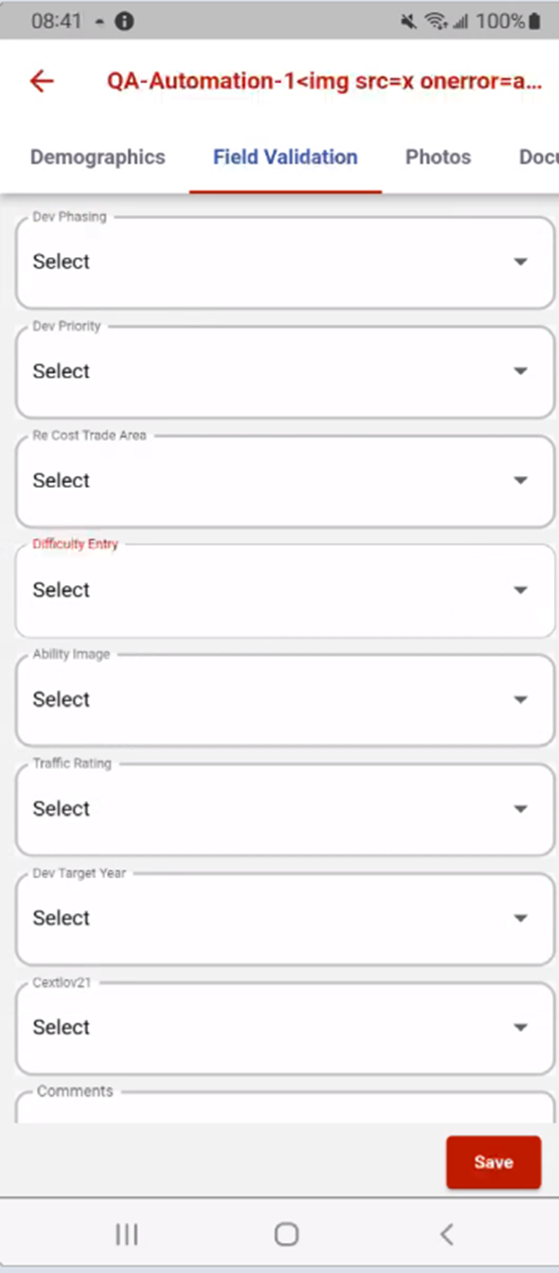
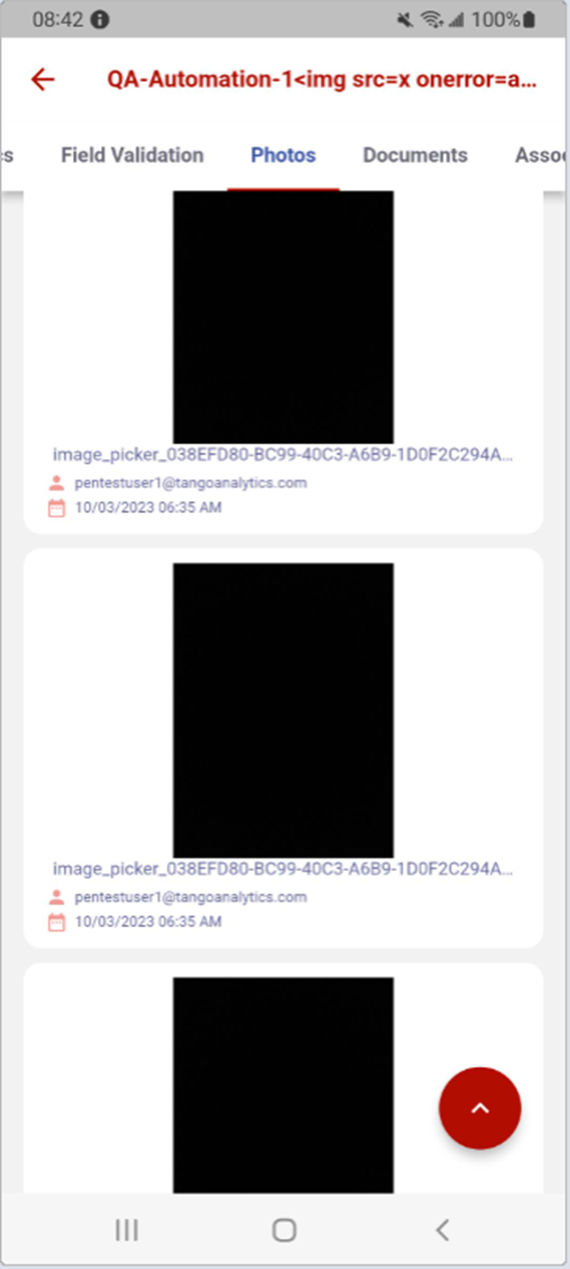
We added mobile support for Targets in the mobile app inclusive of General Information, Demographics, Field Validation, Photos, Documents, and Associated Sites functionality.
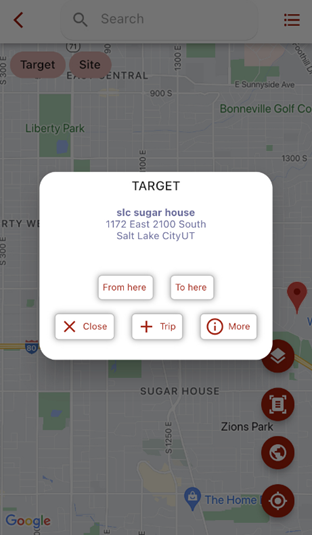
Select a target on the map to view the target record's details:
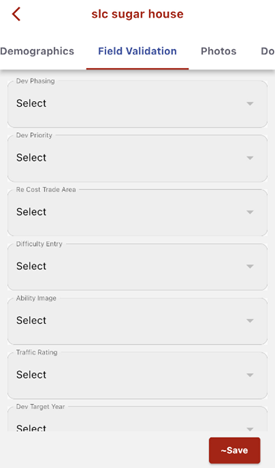
View and complete the target's field validation questions:
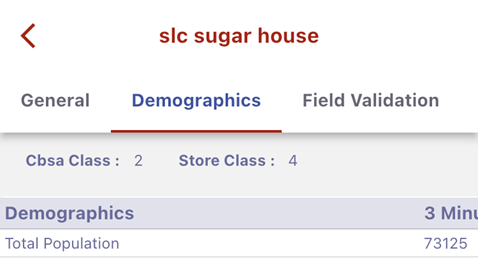
View the target's demographics:
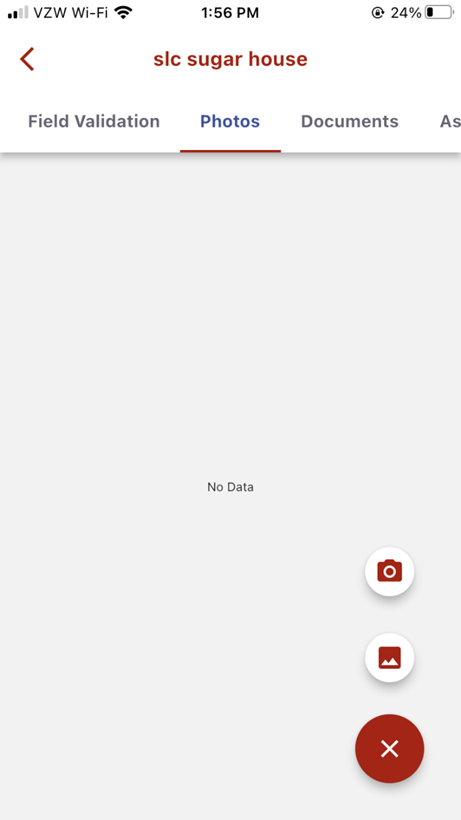
Photos - Upload photos from your device's camera to the target record
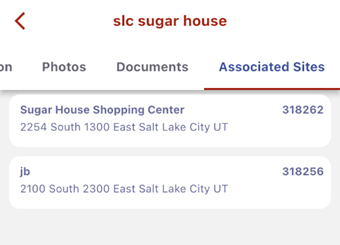
Targets View the target's associated sites:
Trip Planning (Mobile)
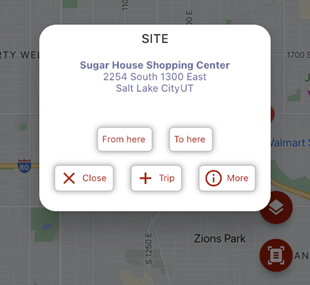
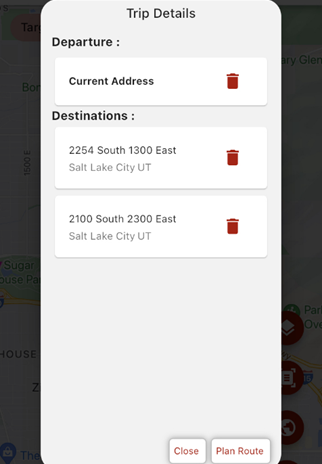
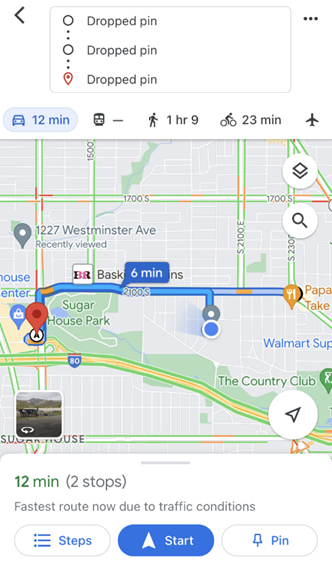
We added a new trip planning feature to the mobile app to select targets, sites, and stores and create driving directions. Organize trips with driving directions between multiple sites and stores.
Targets
This section describes how to use Mobile for Targets. Mobile allows you to open Targets and view demographics and other information from your mobile devices.
Sites
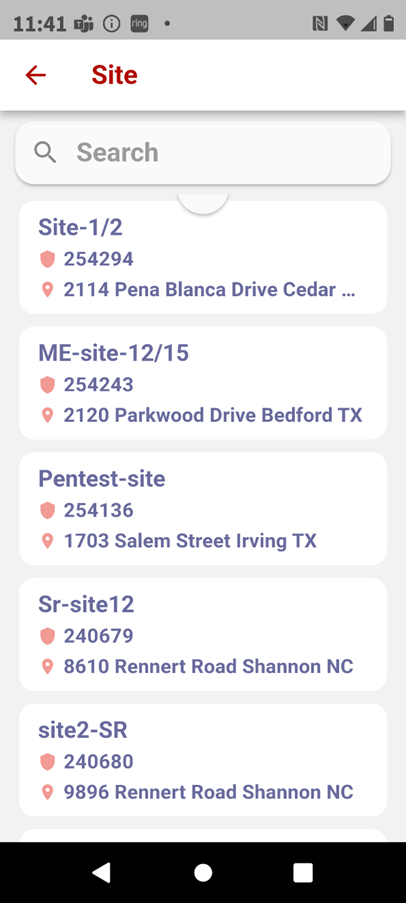
This section describes how to use Mobile for Sites. Mobile allows you to open Sites and view demographics and other information from your mobile devices.
Projects
This section describes how to use Mobile for Projects. Tango Mobile allows you to access many of the features found in Projects when it is accessed from your desktop. Selecting Projects from the Mobile home screen will display a list of projects that have been created from your Tango Platform. The following table provides a description of the features available from the Mobile app.
| Feature | Capability |
|---|---|
| View Schedules |
View upcoming milestones on a project in the next week, month, and the entire project. Ability to enter actual completion dates for milestones one project at a time. Note: You cannot initiate a schedule or reschedule on mobile. |
| Cost Management |
Allows you to view the following:
Note: Cannot create a Budget, PO, CO, or Invoice on Mobile |
| Document Management | View the document folder structure and the ability to view individual documents, including full markup capabilities. |
| Photos | Upload photos to the Project and view existing photos in the project. |
| Status Reports | Submit individual status reports on projects. |
| Comments | Add Notes on the Project. |
| Meeting Minutes | Take structured meeting minutes and store them in the project |
Opening a project in Mobile will open that project with the following tabs for functions associated with the project.
| Tab | Function |
|---|---|
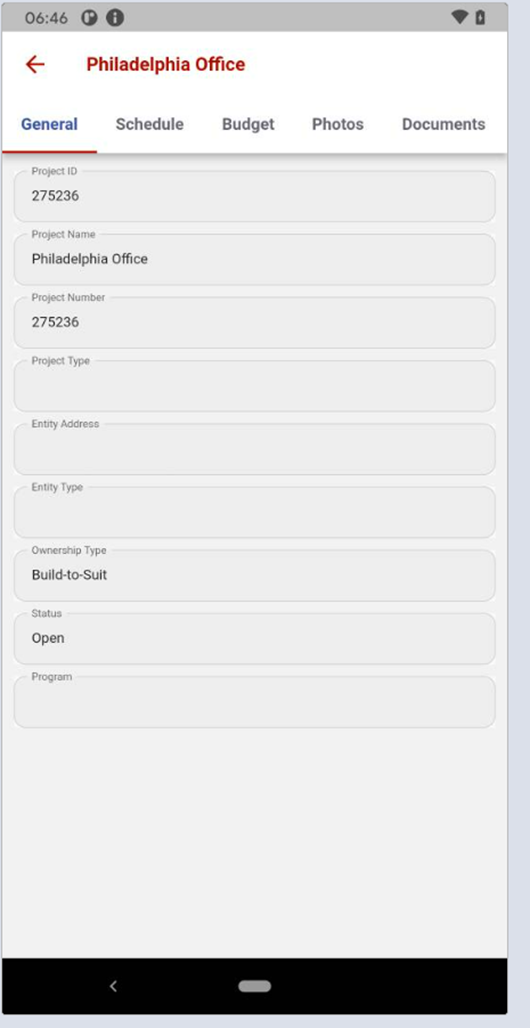
| General | Provides general information about the selected project. |
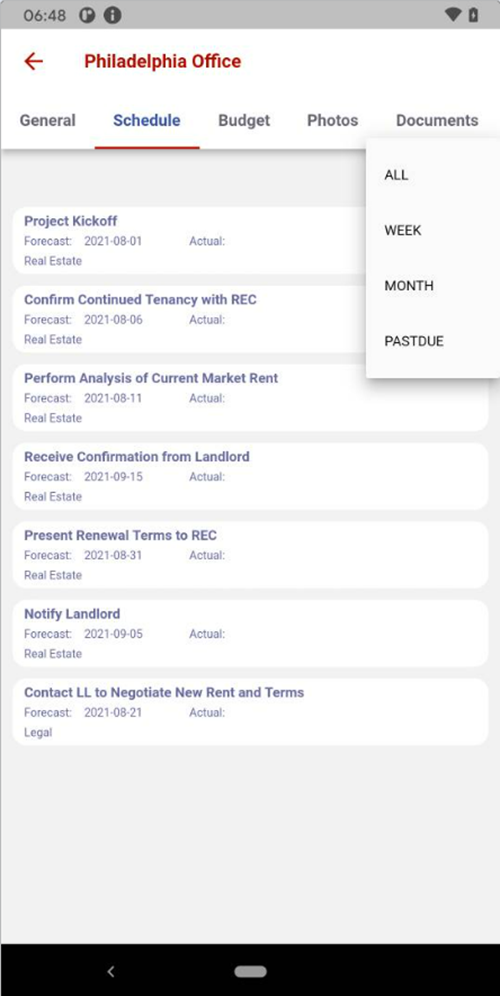
| Schedule | List the schedule for ALL, WEEK, MONTH, or PAST DUE items. |
| Budget | Allows you to view a budget; with tabs for Details, Purchase Orders, Change Orders, and Invoices. |
| Photos | You can take a picture from the app or upload a picture from your phone. |
| Documents |
You can upload documents into any of the following example folders or other folders created by the user:
|
| Punchlist | Provides a list of existing Punch lists and allows you to add/create a Punchlist. You can also search for a Punch List by name, All, or Not Completed. |
| Comments | You can add a comment to the project, and it is stored under the comments tab in the Project. |
| Adhoc Tasks | You can list and create Adhoc tasks that can be assigned to an individual. |
| Status Reports | You can view a comprehensive overview of the projects current state. |
| Meeting Minutes | You can record meeting minutes for a selected project |
| Contacts | You can provide |
Viewing a Project
This section describes how to view projects in Mobile. Clicking on the Projects icon will provide a list of projects that have been created from the Tango Platform on your desktop.
| Step | Action |
|---|---|
|
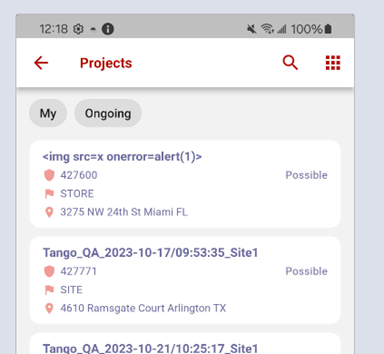
Click Projects to open the list of current projects:
|
|
|
Click on
|
|
|
Click on a project to display details about the project. The details are displayed under the General tab:
|
 to display app navigation to My Approvals. Click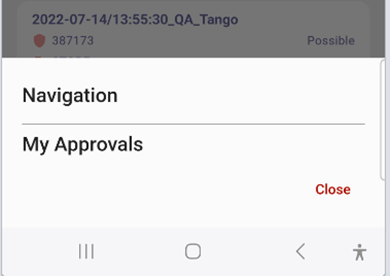
Schedule
This section describes how to view a schedule or add a scheduled item to the list.
| Step | Action |
|---|---|
|
Click the Schedule tab to view the schedule of projects. Note: You can view ALL, WEEK, MONTH, or PASTDUE:
|
|
|
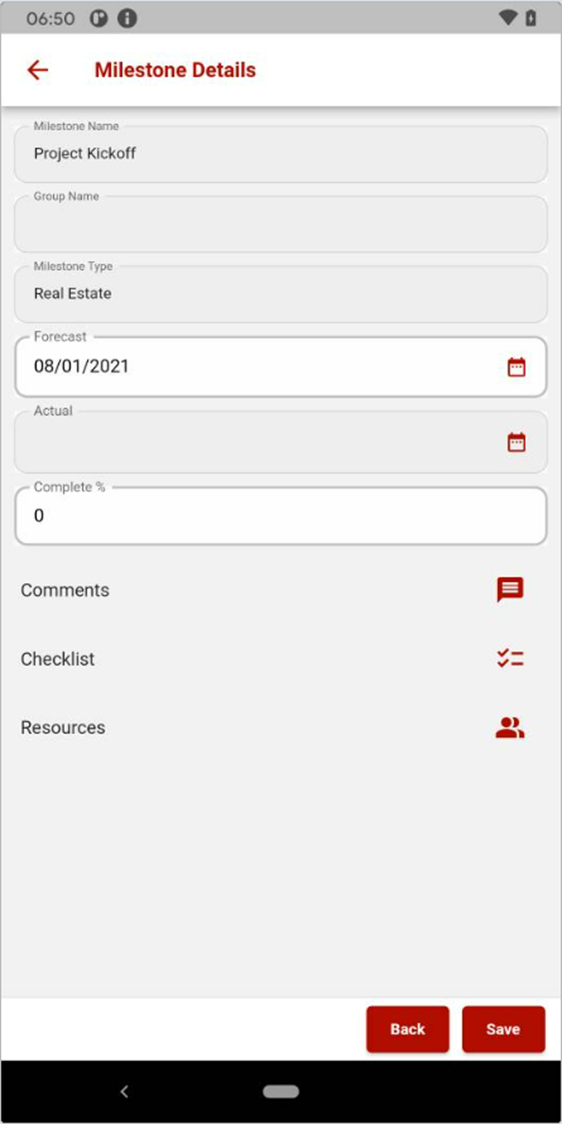
Click on a Milestone in the list to display Milestone Details.
|
|
|
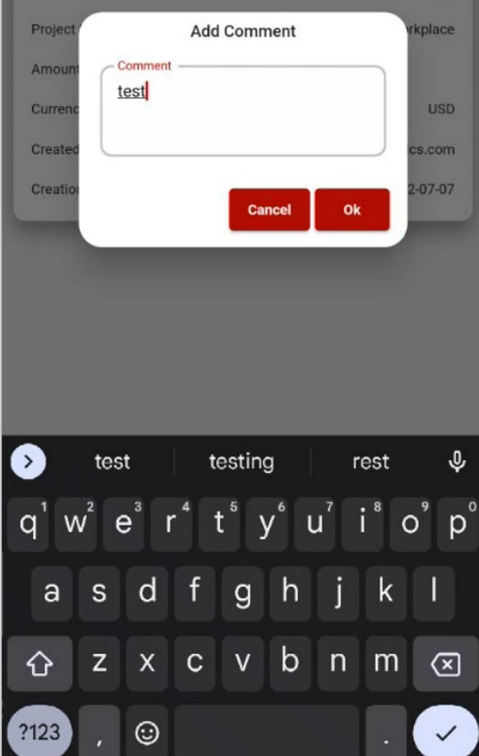
Click the Comments icon to view or add comments to the project milestones. Clicking inside the Comment box will display the keyboard for typing and the microphone icon to narrate directly into the field
|
|
|
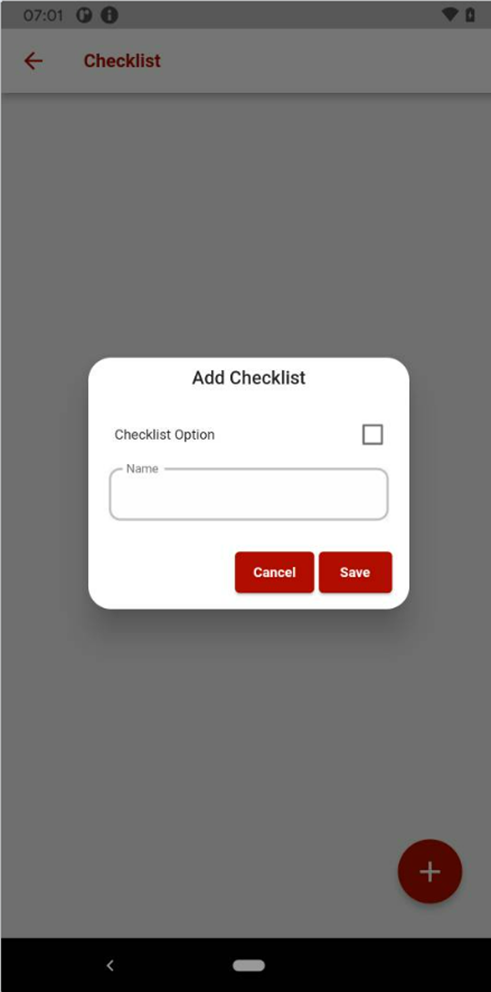
Click the Checklist icon to view or add checklist items. Note: A Milestone Task can be configured with one or more Checklist Items. Each checklist item must be completed before the Actual Date for the Task can be entered. The Checklist Option field allows users to change the status of the Checklist Item to complete from the mobile app.
|
|
|
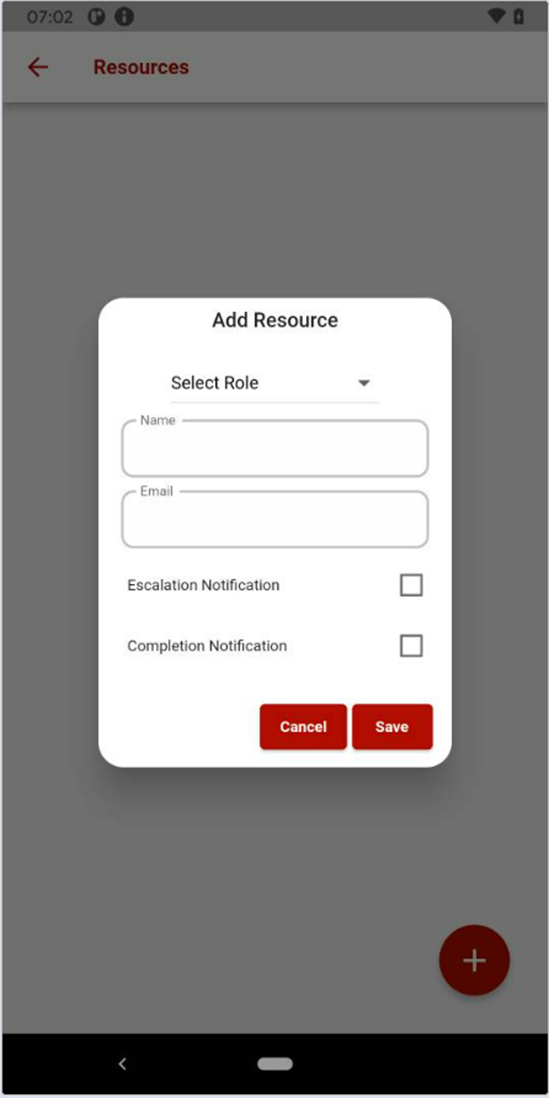
Click the Resources icon to view or add resources.
|
|
|
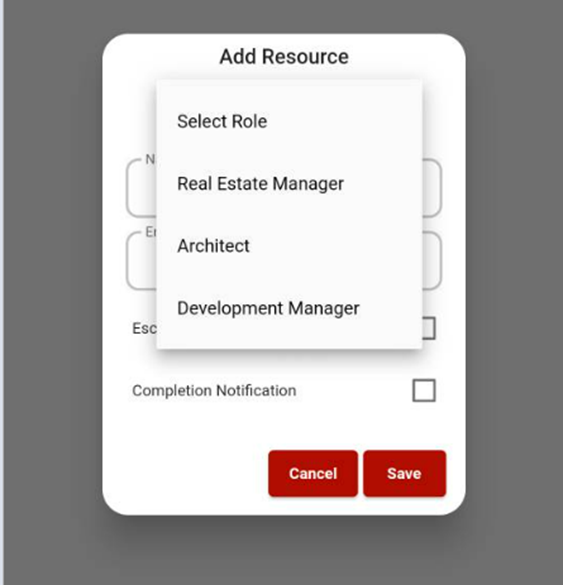
Click Select Role to assign a role. The person assigned to the selected role in the Project is now the resource.
|
Budget
This section provides a budget overview and allows you to view Details, Purchase Orders, Change Orders, and Invoices
| Step | Action |
|---|---|
|
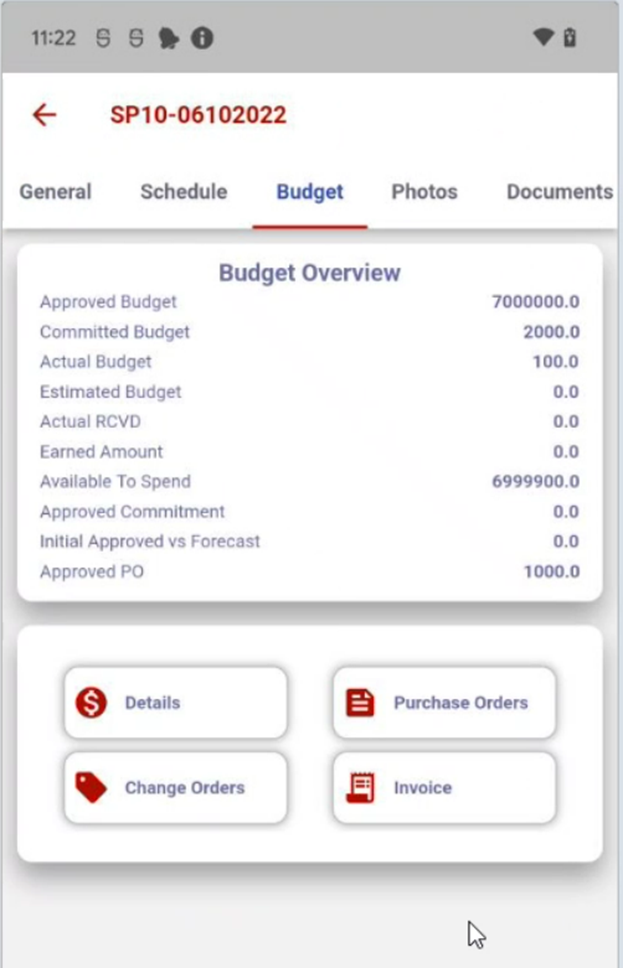
Click on the Budget summary button opens an expandable rollup view of the Budget:
|
|
|
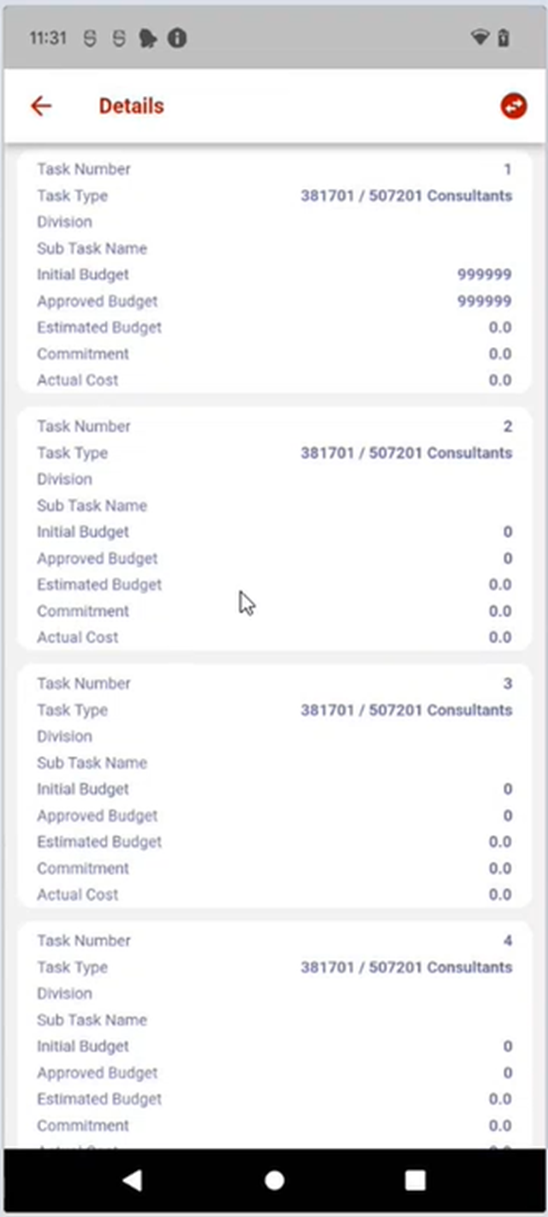
Click Details to view the Budget details:
|
|
|
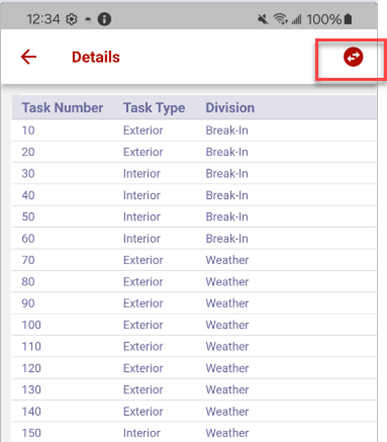
Clicking on the double arrows provides a table view of the project details.
|
|
|
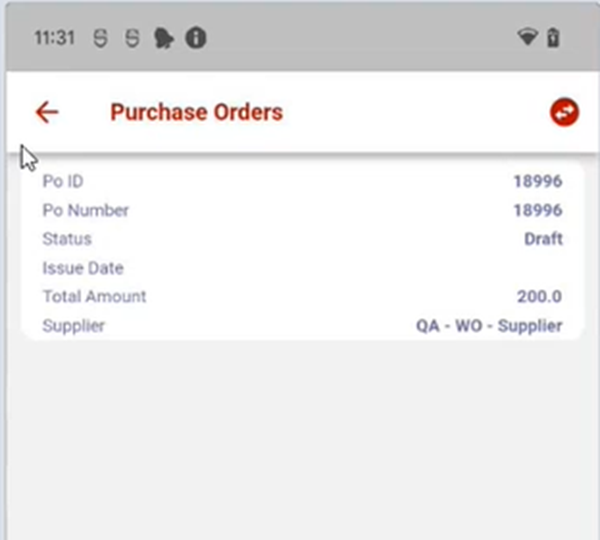
Click on Purchase Orders to view the purchase orders for the selected project. Clicking the double arrows provides a table view.
|
|
|
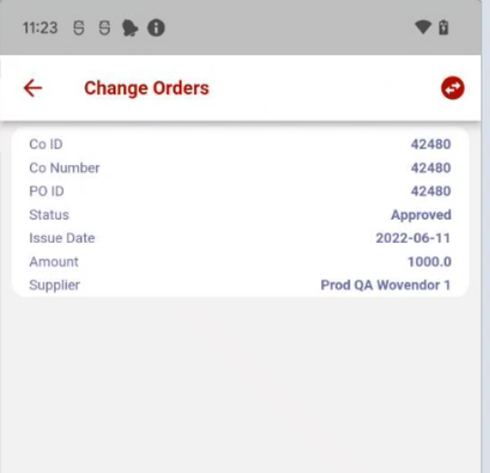
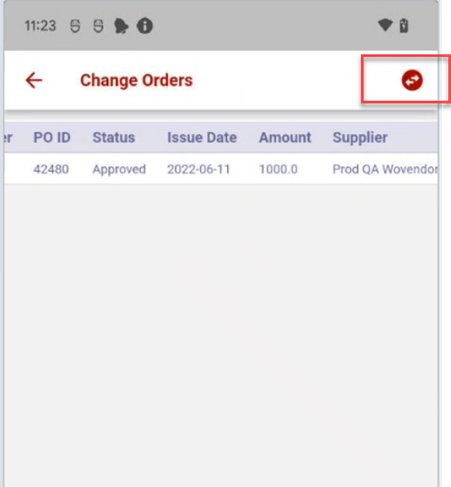
Click Change Orders to view change orders for the selected project:
Note: Clicking on the double arrow icon will toggle the view of the Change Order from a list view to a table view and back again.
|
|
|
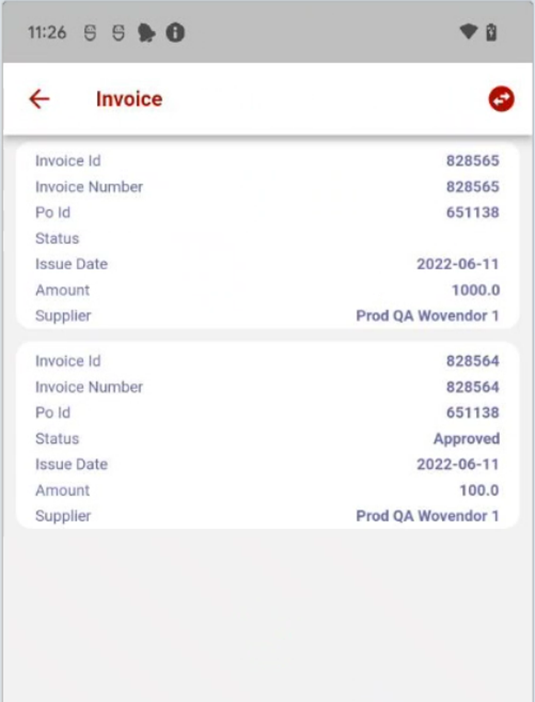
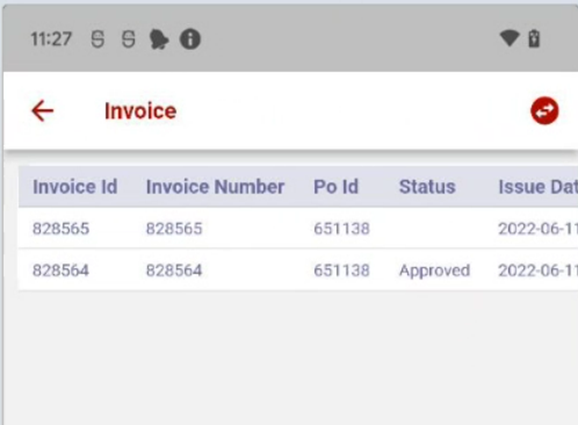
Click Invoice to view the invoices for the selected project:
Note: Clicking on the double arrow icon will toggle the view of the Invoice details from a list view to a table view and back again.
|
Photos
This section describes how to view and add photos to a project.
| Step | Action |
|---|---|
|
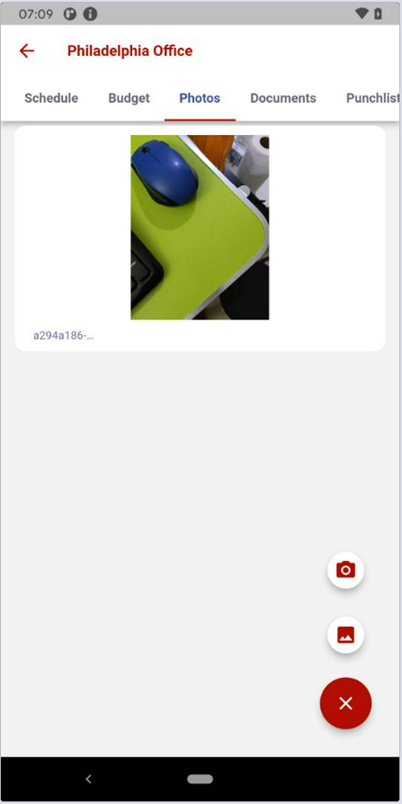
Click the Photos tab to upload an existing photo on your phone or take a picture and upload it to the Project under the Photo tab. Note: Clicking the camera icon will allow you to take a picture with the camera on your mobile device. Clicking the Image icon allows you to upload an image from your mobile device.
|
Documents
This section describes how to view or add documents to a project. The documents folder is tied to the project.
| Step | Action |
|---|---|
|
Click the Documents tab to view or add a document to any of the existing folders currently in the project.
|
|
|
Clicking on the menu button in the menu
|
|
|
Click the Plus icon to add an item.
|
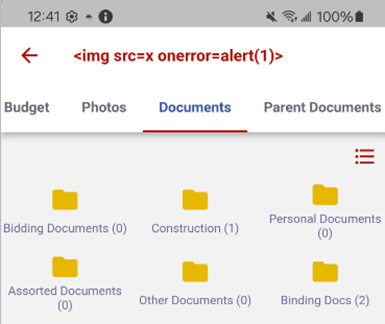
 button will toggle between a list view and thumbnail view.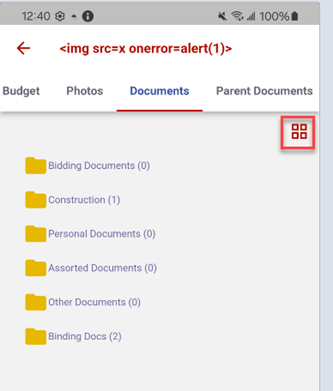
parent Documents
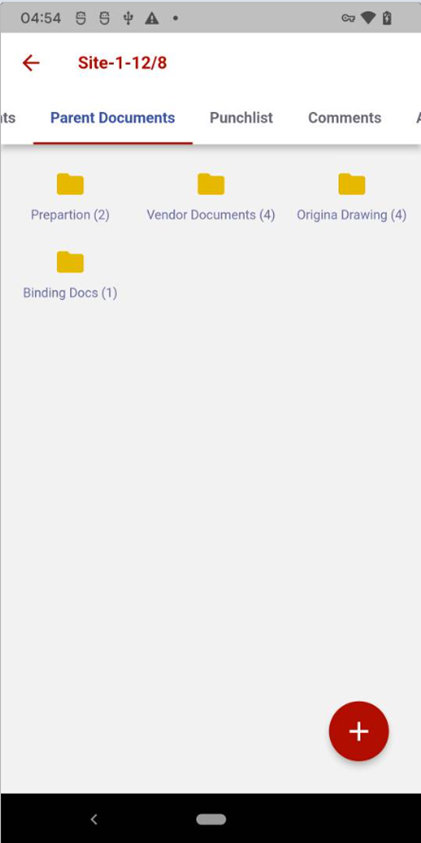
This section describes how to view or add parent documents to a site. The parent documents folder is tied to a site project.
| Step | Action |
|---|---|
|
Click the Parent Documents tab to view or add a document to any of the existing folders currently in the project:
|
|
|
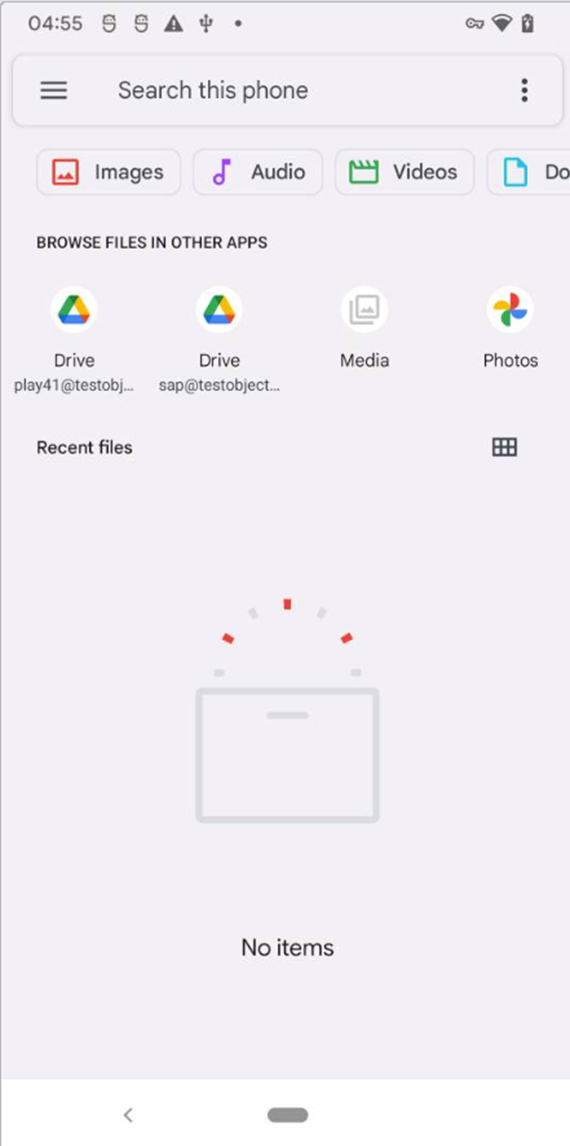
Click the Plus icon to add an item.
|
Punchlist
This section describes how to view or add punch list items to the project.
| Step | Action |
|---|---|
|
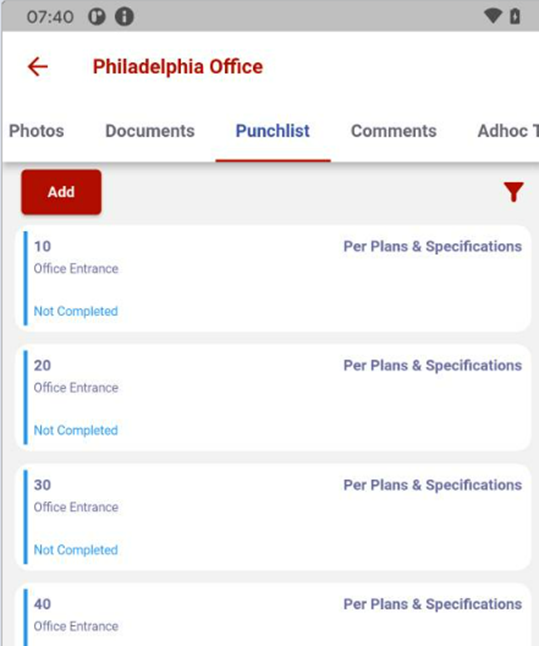
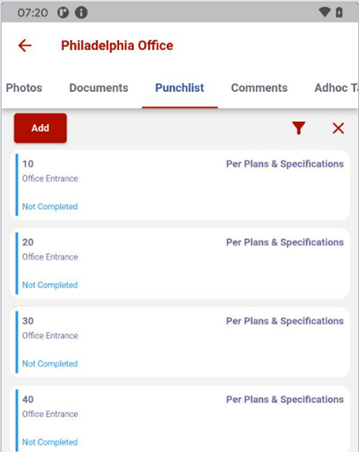
Click the Punchlist tab to view or add punch list items to your project:
|
|
|
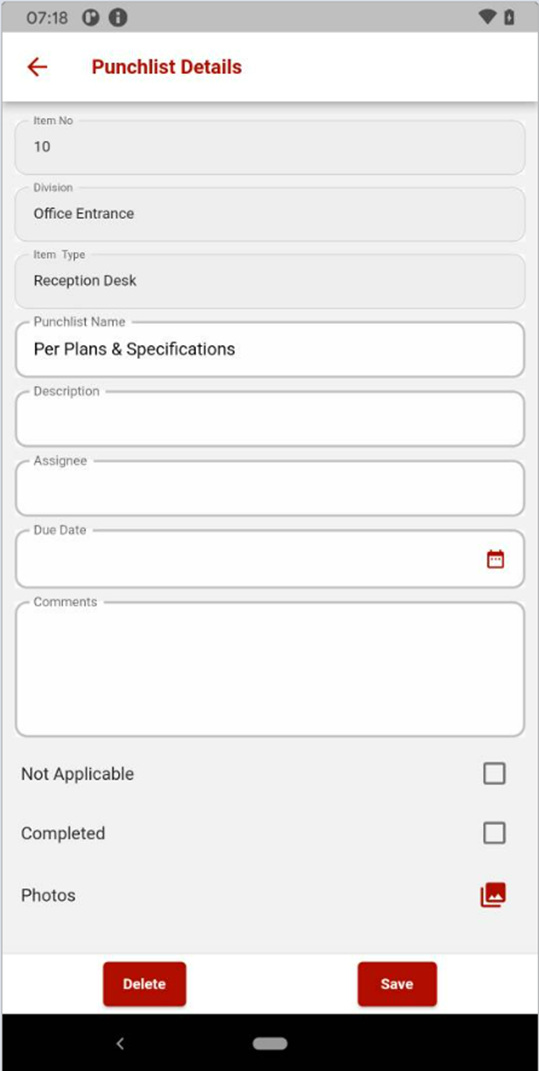
Click on a punch list item in the list to view the Punchlist Details:
|
|
|
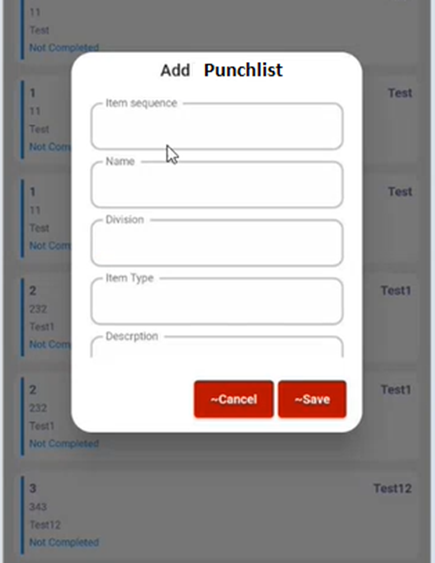
Click the Add button while viewing the list of Punchlist to a new list item. The Add Punchlist template will open:
|
|
|
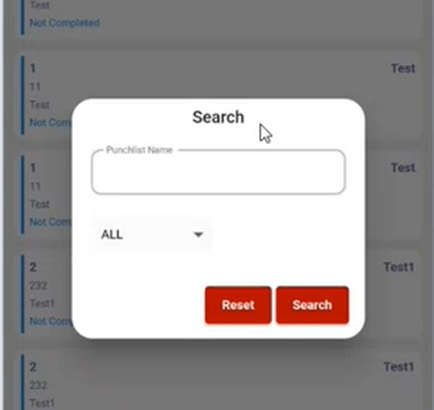
Click the search icon to open the search dialog to search for a punch list task by name:
|
|
|
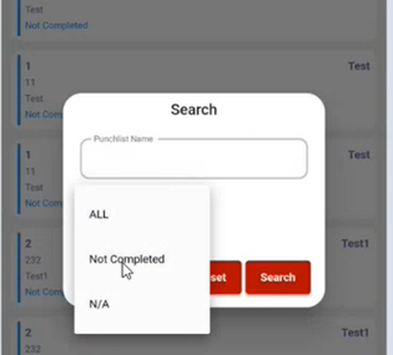
Click the dropdown arrow to select search by ALL, Not Completed, or N/A:
|
|
|
For example, clicking Not Completed will display a list of all Not Completed punch list tasks:
|
Comments
This section describes how to view or add a comment to the project.
| Step | Action |
|---|---|
|
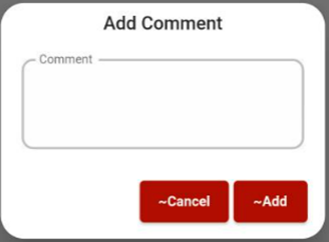
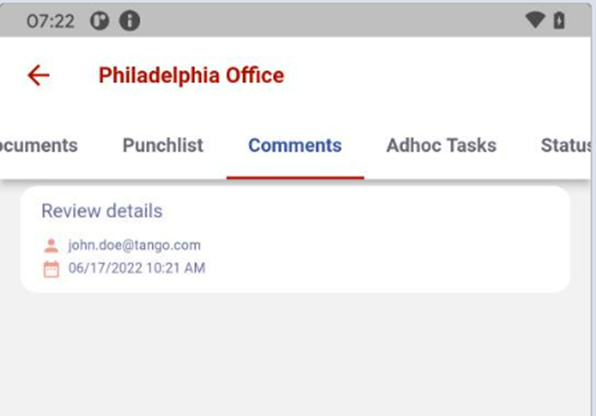
Click Comments to view or add comments to the selected project. Click the + to add a comment. Clicking in the Comment box will display the keyboard for entering text and the microphone icon to narrate directly into the field.
|
|
|
Click Add to add the comment to the list.
|
Adhoc Tasks
This section describes how to view, add, or modify adhoc tasks.
| Step | Action |
|---|---|
|
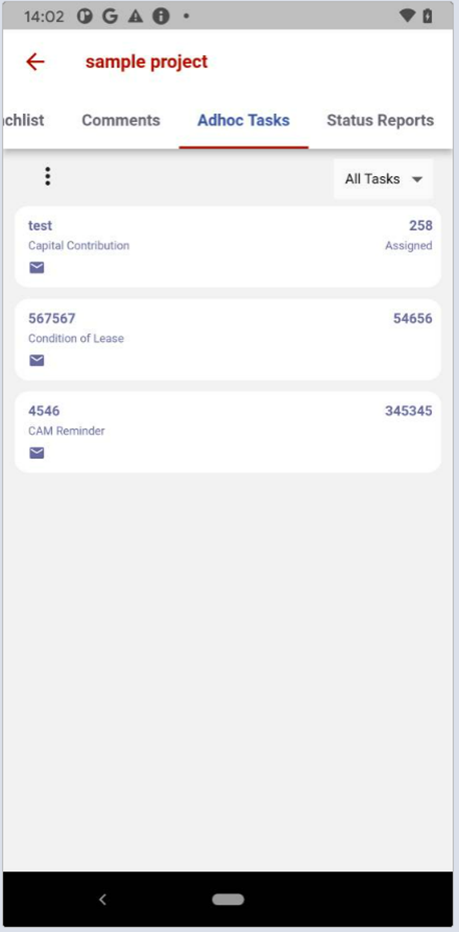
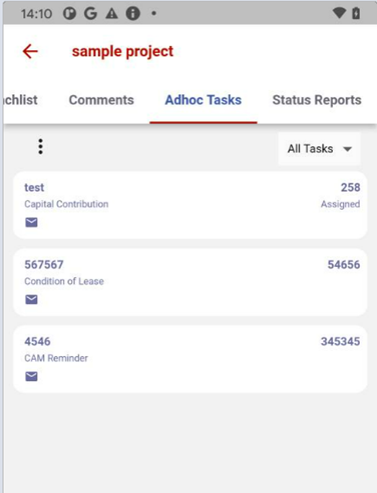
Click Adhoc Tasks to view adhoc task page.
|
|
|
Click the three dots menu to Add Item.
|
|
|
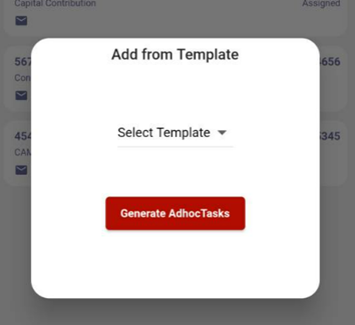
Click the three dots menu to Add from Template.
|
|
|
Click All Tasks to list all tasks or My tasks
|
|
|
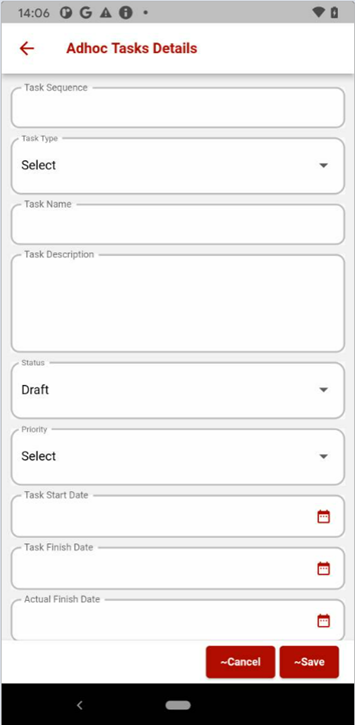
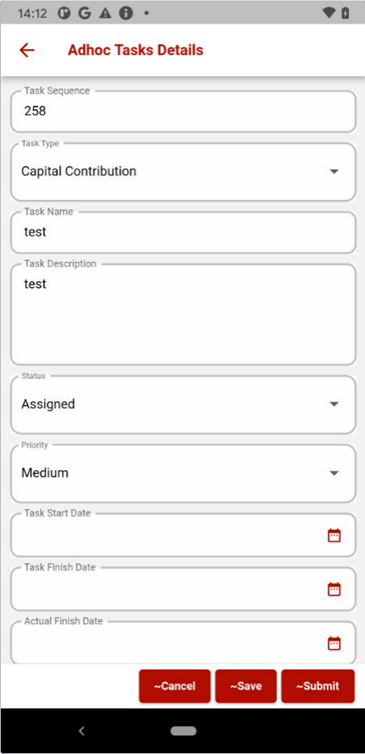
Click a task in the list to open the Adhoc Task Details page.
|
Status Reports
This section describes how to view or add Status Reports in a project.
| Step | Action |
|---|---|
|
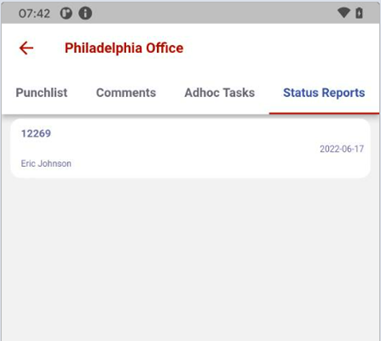
Click Status Reports to view a list of Status Reports for the selected project.
|
|
|
Click a status report in a list to view the Status Report details.
|
|
|
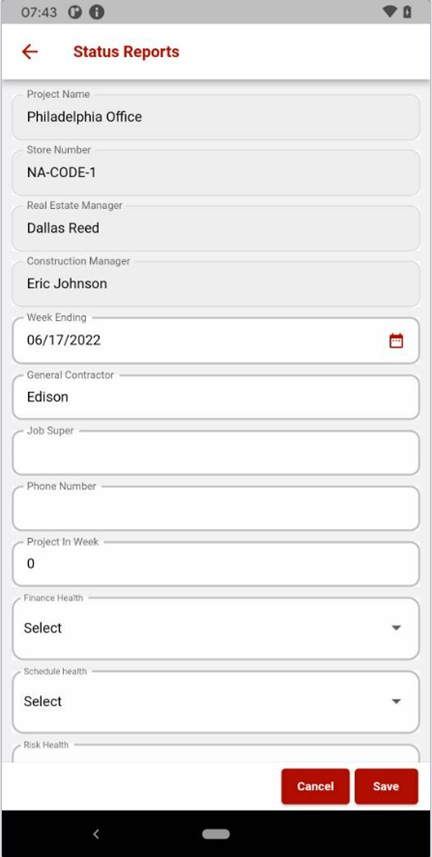
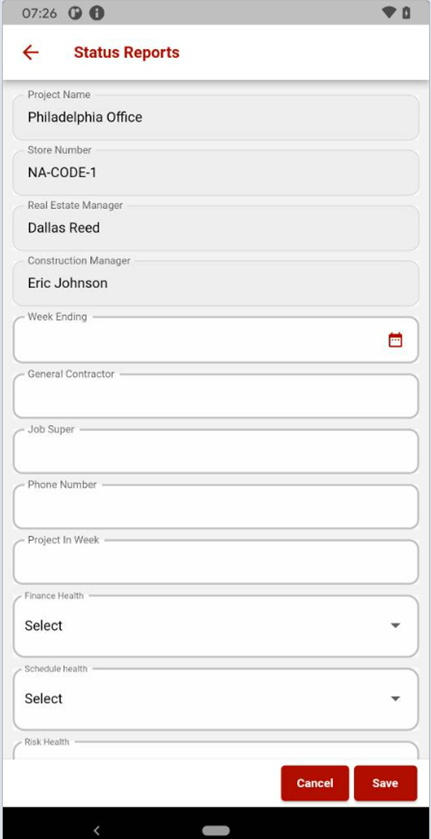
Click the Add button to add a new Status Report to the selected project.
|
|
| When you click Save, a message will display saying Data saved Successfully and you will see the new status report in the list. |
Meeting MInutes
This section walks through the steps to add meeting minutes to a selected project in Mobile.
| Step | Action |
|---|---|
|
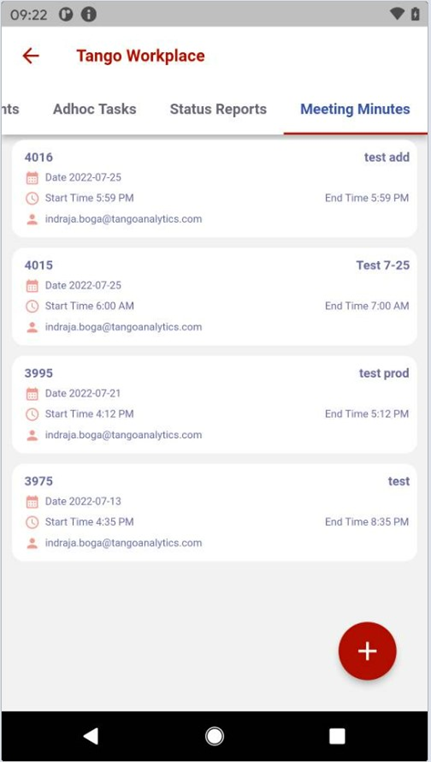
Click Meeting Minutes to view a list of or to add meeting minutes for the selected project.
|
|
|
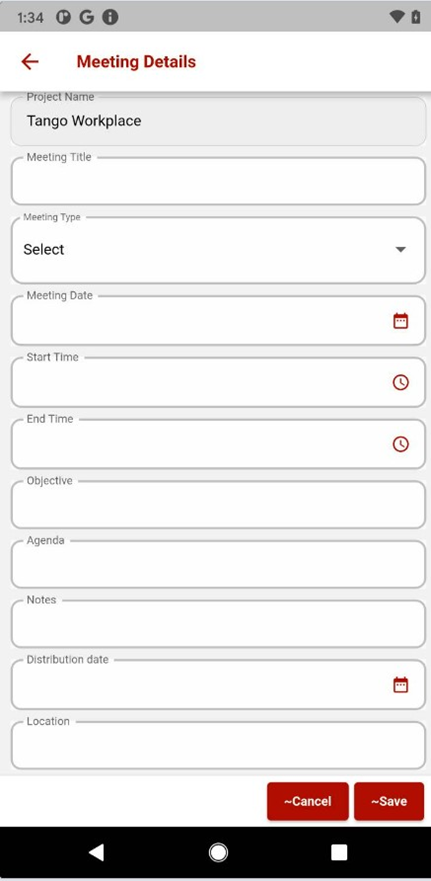
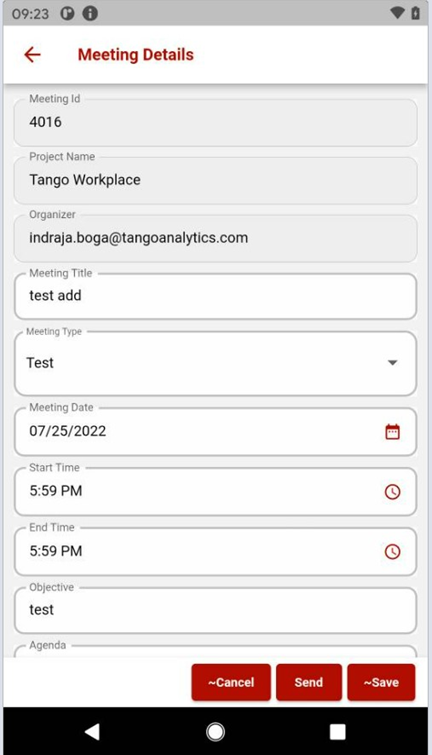
Click the Add button to open the Meeting Minutes template and add meeting minutes to the list.
Note: When you click Save, a message will display saying Data saved Successfully and you will see the new meeting minutes in the list. |
|
|
Click the Meeting Minutes item in the list to display the details of a Meeting Minutes item.
|
|
| When you scroll down to the bottom half of the details window, and click the attendees, you will see a list of attendees that have been added to the meeting minutes. | |
|
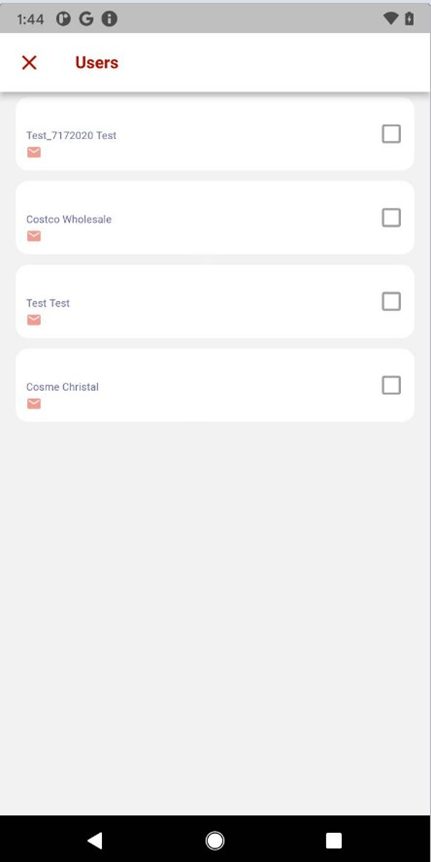
Click the Supplier Site Contacts to display a list of suppliers to distribute the minutes. Click a check box to select contacts and ten X to save and exit this screen.
|
|
|
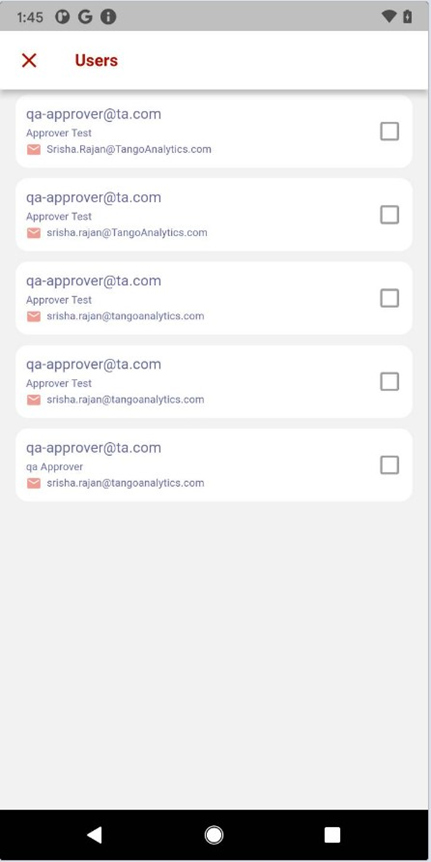
Click the Contacts to display a list of contacts to distribute the minutes. Click a check box to select contacts and ten X to save and exit this screen.
|
|
|
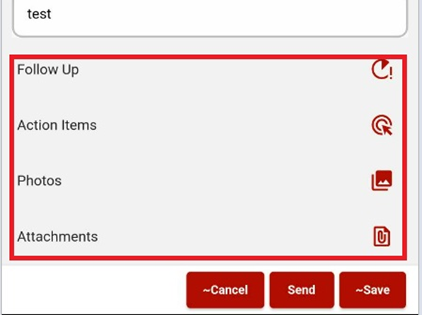
There are additional actions that can be selected and added to the meeting minutes.
|
|
|
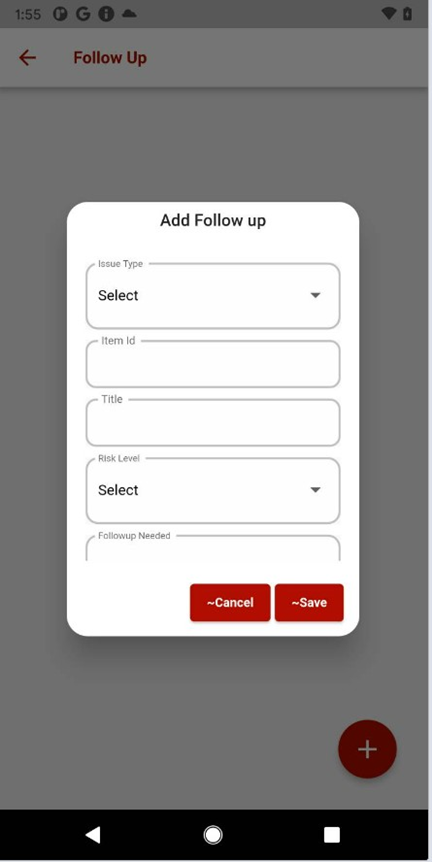
Click the follow up button to list/add a follow up to the meeting minutes. Click the button to open the template and add a follow up.
|
|
| Click the Action Items icon to add/list an action item. | |
|
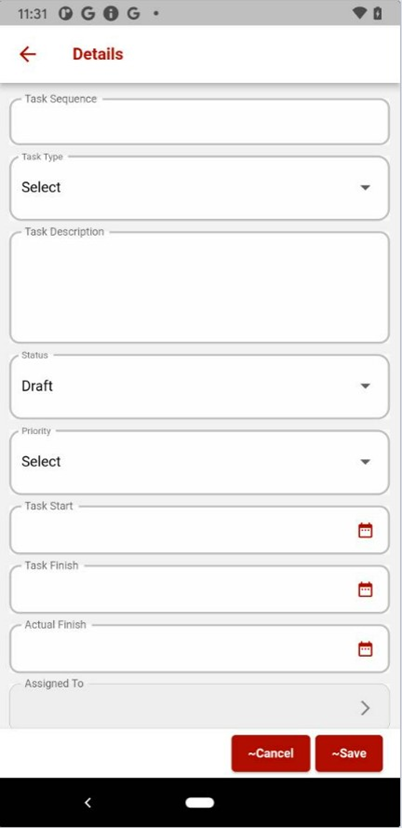
Click the menu icon to display Add Item and Add from Template to add an action item. Clicking Add Item displays the following screen. Note: You must have created a template in the web application to choose a different template from the default Add Item template.
|
|
|
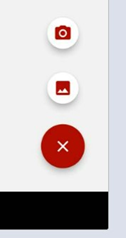
Click the Photos icon to take a picture or upload a photo from your device.
|
|
| Click the Attachments icon to add an attachment from your device |
Contacts
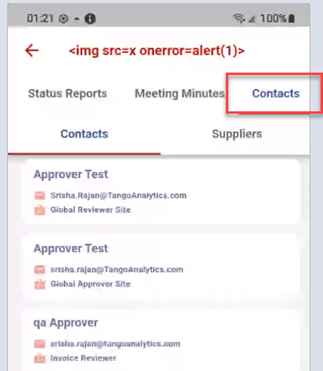
This section describes how to view Contacts in a project. Contact details are displayed and can not be deleted, added, or edited in the mobile application.
| Step | Action |
|---|---|
|
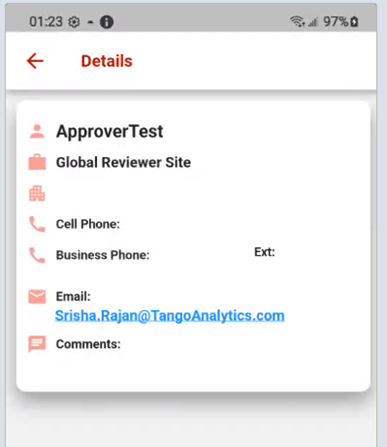
Click Contacts to view a list of Contacts and Suppliers for the selected project.
|
|
|
Click a contact in a list to view the Contact details.
|
|
|
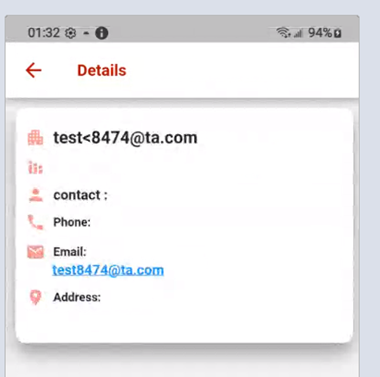
Click the Supplier button to view a suppliers contact details for the selected project.
|
Bidding
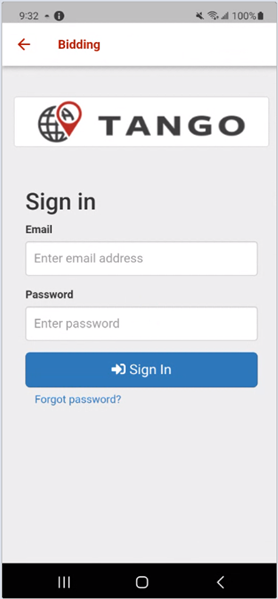
The bidding tab will allow you to enter you credentials so that you are redirected to the web version of the Tango Core Platform for access to Bidding.
Locations
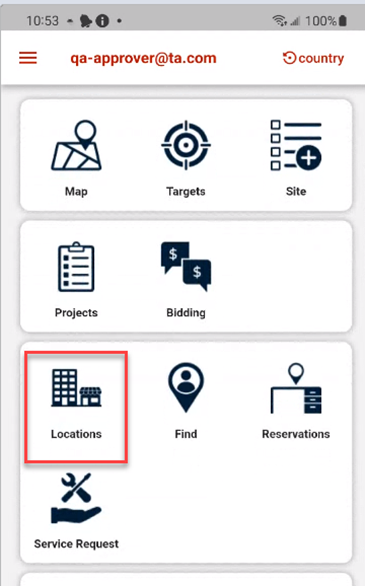
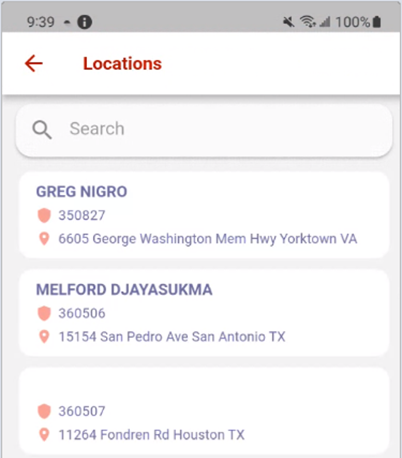
This section describes how to list locations and display details about that location.
| Step | Action |
|---|---|
|
Click on the Locations icon to view a list of locations.
|
|
|
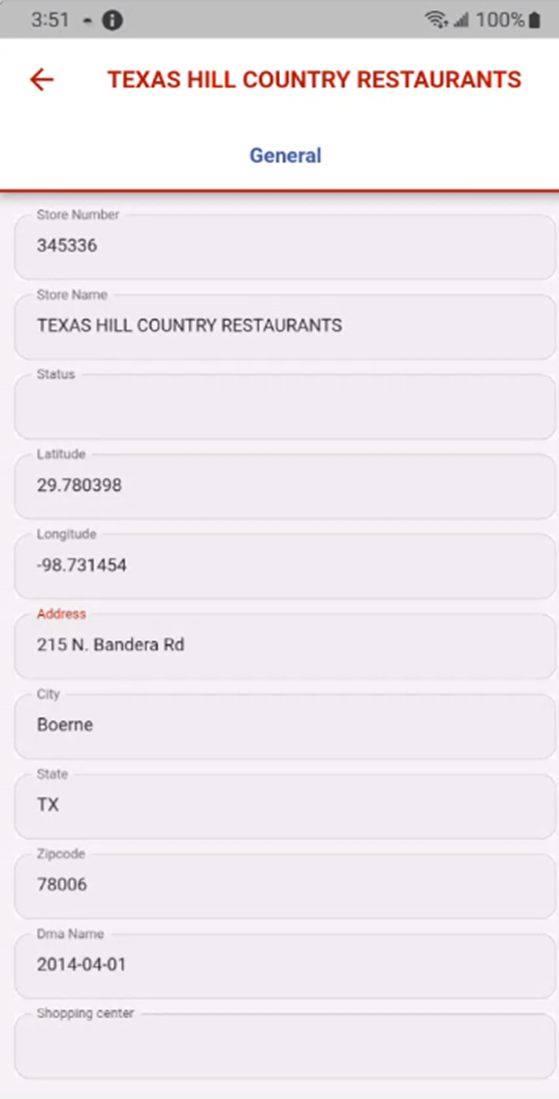
Click on a location to display details about that location.
|
|
|
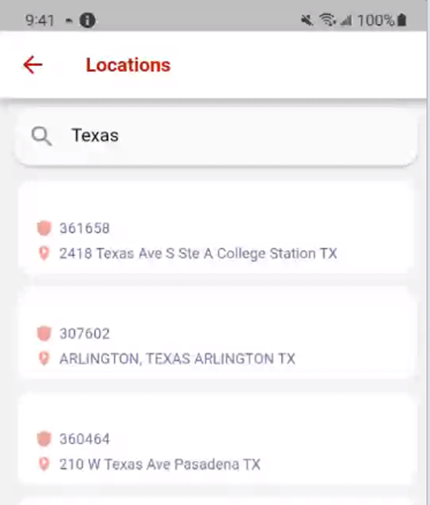
You can search for a location in a city, state, country etc. by entering a search string in the search field.
|
|
|
Clicking on a location will display details about that location.
|
Find
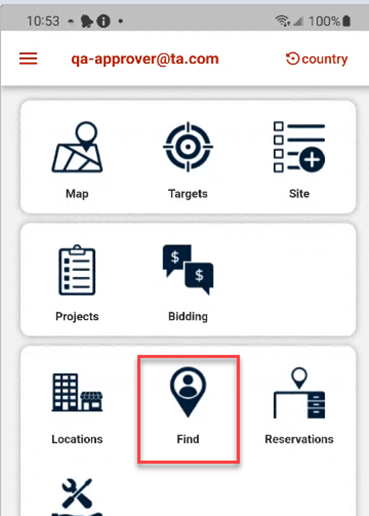
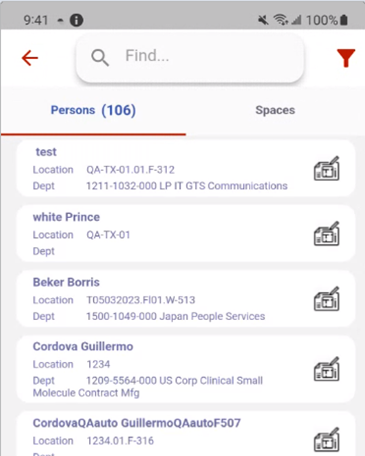
Selecting the Find icon allows you to search for Persons or Spaces. This section describes how to use the Find feature in the Mobile App.
| Step | Action |
|---|---|
|
Click on the Find icon to view a list of Status Reports for the selected project.
|
|
|
Click on Person or Spaces to list the persons or spaces you want to find details about.
|
|
|
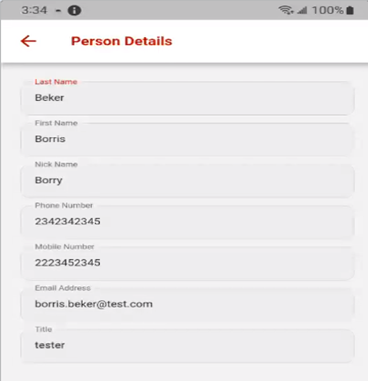
Clicking on a person will display details about that person, including last name, first Name, Nickname, Phone Number, Mobile Number, email address, and title.
|
|
|
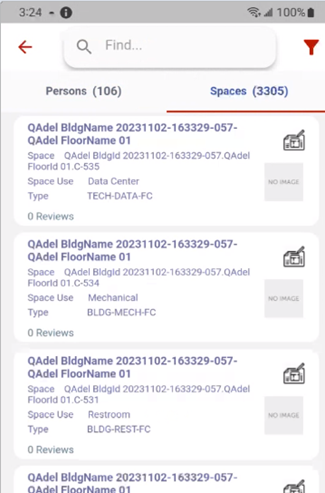
Clicking on Space provides a list of spaces.
|
|
|
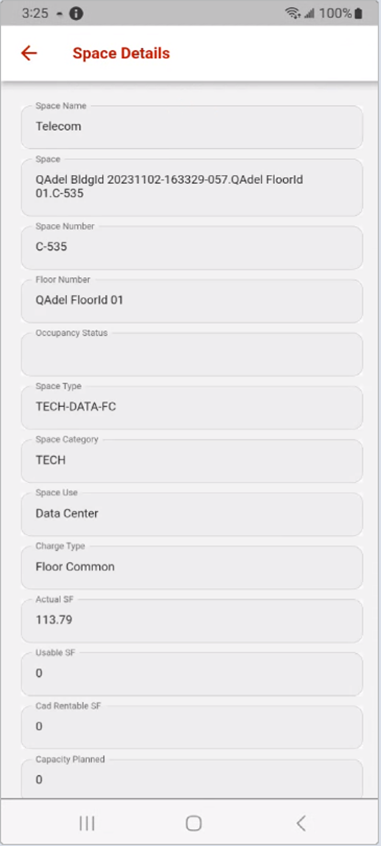
Clicking on a space will display the details about that space.
|
reservations
TBS
mobile service request
This section describes how to use Mobile for Service Request. Mobile allows you to view the open and closed service requests and the status of each. It also allows you to Add a new service request.
Viewing a service request
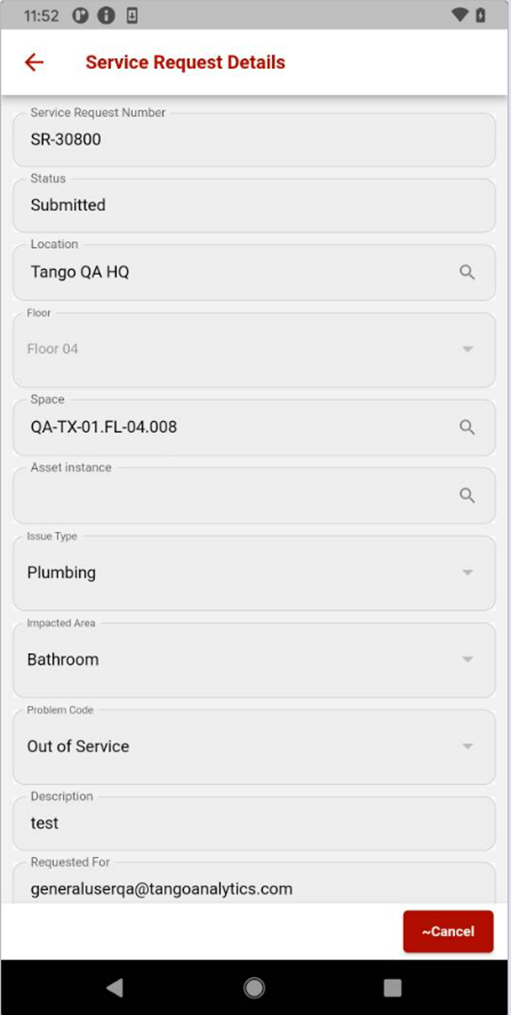
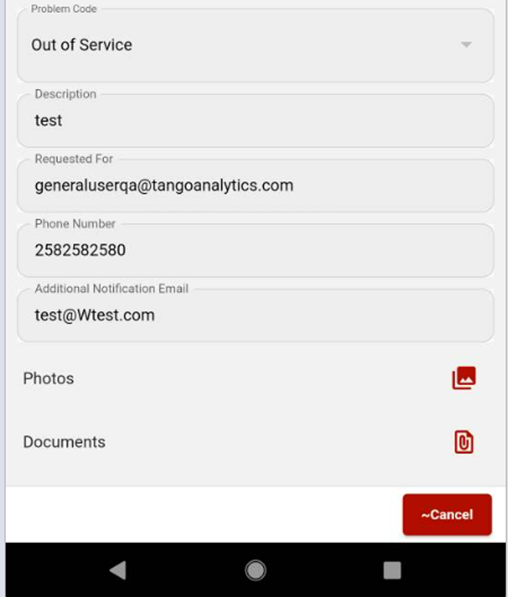
This section describes how to view service requests in Workplace. Clicking on the Service Request icon will provide a list of service requests that have been created from the Tango Platform on your desktop. The following fields are displayed for the selected service request.
| Field | Function |
|---|---|
| Service Request Number | This is the service request number generated by the system when it is transferred from Edge. |
| Status |
Open Status List:
Closed Status List
|
| Location | This is the name a business uses for a building. |
| Floor | Floor located in a building |
| Space | A location on a floor or in a building |
| Asset | The asset such as a phone or printer |
| Issue Type | Provides a list of issues to select from (i.e., Plumbing, Heating and Cooling etc.) |
| Impacted Area | List a location for the issue (i.e., Lobby, Breakroom, Bathroom etc.) |
| Problem Code | List a possible event (i.e., No AC, No Heat, etc.) Codes listed may vary for the issue type selected. |
| Description | Required space to provide a brief description of the issue |
| Requested For | The person making the request |
| Phone Number | Contact phone number. |
| Additional Notification Email | Additional contact information, |
| Photos | Provides a way to upload a photo or take a picture from your device. |
| Documents | Provides a way to upload a document related to the issue. |
To view a service request in the list, perform the following:
| Step | Action |
|---|---|
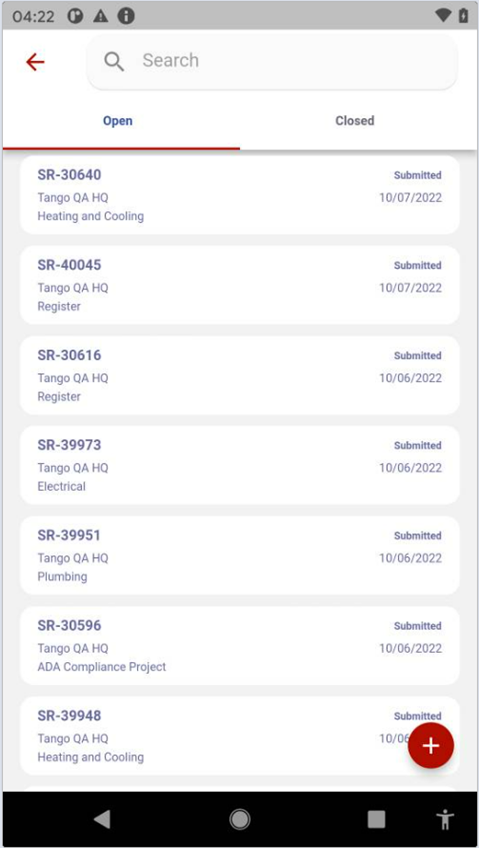
|
Click Service Request to open the list of current service requests:
|
|
|
Click on a service request to display details about the service request: Top Half
Bottom Half
|
Adding a service request
You can add a new Service Request from your mobile device by performing the following:
QR Code scanner
This section describes how to use the QA code scanner when creating a new service request.
| Step | Action |
|---|---|
|
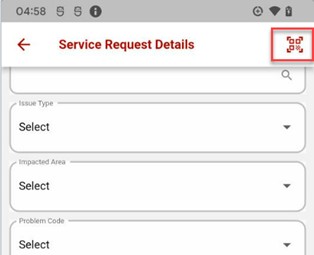
Click the QR code scanner icon on the landing page (shown below) after clicking the add service request icon +.
|
|
|
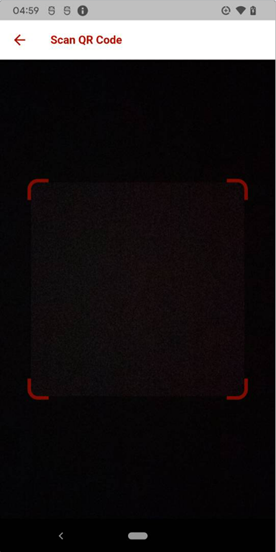
The camera on the device will open to scan a QR Code:
|
|
|
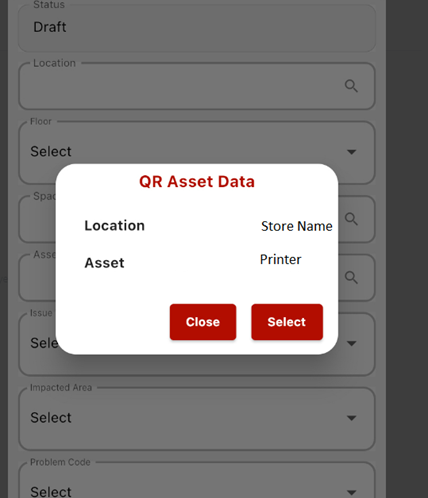
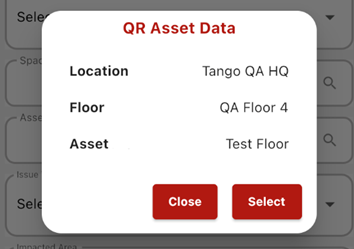
When scanning a QR code for a Store asset, the store QR Asset Data will display:
|
|
|
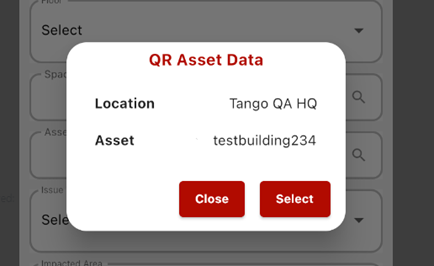
When scanning a QR Code for a Building asset, the following QR Asset Details will display:
|
|
|
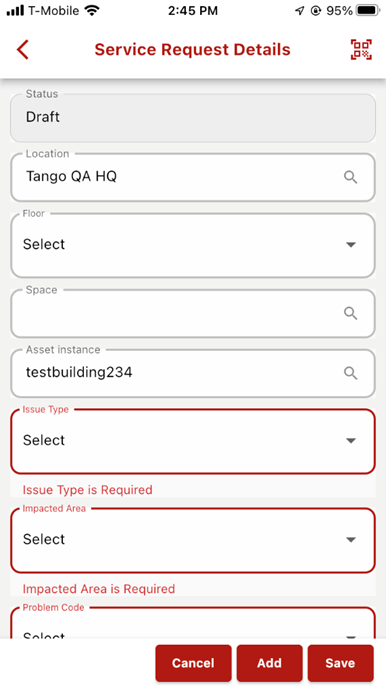
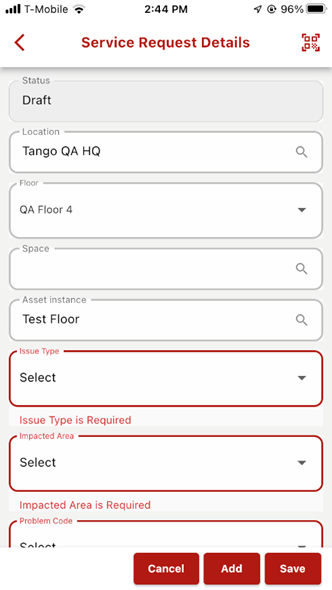
When the asset is selected on the details dialog box, the details will automatically populate the new service request and the required data fields will be highlighted in red:
|
|
|
When scanning a QR Code for a Floor asset, the following QR Asset Details will display:
|
|
|
When the asset is selected on the details dialog box, the details will automatically populate the new service request and the required data fields will be highlighted in red:
|
|
|
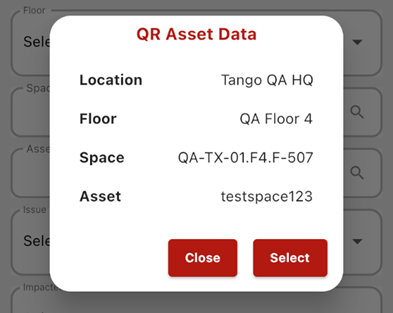
When scanning a QR Code for a Space asset, the following QR Asset Details will display:
|
|
|
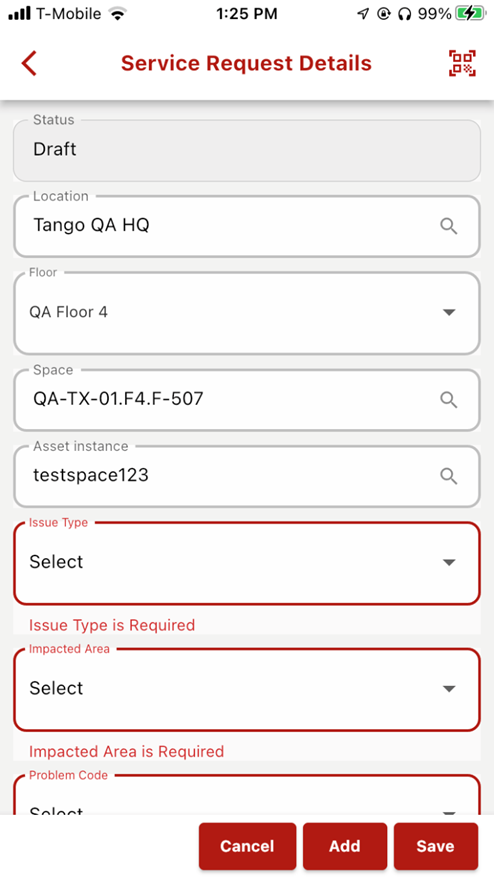
When the asset is selected on the details dialog box, the details will automatically populate the new service request and the required data fields will be highlighted in red:
|
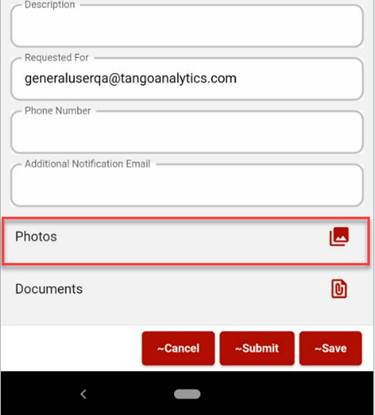
Photos
This section describes how to view and add photos to a project.
| Step | Action |
|---|---|
|
Click the Photos icon to upload an existing photo on your phone or take a picture and upload it to the service request. Note: Clicking the camera icon will allow you to take a picture with the camera on your mobile device. Clicking the Image icon allows you to upload an image from your mobile device.
|
Documents
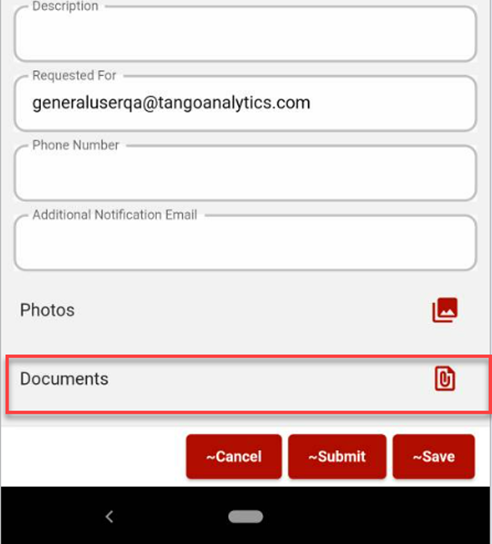
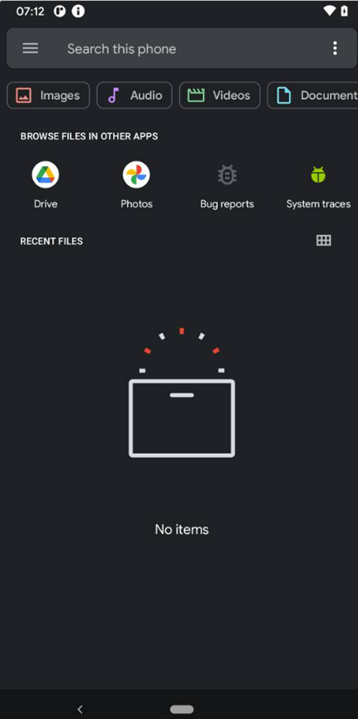
This section describes how to view or add documents to a service request.
| Step | Action |
|---|---|
|
Click the Documents icon to view or add a document to the service request from your mobile device, at |
|
|
Click the Plus icon to add an item.
|
mobile approvals
This section describes how to use Mobile Approvals. Mobile allows you to access reject, and approve PO’s, CO’s, Initiatives, and Invoices. Selecting Approvals from the Mobile home screen will display a list of approvals that have been created from your Tango Platform. The following table provides a description of the features available from the Mobile app.
Opening approvals in Mobile will open the approvals menu with the following tabs for functions associated with the approvals.
| Tab | Function |
|---|---|
| Project Approvals | Lists Projects awaiting approval and provides a history of approval and reject actions. Projects can be approved or rejected in the Mobile app. |
| Budget Approvals | Lists Budgets awaiting approval and provides a history of approval and reject actions. Budgets can be approved or rejected in the Mobile app. |
| Budget Change Request | Lists Budget Change Request awaiting approval and provides a history of approval and reject actions. Budget Change Requests can be approved or rejected in the Mobile app. |
| Purchase Order Approvals | Lists Purchase Order (PO)’s awaiting approval and provides a history of approval and reject actions. PO’s can be approved or rejected in the Mobile app. |
| Change Order Approvals | Lists Change Orders (CO)’s awaiting approval and provides a history of approval and reject actions. CO’s can be approved or rejected in the Mobile app. |
| Invoice Approvals | Lists Invoices awaiting approval and provides a history of approval and reject actions. Invoices can be approved or rejected in the Mobile app. |
| Lease Approvals | Lists Leases awaiting approval and provides a history of approval and reject actions. Leases can be approved or rejected in the Mobile app. |
| Lease Batch Rent Approvals | Lists Lease Batch Rents awaiting approval and provides a history of approval and reject actions. Lease Batch Rents can be approved or rejected in the Mobile app. |
| Lease OTP Approvals | Lists Lease One Time Payment (OTP) awaiting approval and provides a history of approval and reject actions. Lease OTP’s can be approved or rejected in the Mobile app. |
| Lease Recurring Cost Approvals | Lists Lease Recurring Costs invoices awaiting approval and provides a history of approval and reject actions. Lease Recurring Costs can be approved or rejected in the Mobile app. |
| Document Approvals | Lists Documents awaiting approval and provides a history of approval and reject actions. Documents can be approved or rejected in the Mobile app. |
Viewing Approvals
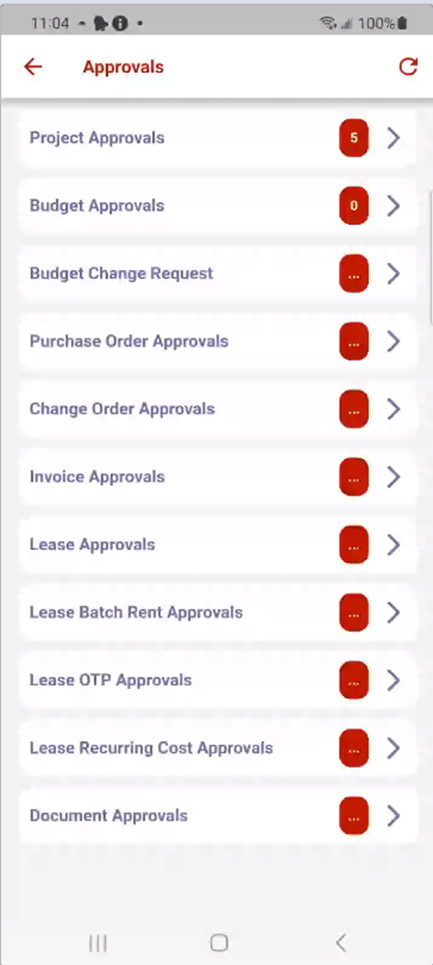
This section describes how to view approvals in Mobile. Clicking on the Approvals icon will provide a list of approvals that have been created from the Tango Platform on your desktop.
| Step | Action |
|---|---|
|
Click Approvals to open the list of current My Approvals list:
|
Project approvals
This section describes how to view PO’s ready for approval.
| Step | Action |
|---|---|
|
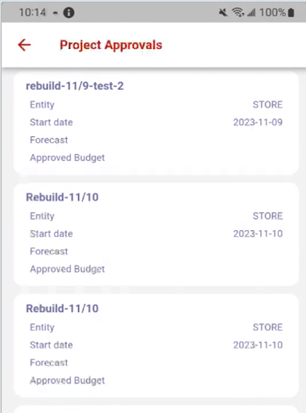
Click on Project Approvals to view a list of Projects. Note: If there are no approvals in a category, No Data will be displayed
|
|
|
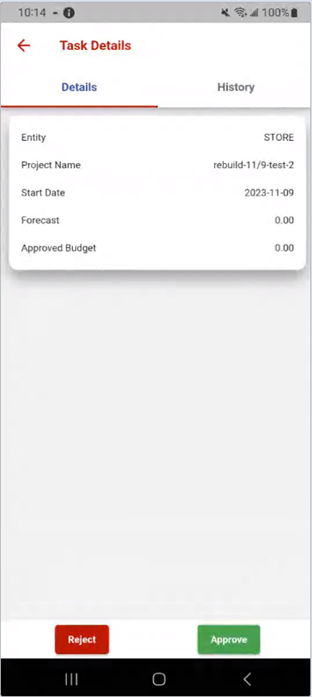
Click on a project to display the project details:
|
|
|
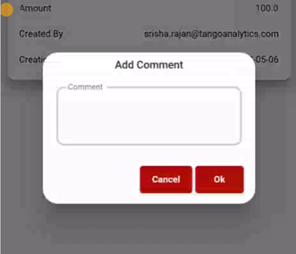
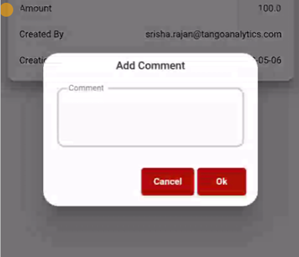
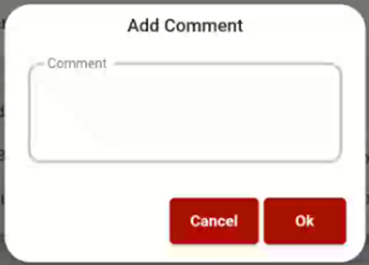
Click on Reject if you do not want to approve the CO. a Comment dialog box will display:
|
|
|
Click Approve for approval, a comment box will display:
|
|
|
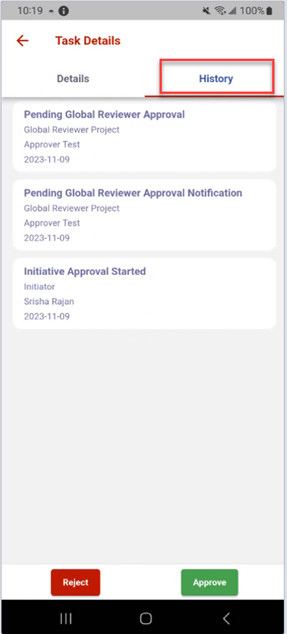
Click History to view Approvals for the selected project:
|
budget change request
This section describes how to view Budget Change Requests ready for approval.
| Step | Action |
|---|---|
|
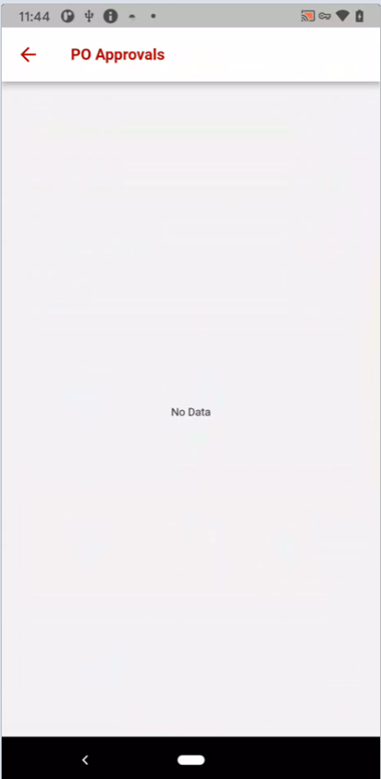
Click on Budget Change Request Approvals to view a list of Budget Change Requests. Note: If there are no approvals in a category, No Data will be displayed
|
Purchase Order Approvals
This section describes how to view Purchase Order’s ready for approval.
| Step | Action |
|---|---|
|
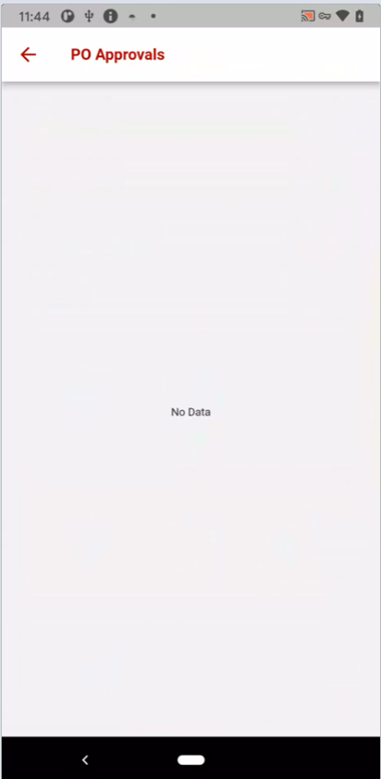
Click on Purchase Order Approvals to view a list of POs. Note: If there are no approvals in a category, No Data will be displayed
|
Change Order approvals
This section provides a list of CO Approvals.
| Step | Action |
|---|---|
|
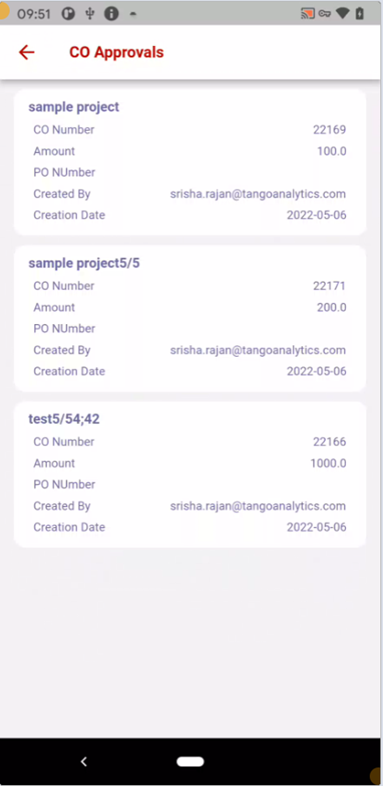
Click on the CO Approvals tab to view the list of CO Approvals:
|
|
|
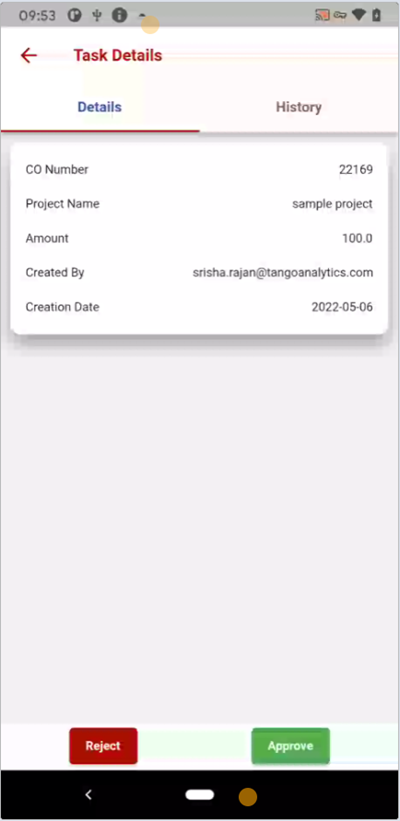
Click on a CO in the list for Details, History, or to Reject/Approve the CO:
|
|
|
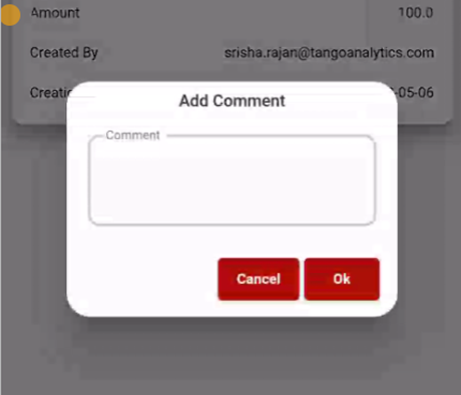
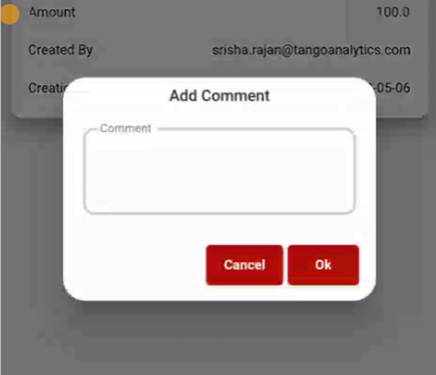
Click on Reject if you do not want to approve the CO. a Comment dialog box will display:
|
|
|
Click Approve for approval, a comment box will display:
|
initiative approvals
This section describes how to view a list of the Initiative Approvals.
| Step | Action |
|---|---|
|
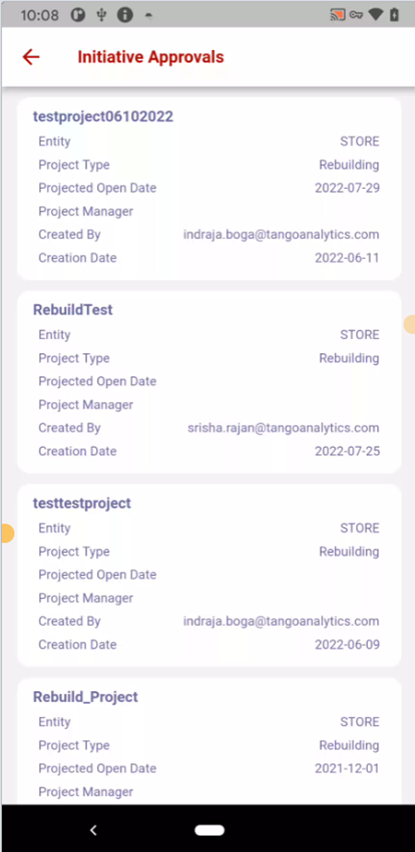
Click Initiative Approvals to display a list of Initiatives ready for approval:
|
|
|
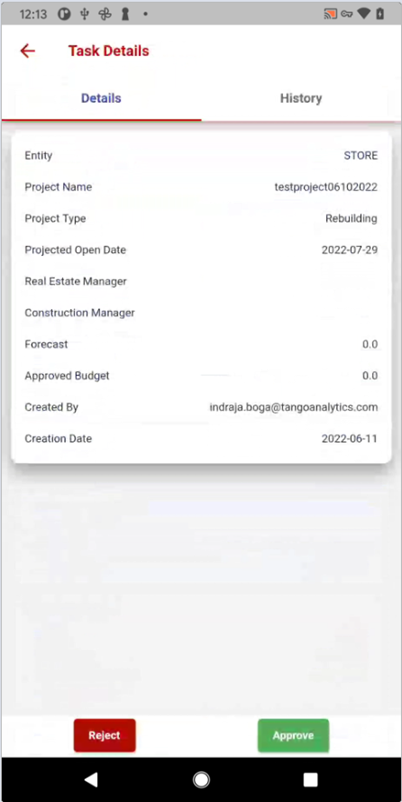
Click on an Initiative to display the details for that initiative. From this screen you can view the details, history, reject, or approve the initiative:
|
|
|
Click on Reject or Approve for the desired action and a Comment dialog box will display:
|
invoice approvals
This section describes how to view Invoice Approvals.
| Step | Action |
|---|---|
|
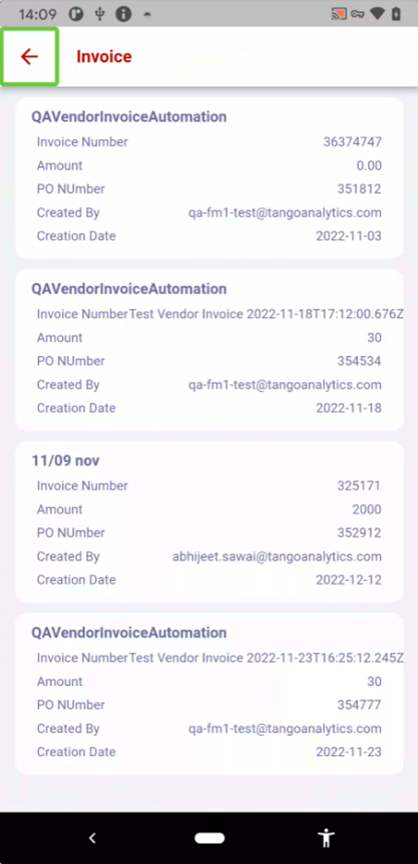
Click Invoice Approvals to display a list of Invoices for approval:
|
|
|
Click on an Invoice to display the invoice details:
|
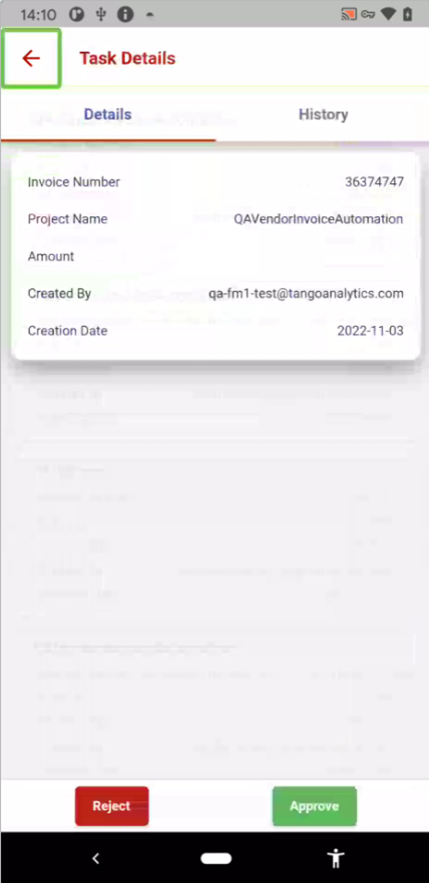
NOTE: The Reject and Approve functionality is identical across the approval elements of PO, CO, Initiatives, and invoices and will not be repeated here.
lease approvals
This section describes how to view Leases and how to Approve or Reject a lease from the Mobile app.
| Step | Action |
|---|---|
|
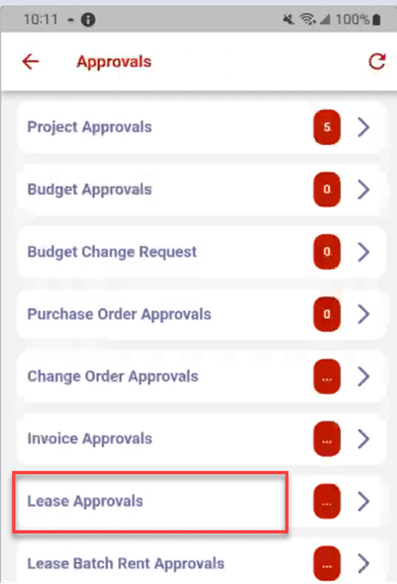
Click on Lease Approvals to view a list of leases. Note: If there are no approvals in a category, No Data will be displayed
|
|
|
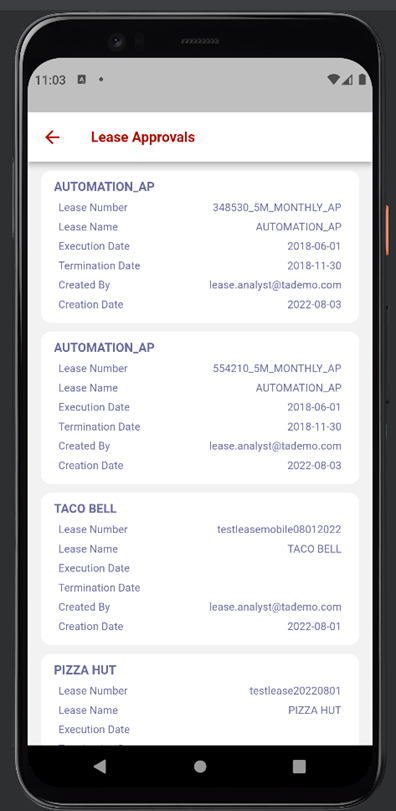
The Lease Approvals list will display:
|
|
|
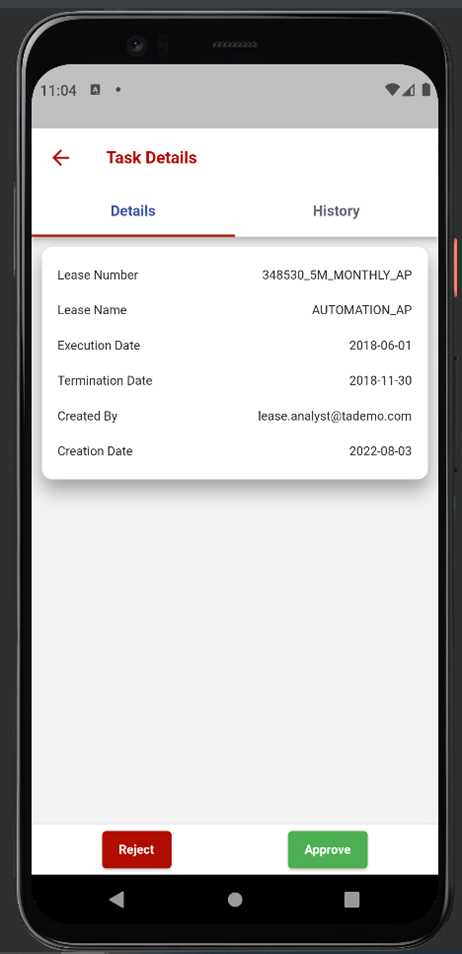
Click on a Lease to see the Lease Details. From this screen you can choose to Reject or Approve the lease.
|
|
|
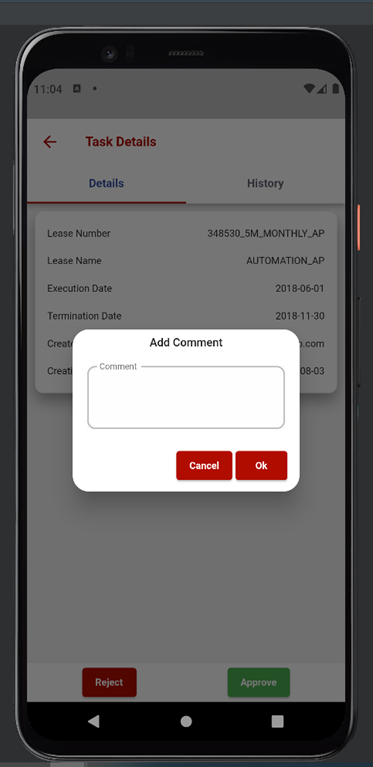
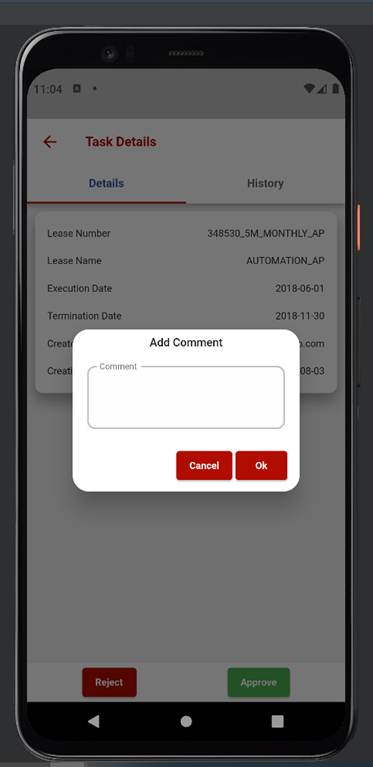
Click on Reject or Approve and a comment window will display. Provide any comments for your action.
|
|
|
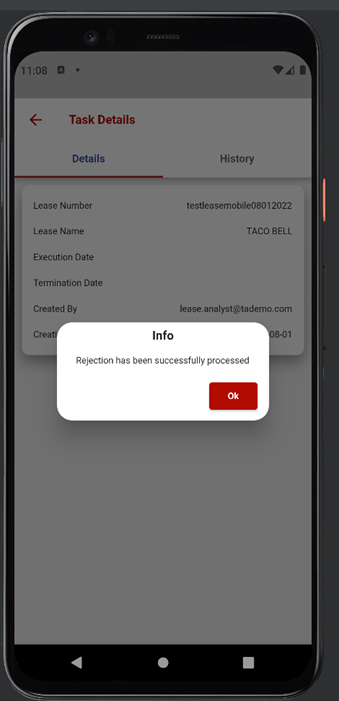
Click on OK after entering a comment and you will receive a confirmation.
|
lease batch rent approvals
This section describes Lease Batch Rent Approvals. Approvers can ‘Approve’ or ‘Reject’ rent batches in the same manner as the web application. There is a “History” tab showing the workflow which automatically updates in the web application Lease Payments Workflow tab.
| Step | Action |
|---|---|
|
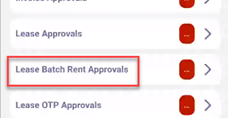
Select Lease Batch Rent Approvals, which shows a count of the Approvals.
|
|
|
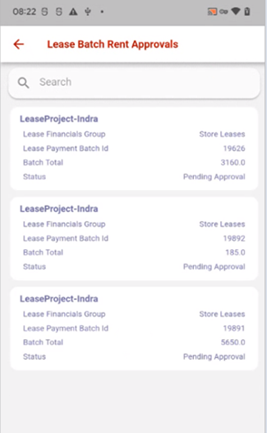
A list of all rent batches will be provided with various batch details such as Batch Name, Lease Financial Group, Batch ID, Batch Total, and Status. A search bar is available to search for a specific payment.
|
|
|
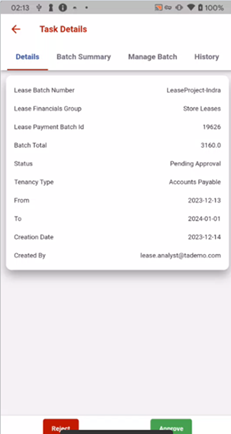
Click on the lease rent batch ‘Details’ tab to Approve or Reject. Additional details about the batch are provided.
|
|
|
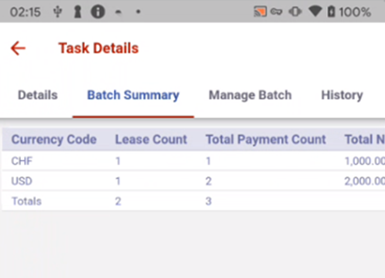
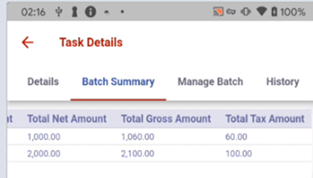
The ‘Batch Summary’ tab provides a summary of Lease Count, Payment Count, Total Net Amount, Total Gross Amount and Total Tax Amount by Currency Code.
|
|
|
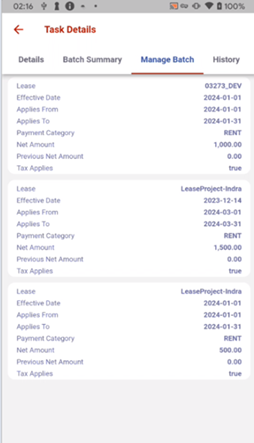
The ‘Manage Batch’ tab will list all the payments in the rent batch, and provides payment details such as Lease, Effective Date, Applies From, Applies To, Payment Category, Net Amount, Previous Net Amount and Tax Applies.
|
|
|
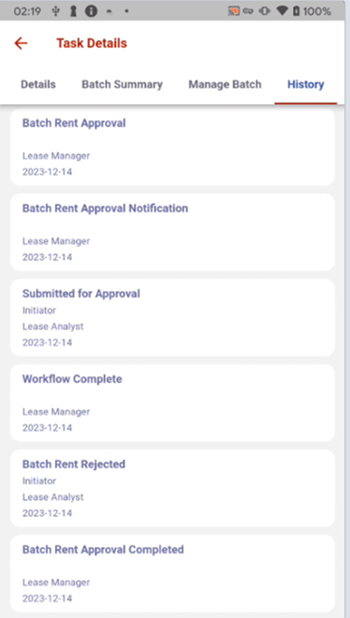
The History Tab will reflect the Workflow process which will also be updated in the web application.
|
|
|
Click on Reject or Approve and a comment window will display. Provide any comments for your action.
|
lease one time payment (otp) approvals
This section describes how to view Lease OTP’s ready for approval.
| Step | Action |
|---|---|
|
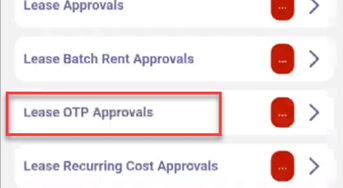
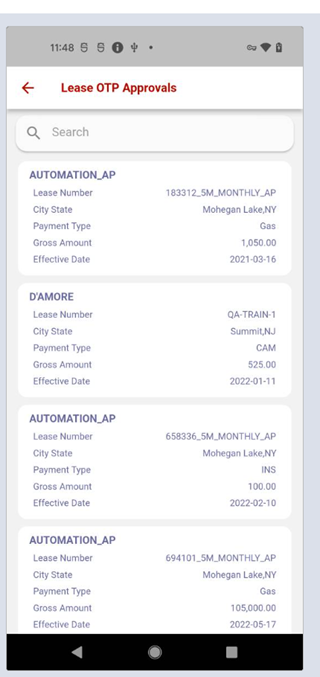
Click on Lease OTP Approvals to view a list of OTP’s. Note: If there are no approvals in a category, No Data will be displayed:
|
|
|
Click on Lease OTP Approvals to view a list of OTP’s. Note: If there are no approvals in a category, No Data will be displayed
|
|
|
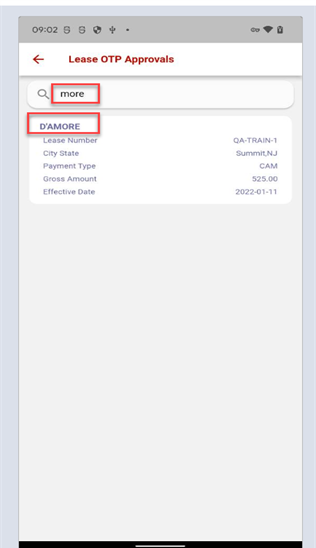
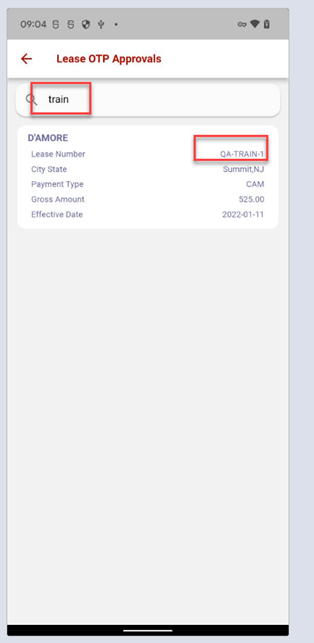
You can narrow your search using a name or a lease number:
|
|
|
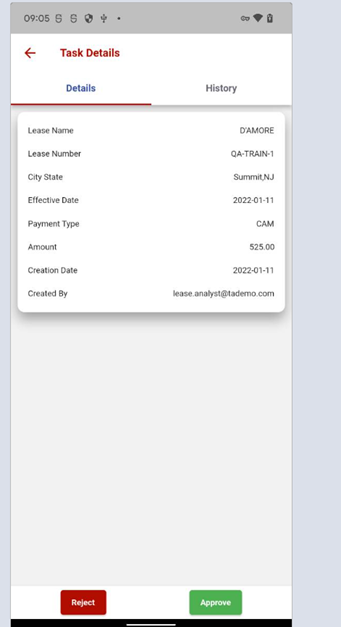
Click on the desire Lease OTP approval to display the Task Details:
|
|
|
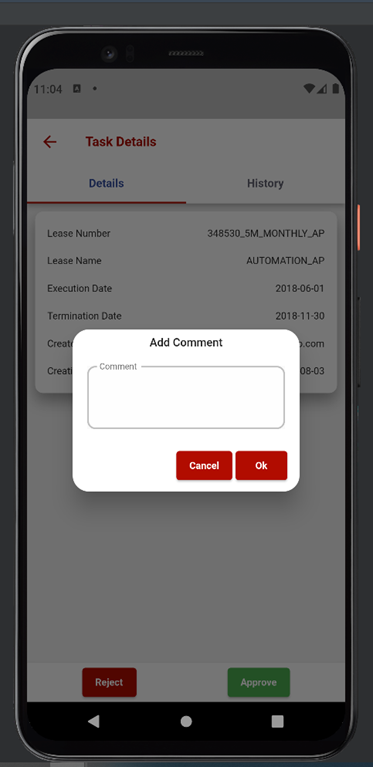
Click on Reject or Approve and a comment window will display. Provide any comments for your action.
|
document approvals
This section describes how to view Document Approvals.
| Step | Action |
|---|---|
|
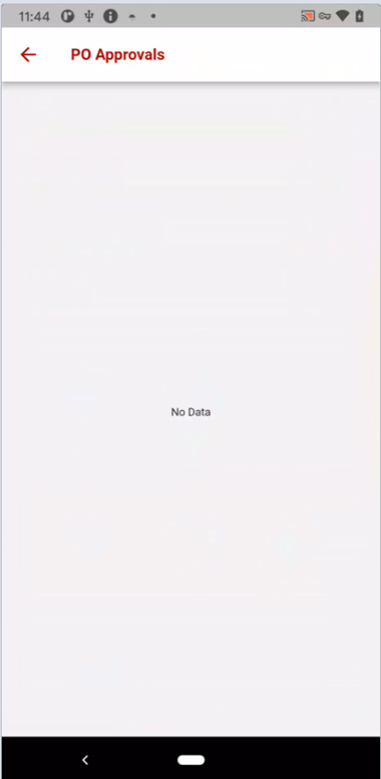
Click on Document Approvals to view a list of documents. Note: If there are no approvals in a category, No Data will be displayed
|
|
Was this article helpful?
That’s Great!
Thank you for your feedback
Sorry! We couldn't be helpful
Thank you for your feedback
Feedback sent
We appreciate your effort and will try to fix the article