Table of Contents
Leases
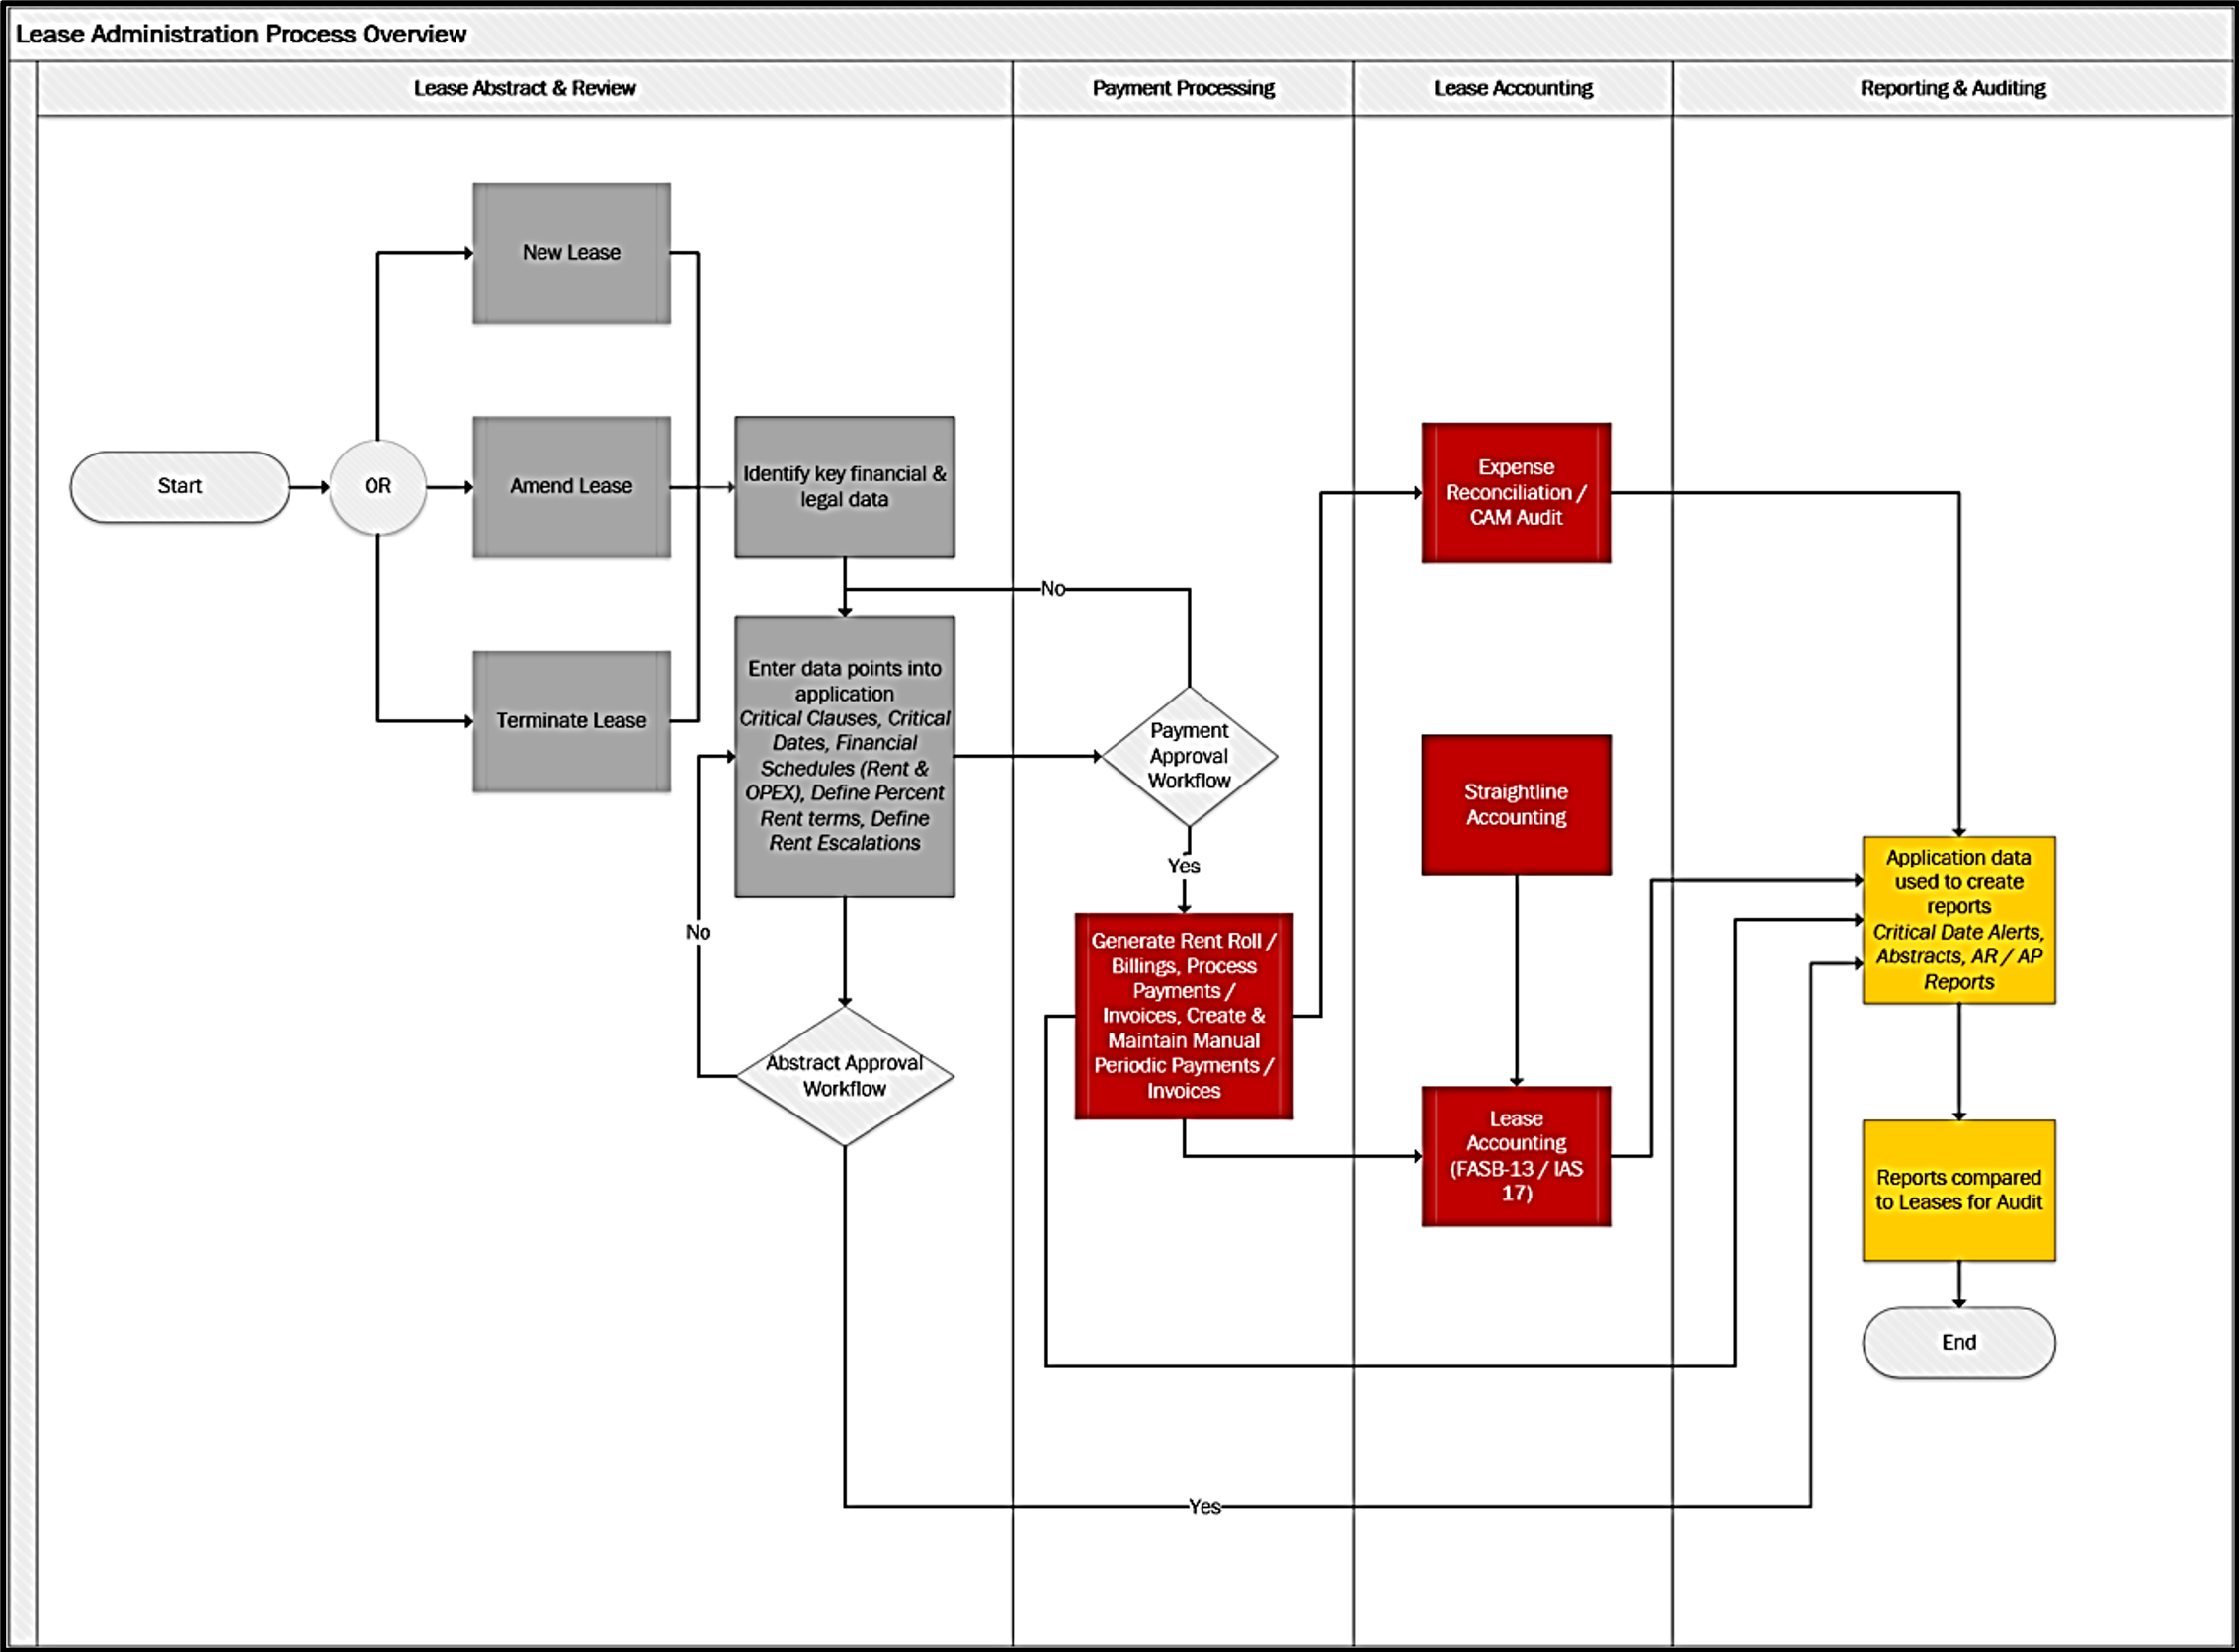
This section describes the lease process under the Contracts module of the Tango core platform.
Image: Tango Lease Process Overview
Lease Platform Layout & Features
The Leases module is used to create and update various terms and conditions of a lease record upon receipt of a lease document.
The following procedure will walk the user through the navigation and functionality of the Leases module of the TA System.
| Step | Action |
|---|---|
| 1. | From the Functional Dashboard > Contracts section, click the Leases icon. |
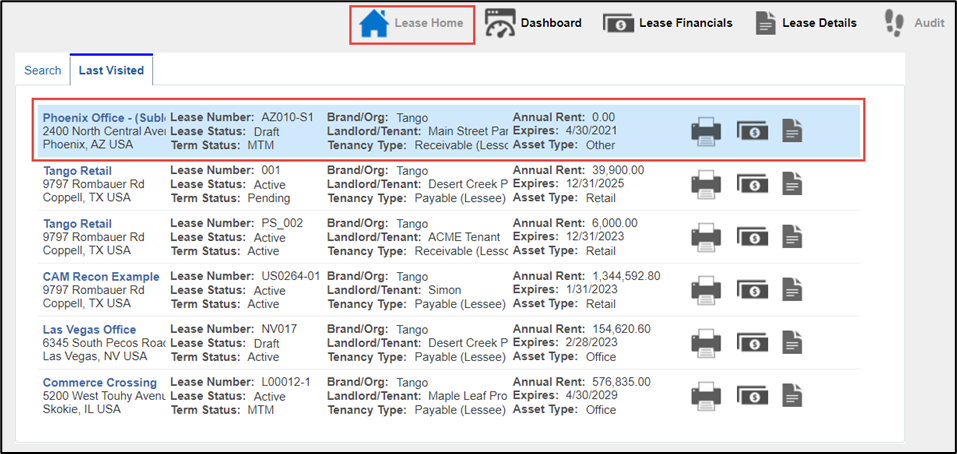
| 2. | The Lease Landing page also known as the Lease Home page will appear. This page is comprised of two sections:
|
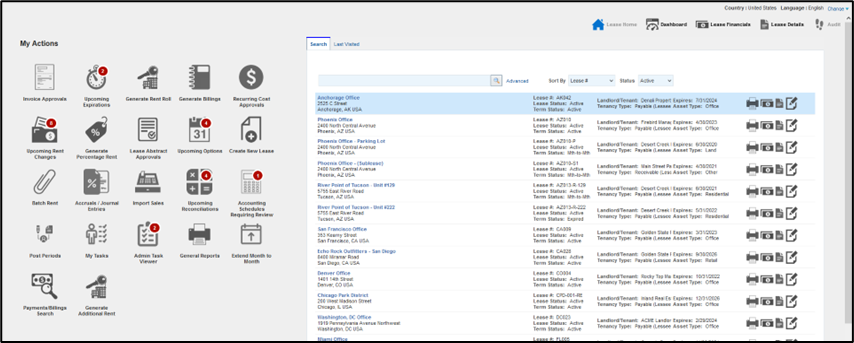
Search
The Search functionality retrieves all lease records that match a search criterion, or the first record in any search the User has entered. A user can search for lease records using one of the following methods:
Basic Search: Lease Home Page
Basic Search: Within a Lease Record
Advanced Search: Lease Home Page
Basic Search
Search for a specific Lease record by entering full or partial criteria in the search field and click the Search icon ( ) or use the Advanced filters to narrow the search. For example, in the search field, type the value to display all Active Leases containing reference to the value populated in the search.
Select the dollar bill icon (

) or the page icon (

) on the right side of the search to open the financial or general details of the Lease. Alternatively, select the lease, then click on the Lease Financials or Lease Details buttons located at the top right corner of the Lease Home page.
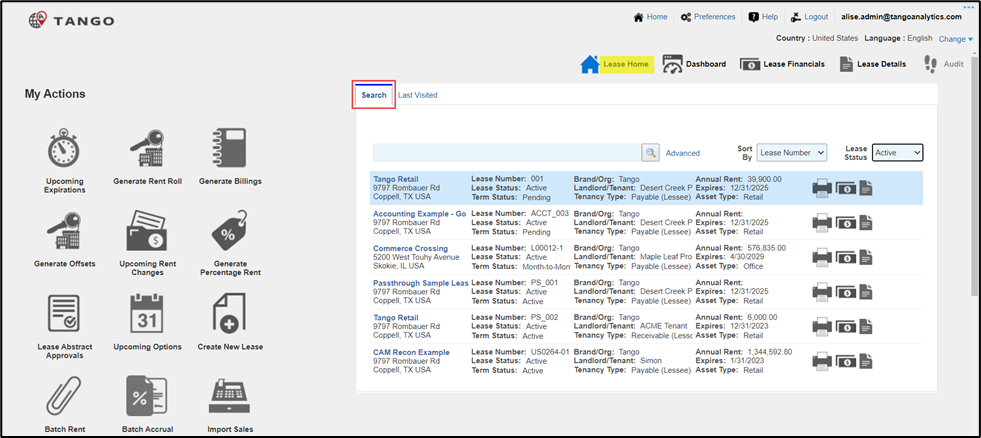
Search Banner
The system uses data from the Lease Details > Basic Info and Recurring Costs > Basic Info tabs to save the banner details of the lease, as extracted from the Tango system.
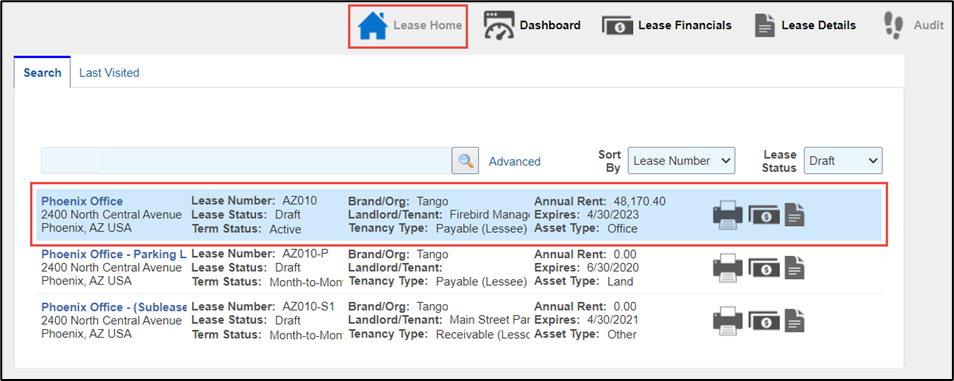
The details displayed, in what is referred to, as the Search Banner are very similar to that displayed in the Lease Header. The banner is divided into five columns and three rows down.
Four of the columns display the following lease details:
| Column 1 | Column 2 | Column 3 | Column 4 | Column 5 | ||
|---|---|---|---|---|---|---|
| Lease Name | Lease Number | Brand/Org | Annual Rent |  |  |  |
| Lease Abstract Report Printer | Lease Financials Page Link | Lease Details Page Link | ||||
| Address | Lease Status | Landlord/Tenant | Expires | |||
| City, ST Country | Term Status | Tenancy Type | Asset Type | |||
The fifth column consists of three icons or otherwise referred to as shortcut links.
The banner is particularly useful when the user needs to search for a lease record(s) through the Lease Home Search feature. It allows the user to confirm which lease record(s) they are attempting to retrieve.
Image: Search Banner View from the Lease Home Page
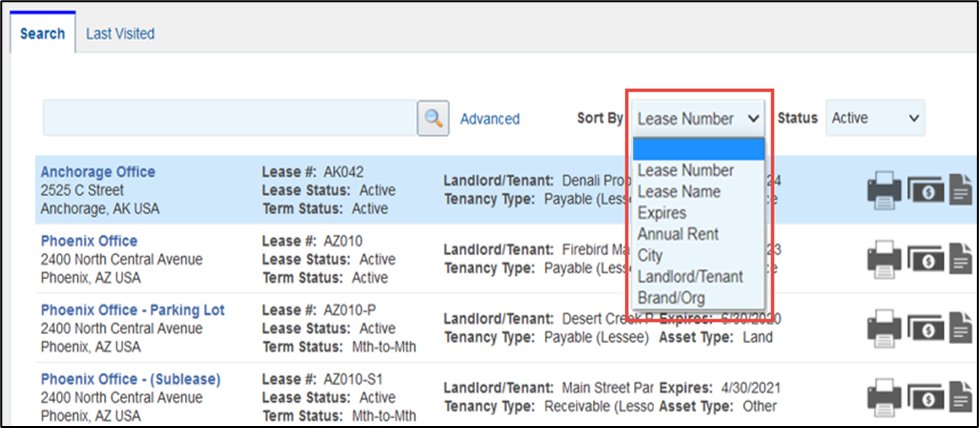
Sort By
You can sort records alphabetically or numerically, in ascending or descending order. Your sorting instructions will be based on the data in a single field.
The default sort is by Lease Number for the leases returned in the initial load of the search page.
Use the drop-down list to select the name of one of the following fields to sort the records in the search table by. The records will be sorted in ascending order.
Lease Number
Lease Name
Expires
Annual Rent
City
Landlord/Tenant
Brand/Org
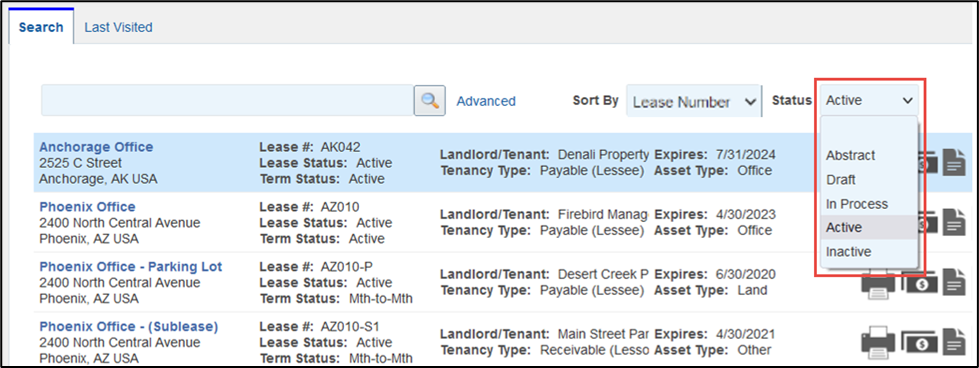
Lease Status
Use the drop-down list to select the lease status to filter the records in the search table. By default, the records initially displayed in the table will be Active.
Last Visited
Navigate to the Last Visited tab to select the last lease you visited. The system keeps a list of all leases you’ve visited during your browsing session.
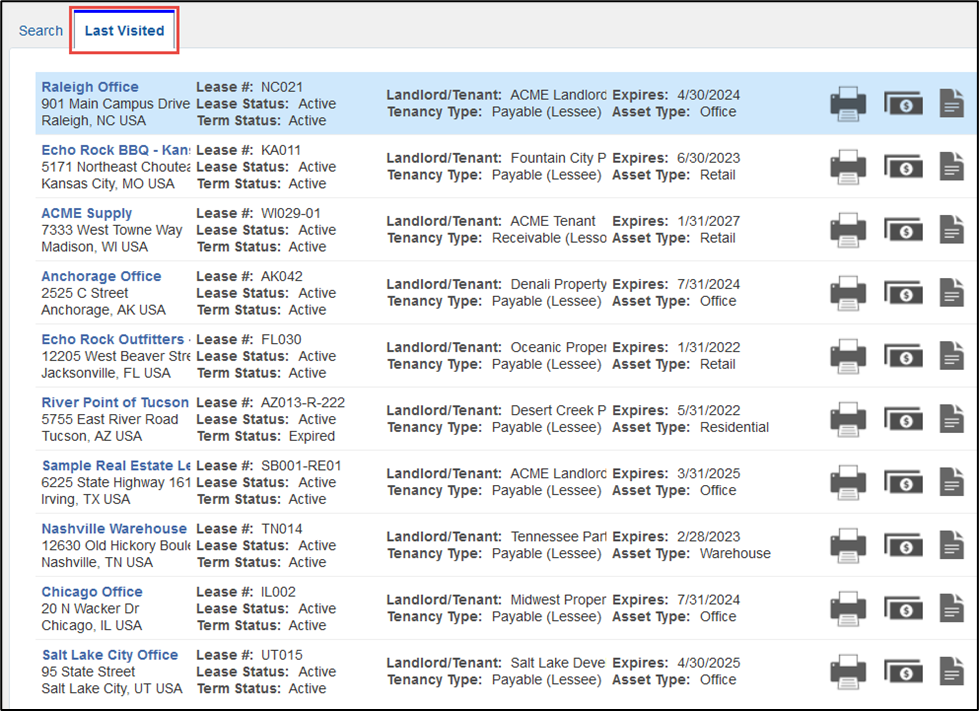
Last Visited Banner
The system uses data from the Lease Details > Basic Info and Recurring Costs > Basic Info tabs to save the banner data of the lease, as extracted from the Tango system.
The details displayed, in what is referred to, as the Last Visited tab are very similar to that displayed in the Lease Header. The banner is divided into five columns and three rows down.
Four of the columns display the following lease details:
| Column 1 | Column 2 | Column 3 | Column 4 | Column 5 | ||
|---|---|---|---|---|---|---|
| Lease Name | Lease Number | Brand/Org | Annual Rent |  |  |  |
| Lease Abstract Report Printer | Lease Financials Page Link | Lease Details Page Link | ||||
| Address | Lease Status | Landlord/Tenant | Expires | |||
| City, ST Country | Term Status | Tenancy Type | Asset Type | |||
The fifth column consists of three icons or otherwise referred to as shortcut links.
The banner is particularly useful when the user needs to quickly return to a lease record(s) that they were previously reviewing. It allows the user to confirm which lease record(s) they are attempting to retrieve.
Image: Last Visited Banner View from the Lease Home Page
Within a Lease Record
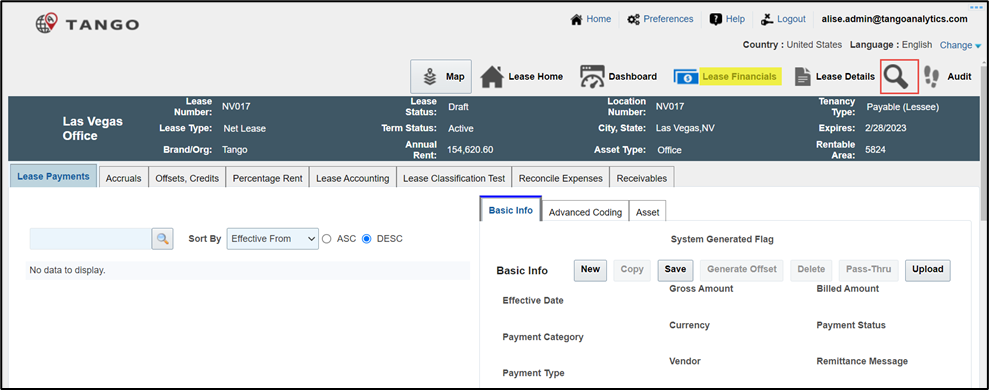
Search for a specific Lease record from within an existing lease record by clicking the Search icon ( ) within the given lease record that open on your screen.
Image: Search icon View from the Lease Details Page
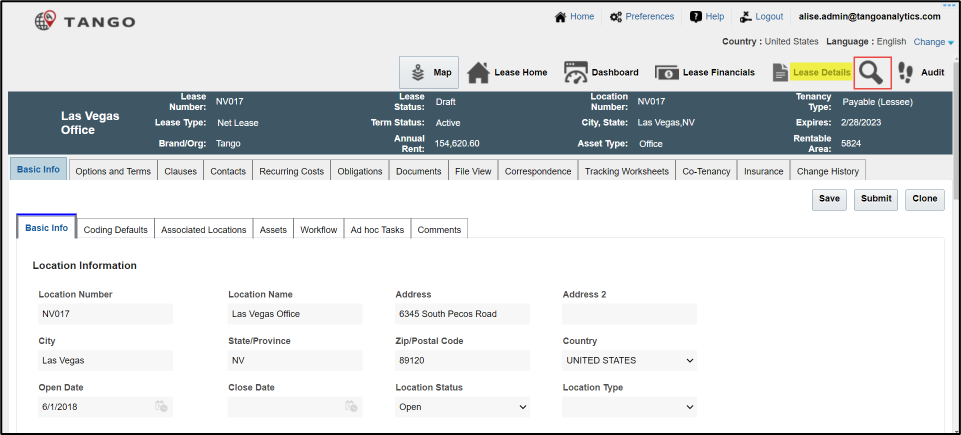
Image: Search icon View from the Lease Financials Page
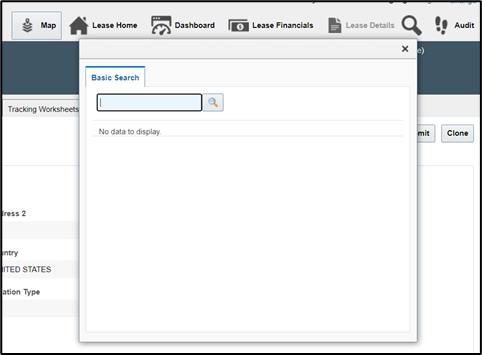
When you click on the Search icon ( ), the dialog box does not display anything besides a search field.
Search for a specific Lease record by entering full or partial criteria in the search field and click the Search icon ( ).
).
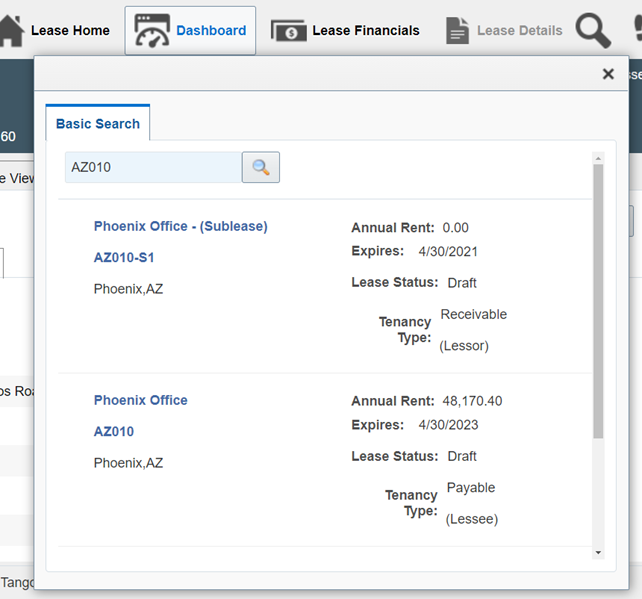
The banner is divided into two columns and four rows down which displays the following lease details:
| Column 1 | Column 2 |
|---|---|
| Lease Name | Annual Rent |
| Lease Number | Expires |
| City, State | Lease Status |
| Tenancy Type |
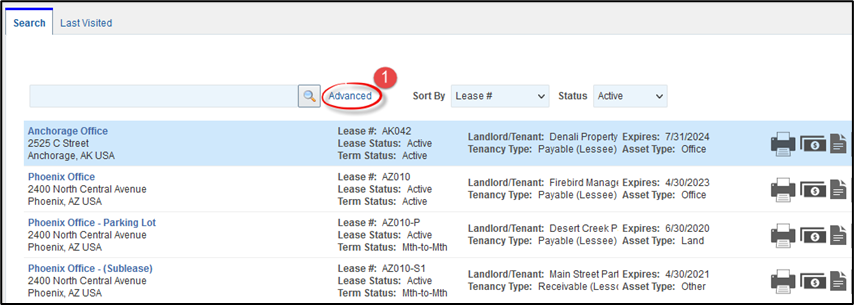
Advanced Search
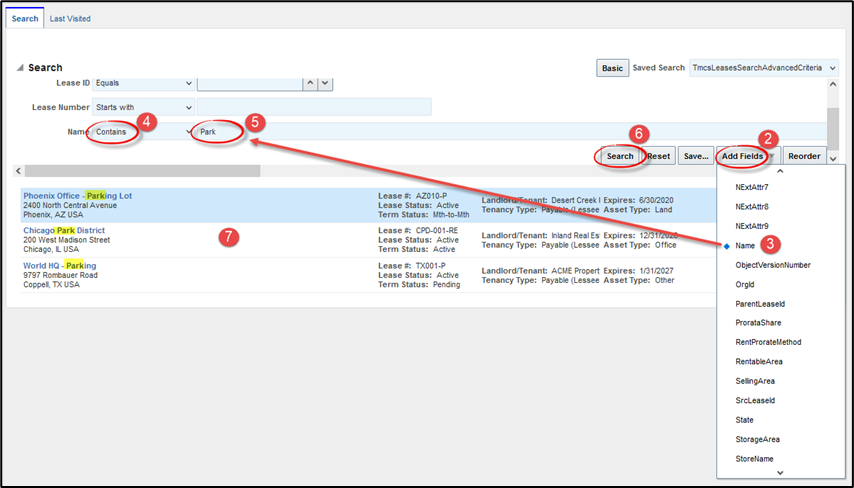
Use the option on the advanced search form located on the Lease Home page to define very specific parameters to retrieve more precise results.
| Step | Action |
|---|---|
| 1. | Click the Advanced search link to the right of the search field.
|
| 2. | Click the Add Fields button.
|
| 3. | Click on a field label in the dialog box to add the field to your current search. |
| 4. | Select the Search operator of your choice to broaden or narrow your search. |
| 5. | Fill in the word(s) in the search field necessary to retrieve all records containing the word(s) defined. |
| 6. | Click the Search button to display the results. |
| 7. | Select the dollar bill icon ( NOTE:
|
 ) or the page icon (
 ) on the right side of the search to open the financial or general details of the Lease. Alternatively, select the lease, then click on the Lease Financials or Lease Details buttons located at the top right corner of the Lease Home page.
Was this article helpful?
That’s Great!
Thank you for your feedback
Sorry! We couldn't be helpful
Thank you for your feedback
Feedback sent
We appreciate your effort and will try to fix the article