Table of Contents
Search for User
This section describes how to add a new user in Tango.
Note: Users are added to Tango after they have been activated in the client system with a valid email address.
| Step | Action | ||||||
|---|---|---|---|---|---|---|---|
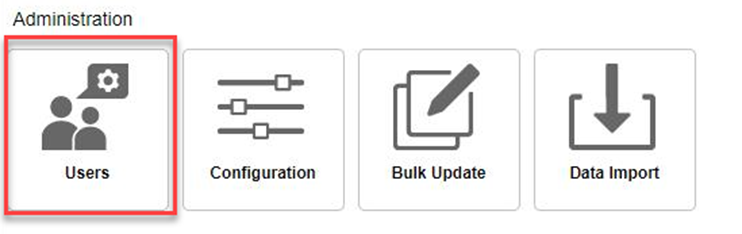
| 1. | Click Users in the Administration folder. |
||||||
| 2. |
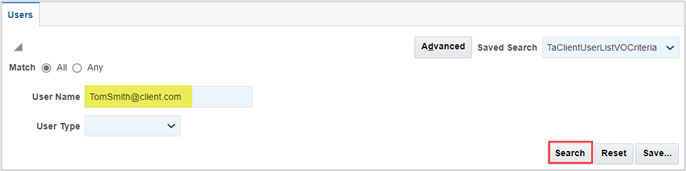
Confirm the user does not exist in the Tango system using one of these methods:
|
||||||
| 3. |
|

Create User Record
Follow the steps below to add a new user.
| Step | Action |
|---|---|
| 1. |
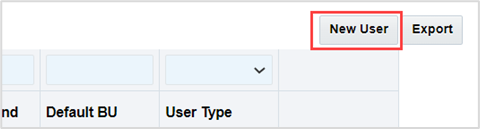
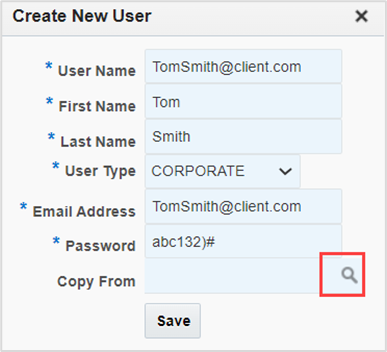
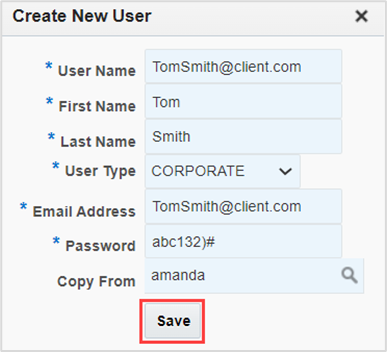
Click New User and complete the following fields:
d. Email Address – User’s business email account.
|
| 2. |
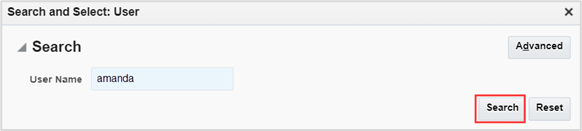
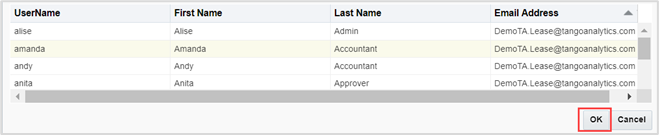
Optional: Apply user attributes from a similar user to the new user as follows:
|
| 3. | Click Save. |
Sync User
Use this feature to update user security access by syncing with a user who has the required access. Refer to Access for detailed information.
| Step | Action |
|---|---|
| 1. | Locate the existing user in the User Results pane. |
| 2. | Click Sync. |
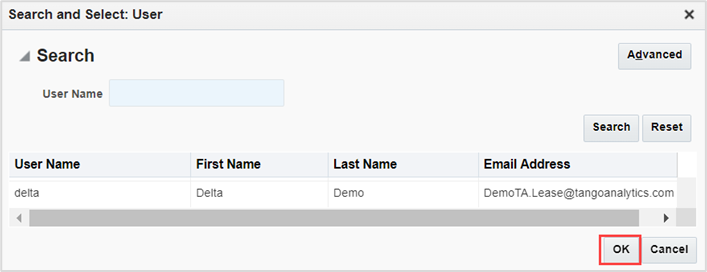
| 3. | Select the user to sync with and click OK. |

User Management
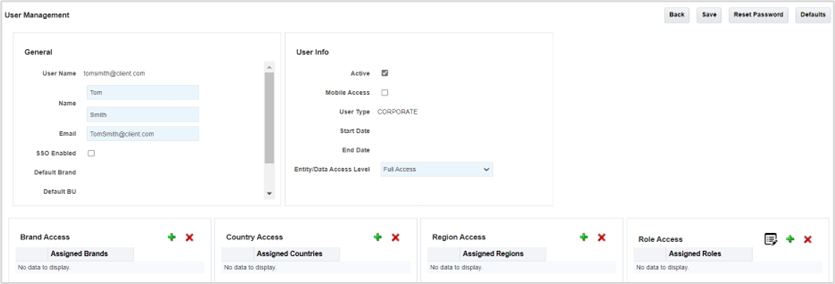
The System Administrator will access the new user in the User Management page to begin defining and applying access based on the users’ roles and responsibilities.
| Step | Action |
|---|---|
| 1. |
Locate the user in the User Results pane, then click the email to open the record.
The User Management page displays. |

General
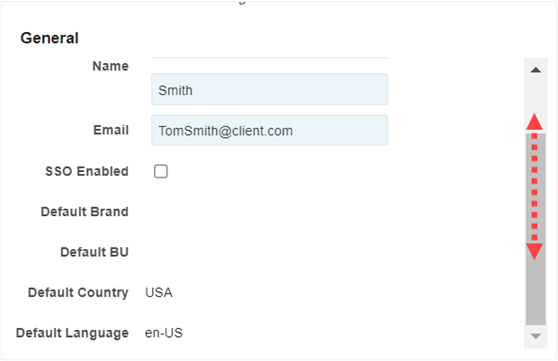
The General pane displays basic user information.
Notes:
The Single Sign On (SSO) Enabled box can be checked, if applicable. Users of SSO will not need to log into Tango at each session.
If any changes are made to this pane, click the Save button located in the top right-hand side of the page.
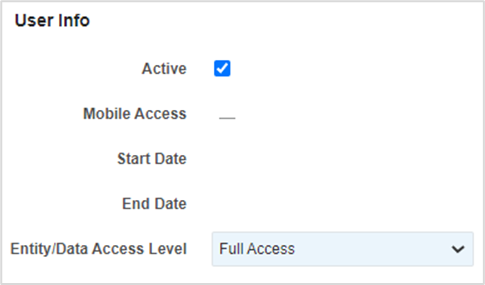
User Info
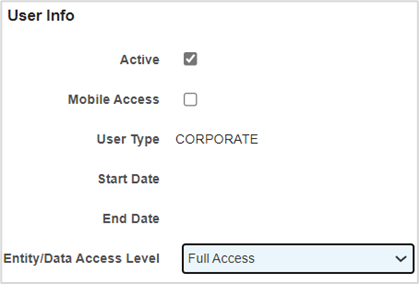
User Info pane contains the following active features:
Active – This defaults to checked when the new user is entered and saved in Tango. Unchecking this box disables the user’s login credentials.
Mobile Access – Check this box to enable a user to connect to the Tango mobile application.
Entity/Data Access Levels – There are three levels of access to the system. Choose from one of the following, then click Save in the top right-hand corner of the page:
Full Access – User can access and make changes to any active module except the System Administration module.
Restricted Access – User can view and make changes to specific modules as defined by their user attributes.
Restricted Read Only – User can view only those modules that the client has deemed applicable to that role.
Set User Defaults
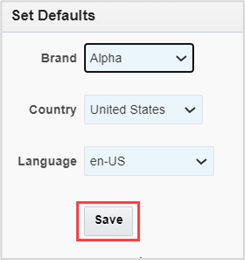
Defaults can be applied to country, brand, or language.
| Step | Action |
|---|---|
| 1. | Navigate to Manage Users page and locate the user. |
| 2. | Click Defaults. |
| 3. | Select the default for Brand, Country, and Language, then Save. |

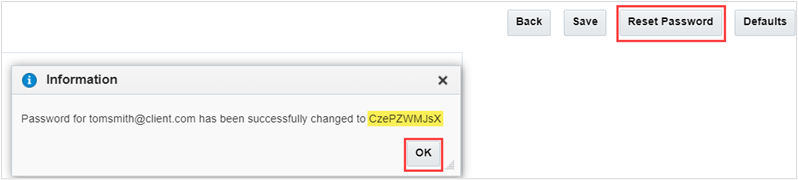
Reset Password
Click Reset Password and the system generates a password that can be shared with the user.
Access
Access privileges are based on the user’s location and duties and begin with the selections made in each pane starting with Brand Access and ending with Role Access. This same rule is applied when modifying user access.
Best Practice: When all access fields are completed, perform a test by checking boxes next to County/Region/Role access and confirming their dependent access is correct.

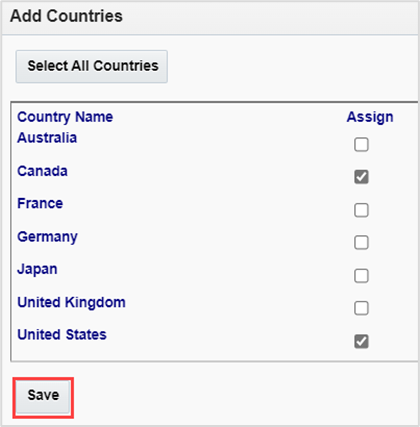
User Story: User Tom Smith is associated with Brand XYZ with Corporate offices in the United States and Canada. His role requires Lease Admin, Edit, and Delete security privileges.
Brand Access
| Step | Action |
|---|---|
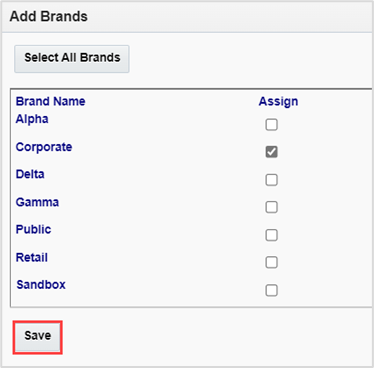
| 1. | Navigate to the Brand Access pane. |
| 2. | Click the + icon to display available brands. |
| 3. |
Check the box that corresponds with the Brand(s) the user should access, else click Select All Brands and Save.
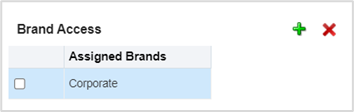
The Brand(s) display in the user profile. |
Country Access
| Step | Action |
|---|---|
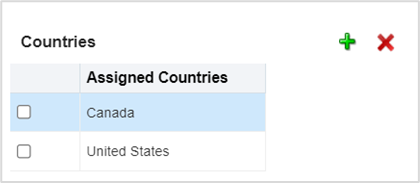
| 1. | Navigate to the Countries Access pane. |
| 2. | Click the + icon to display available countries. |
| 3. |
Check the box that corresponds with the Country(ies) the user should access, else click Select All Countries and Save.
The Country(ies) display in the user profile.
|
Region Access
This section allows you to assign regions.
| Step | Action |
|---|---|
| 1. |
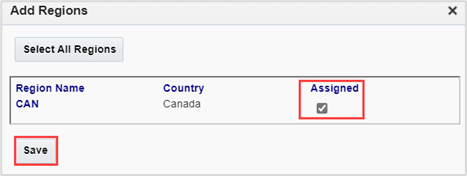
Click the box in the Country row (i.e., Canada) in the Country Access pane, then click the + icon in the Region Access pane. A list of regions displays. |
| 2. | Select the region(s) the user will access, else click Select All Regions and Save. |
| 3. |
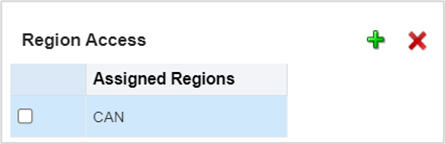
Repeat steps 1-2 for all countries assigned in the Country Access pane.
The region(s) display on the user profile. |

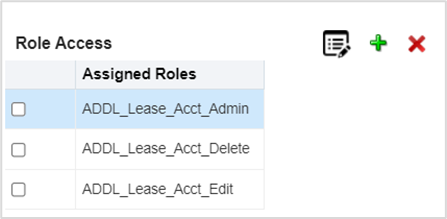
Role Access (Security Profiles)
What a user can access is as important as their level of interaction with the system. For example, if a user has Read Only access to Leases, they should not be issued Edit and Delete privileges. Conversely, if a user has been granted Full Access, then Edit and Delete privileges can be an appropriate access choice. Details about each security profile can be found on the Security Matrix Document.
| Step | Action |
|---|---|
| 1. |
Select a box from an access pane to modify specific security, as applicable.
|
| 2. | Navigate to the Role Access pane. |
| 3. | Select the radio button for Business Unit (BU) or Country level in the Role Access pane, as applicable. |
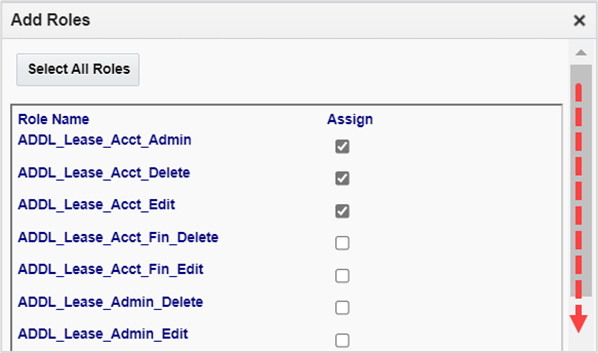
| 4. | Click the + icon to display the roles. |
| 5. |
Check the box next to the security profiles to assign, then Save. Not common: Select All Roles. Note: Scroll to see all available roles.
The role(s) display on the user's profile. |
| 6. |
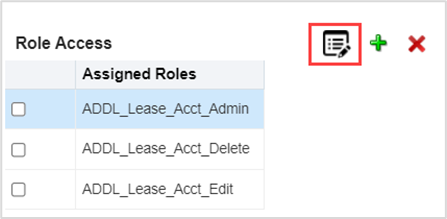
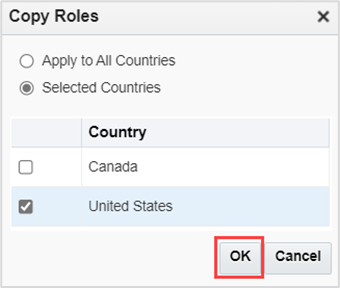
Optional: Copy roles from one country to another as follows:
b. Choose the radio button Apply to All Countries then OK. Else, c. Choose Selected Country, check the country box, then OK.
d. Check the Country box in Country Access pane to confirm the copied security profiles display. |
| 7. | Click Save to apply all changes. |


Modify Access for Existing User
As a user role changes over time, so can their access. Promotions, moves to a new department or segment of the business can trigger access modifications.
| Step | Action |
|---|---|
| 1. | Navigate to Manage Users page and locate user. |
| 2. |
Add access: Perform the Access Procedures in this document. |
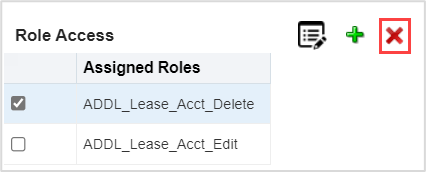
| 3. |
Remove access: Note: Removing a country will remove all associated regions and roles.
|
Disable System Access for an Existing User
After a user is disabled, they will lose the ability to login. A user may be disabled due to a resignation, termination, retirement, or other security issues.
| Step | Action |
|---|---|
| 1. | Navigate to Manage Users page and locate user. |
| 2. |
Uncheck the box Active. System access for the user is disabled. |
| 3. | Click Save to apply changes. |
Access to Entity Security
By default, new users have all Entity Access boxes checked (Target, Sites, Projects, Stores, Lease) in the system. This works in combination with the other user security settings. For example, if a user has access to XYZ Brand in the United States, only those entities belonging to that country, region, or brand will display. Unchecking the Entity Access box for any entity will remove access for that user in the system.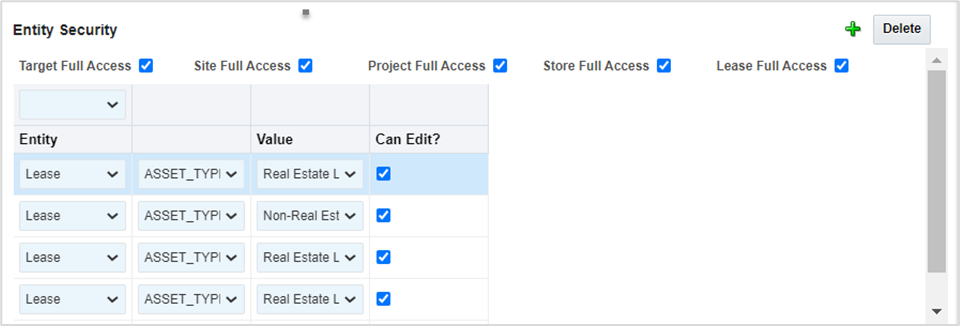
Use Case: Restrict the access to certain types of Leases for Tom Smith. Perform the following steps.
| Step | Action |
|---|---|
| 1. | Navigate to Manage Users page and locate user. |
| 2. | Uncheck the box Lease Full Access |
| 3. | Click the + icon. A new entity table row displays. |
| 4. |
Click the down caret in each column and make the following selections:
|
| 5. | Click Save. |

Was this article helpful?
That’s Great!
Thank you for your feedback
Sorry! We couldn't be helpful
Thank you for your feedback
Feedback sent
We appreciate your effort and will try to fix the article