TARGETS
Once a Target is created on the Map, additional details can be added and reviewed from the Targets tile.
Reasons to use the Target tile would include:
Set a site to be the primary site for sales forecasting and optimization scenarios, etc.
Change the status of a target
View demographic data of a target
Step
|
Action
|
1.
|
Click Targets on the Function Dashboard.
The Target search page displays.
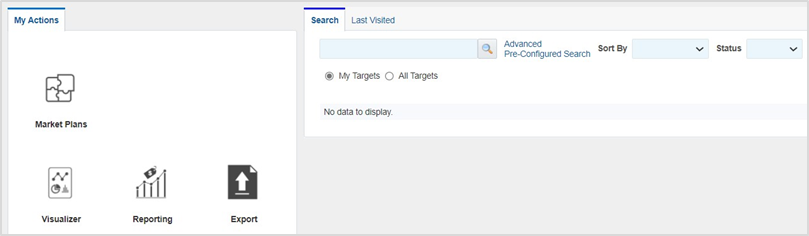 Note: The page defaults to My Targets. Click the radio button All Targets, as applicable. Note: The page defaults to My Targets. Click the radio button All Targets, as applicable.
|
Step
|
Action
|
2.
|
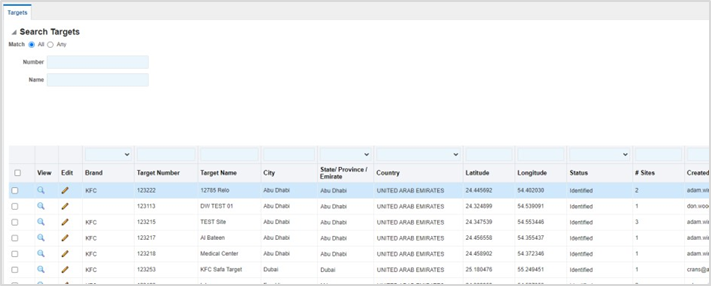
Click Pre-Configured Search, else click All Targets radio button.

Enter search criteria in the search box, else leave blank and click Search. Scroll to view the results.
|
Step
|
Action
|
3.
|
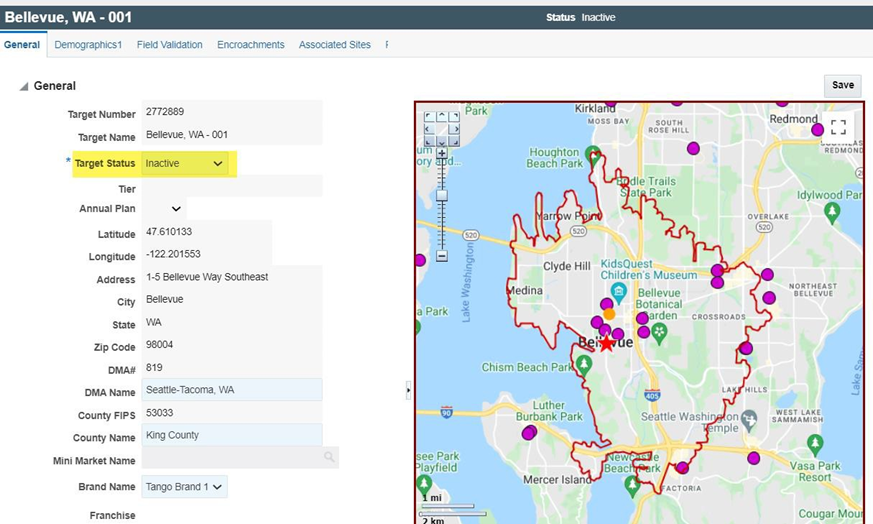
Click the View or Edit icon, as applicable.
Note: The default status for any Target is Identified. If it will not be approved, change the status to Inactive and the icon will not show on the main map in the active layer.
|
|
If…
|
Then…
|
|
View
|
Click through all tabs on the Target page and proceed to Edits if changes are applicable.
|
|
Edit
|
Modify fields in the following tabs, as applicable:
Note: Editable fields are configurable, therefore some fields may be unavailable for edits.
General Field Validation Encroachments Associated Sites
|
|
TABS
The table below describes each of the Target tabs for viewing or editing, as applicable.
Tab
|
Description
|
Editable? Yes/No
|
General
|
Data entered in the Create process.
|
Yes
|
Demographics
|
Demographic data for the selected Target
|
No
|
Field Validation
|
Configurable – Information the market planner would collect on field visits
|
Yes
|
Encroachments
|
Configurable
|
Yes
|
Associated Sites
|
Sites logically linked to the selected Target. View all sites that will result in a single store. Refer to Associated Sites Tab.
|
Yes
|
ASSOCIATED SITES TAB – SET SITE AS PRIMARY
Targets will not be selected as part of the sales forecast unless a primary site is selected.
Note: Only one of these sites can become a location.
Step
|
Action
|
1.
|
Click the Associated Sites tab, then highlight the site, if applicable.
Note: If there are no associated sites, procedure ends.
|
Step
|
Action
|
2.
|
Click Set Primary.
The site is marked as Primary in the Primary column.

|
3.
|
Click Save.
|
A target is a general area and the site is a specific location or address. To run a sales forecast, a site record must be created.
Step
|
Action
|
1.
|
Navigate to the Function Dashboard, then click Sites.
The Site search page displays.
|
Step
|
Action
|
3.
|
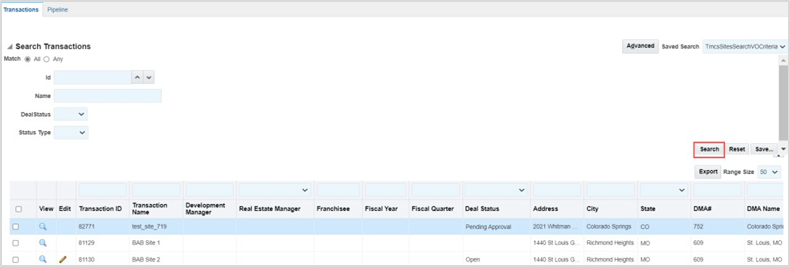
Click Pre-Configuration Search, then click Search to view all sites.
|
4.
|
Click Edit on the row to modify the selected Site’s information page.
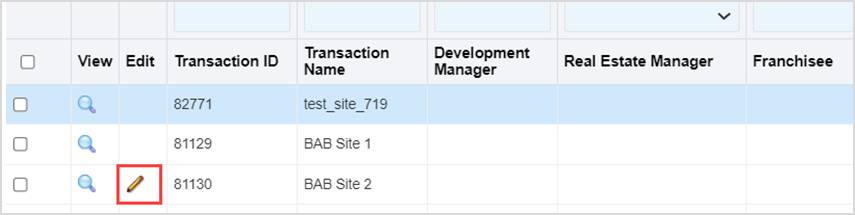
Refer to the table below for a complete description of each tab on the Edit page.
|
Tab
|
Description
|
Site General
|
This tab contains the general info about the Site such as the location details.
|
Site Attributes
|
Allows users to change editable fields.
Note: Required fields will be designated with an asterisk “*”. These fields are required for the Sales Forecast to run properly.
|
Demographics
|
To view the demographic data for the Site, select the Demographics tab. The demographic data cannot be edited. The data is generated by the system based upon the trade area created for the Site.
|
Site Questionnaire
|
Once created, generates a Sales Forecast.
|
Sales Forecast Results and Cannibalization
|
Displays data from the Sales Forecast. Once a Sales Forecast is set with the Scenario Status Current, the data will be updated in these tabs.
|
SITE QUESTIONNAIRE
A questionnaire can be completed in two areas. The first area is when you perform a Sales Forecast and complete a pre-configured questionnaire, and the second is when questionnaires are completed on Sites. This section describes the steps to complete a site questionnaire.
Step
|
Action
|
1.
|
Navigate to the Function Dashboard then click Sites.
|
2.
|
Click Pre-configured Search, then search for the site.
|
3.
|
Click Edit on the site row.

|
Step
|
Action
|
4.
|
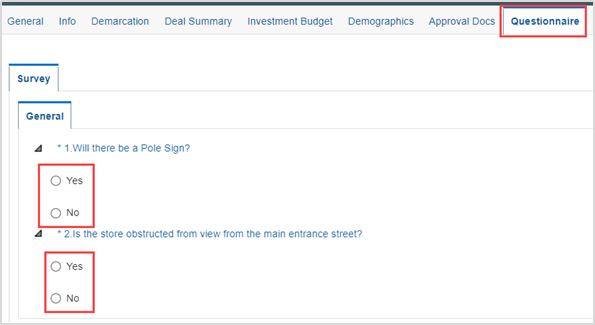
Click the Questionnaire tab and follow these steps:
| If.... |
Then |
| Questionnaire populates |
a. Answer all the questions
b. Click Validate and Save
|
| Nothing populates |
a. Click +Create
b. Answer all questions
c. Click Validate and Save

|
|
CONVERTING SITES TO LOCATIONS
Note: Proceed to next section in this document if Tango Projects is in scope.
Step
|
Action
|
1.
|
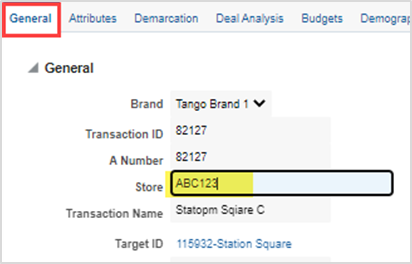
In the site location, click the General tab.
|
2.
|
Type a unique, alphanumeric number in the Store field and click Save.
|
| 3. |
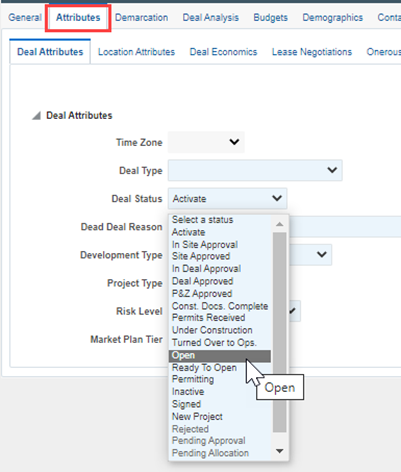
Click the Attributes tab and choose status Open in the Deal Status drop-down.
Click Save.
The location record is saved.
|