Table of Contents
This section describes how to get started with Tango Energy & Sustainability (E&S).
COMPLETING ONBOARDING FORM
The first step in getting your portfolio information into Tango E&S is by completing the Onboarding Form that is sent to you by your designated Customer Success Manager. The Onboarding Form is an Excel file with 3 different tabs. The Portfolio Information tab is used to create all the facilities/properties that will be tracked in Tango E&S. The facility names, addresses, property types, and square footage information are all entered in this tab. The next tab is Account Information, which depicts all the utility accounts associated with each facility. The account number, entity, commodity type, utility and supplier company, and login credentials for the LDC and ESCO online billing portals are required fields, unless your invoice data does not have electronic access available. The last tab is Users which requires first and last names along with email addresses and a permission level. Each user is identified with a username (email address), a password, and a permission level (all facilities or a specific facility). This lets us know which email addresses to initially activate so you and your team can sign into Tango E&S.
SIGNING IN TO TANGO E&S FOR THE FIRST TIME
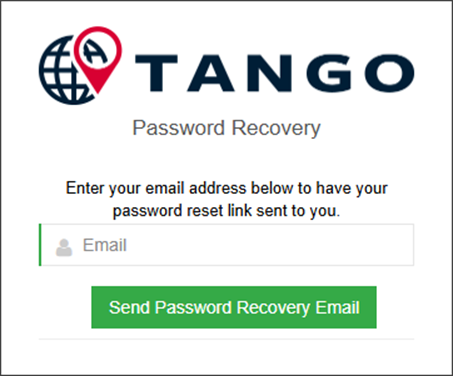
Once your email address has been activated, you will receive an email from tango-es-noreply@tangoanalytics.com with your login credentials. You will then be able to sign into Tango E&S using the website https://tango.utilitydatamanagement.com. If you cannot find the email or forgot your password, you can use the “Forgot Password” link which will send you a link to reset your password. If you have not received the email, please check your Promotions and Spam folders then reach out to your Customer Success Manager.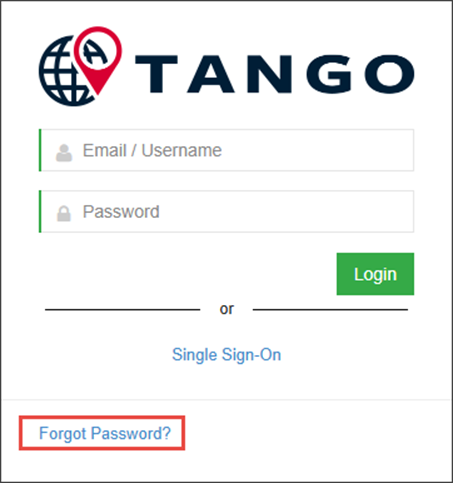
NAVIGATION
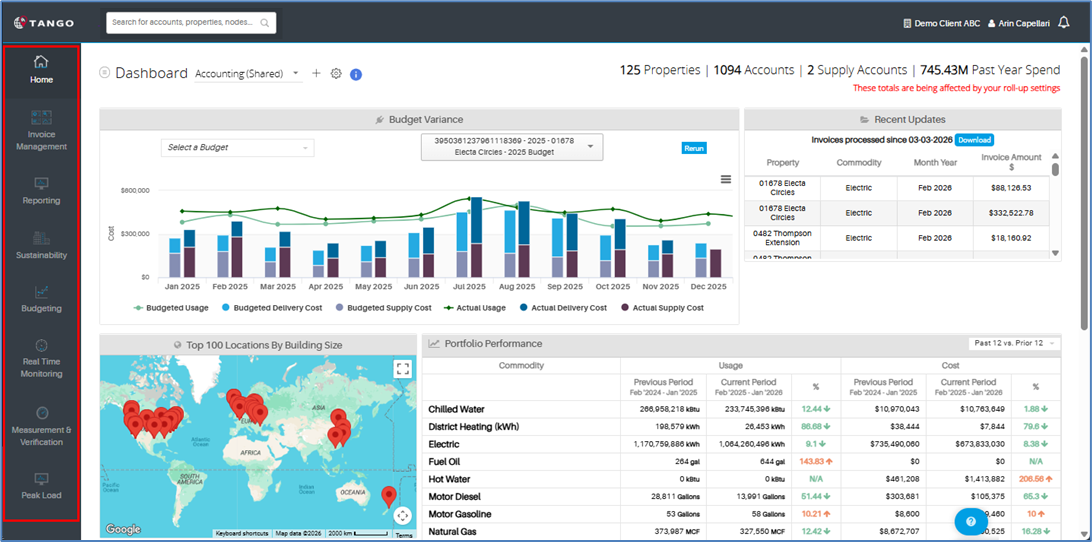
LEFT HAND NAVIGATION BAR
The Left-Hand Navigation Bar contains all the major functions/features of Tango E&S that were briefly discussed in Chapter 2. Each module will bring you to a different page.
SEARCH BAR
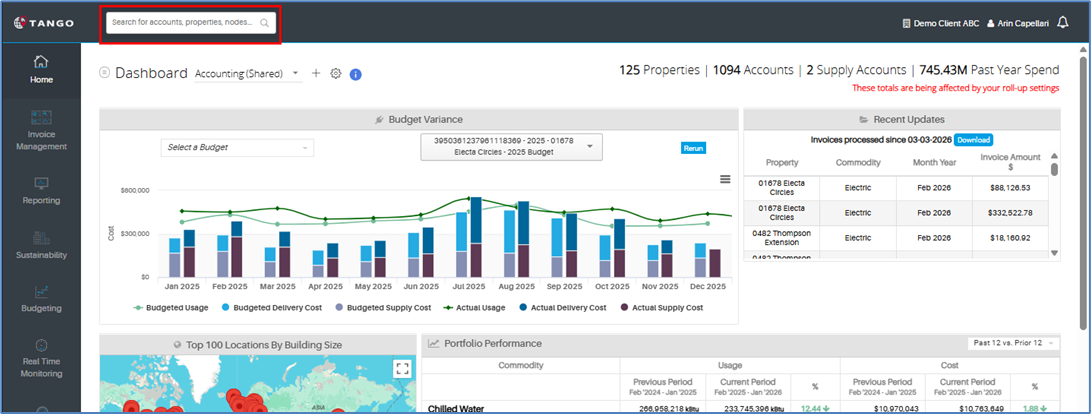
The Search Bar is located on the top left-hand corner of the screen. Once your hierarchy is set up, you can type a region, property name, account name, or an account number and press enter. This will bring you to the details of that particular property or account you entered.
CREATING INITIAL HIERARCHY IN TANGO E&S
The hierarchy of your portfolio can be created in two different ways, via the user interface or using an Excel template. The client or region would be the highest level of the hierarchy, followed by the properties and accounts. If you wish to have many levels and have many accounts, the Excel Template is highly recommended.
The first way via the user interface would only be recommended for a small number of accounts. This would consist of manually entering the data in the Invoice Management module on your left- hand navigation. If you hover to the right of your company’s name, you will see a “+” sign.
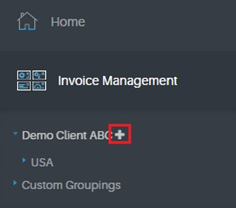
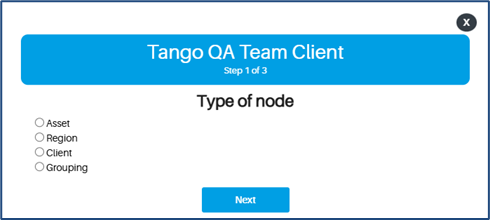
Once clicked, you can add an Asset, Region, Client, or any general Grouping that fits your hierarchy. Continue this process until you are ready to enter the most granular (the account level).
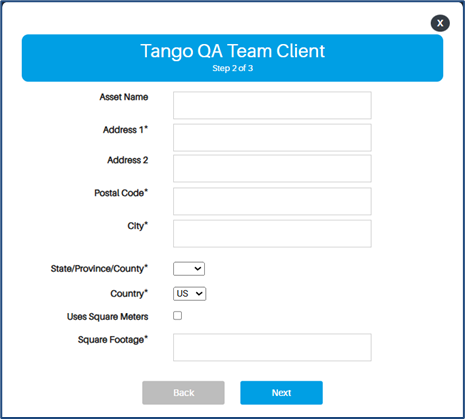
After the property is added, the accounts can now be created.
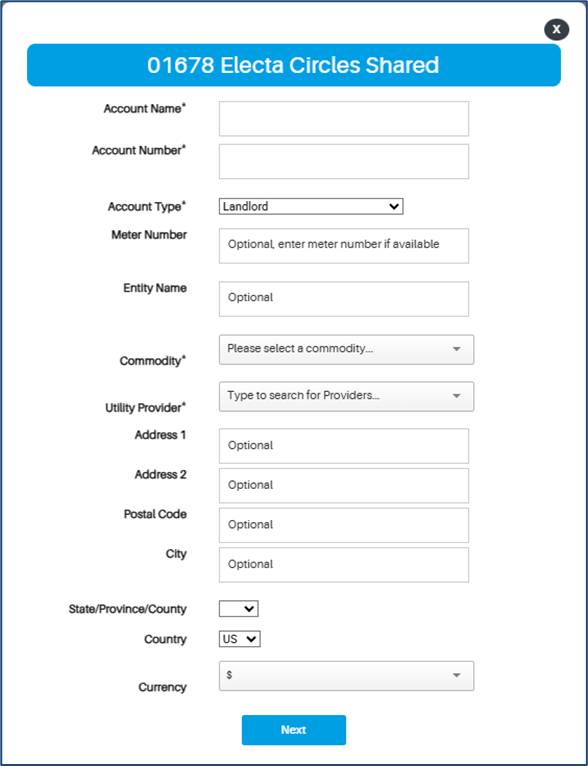
This process continues until all accounts for all commodities are created for each property.
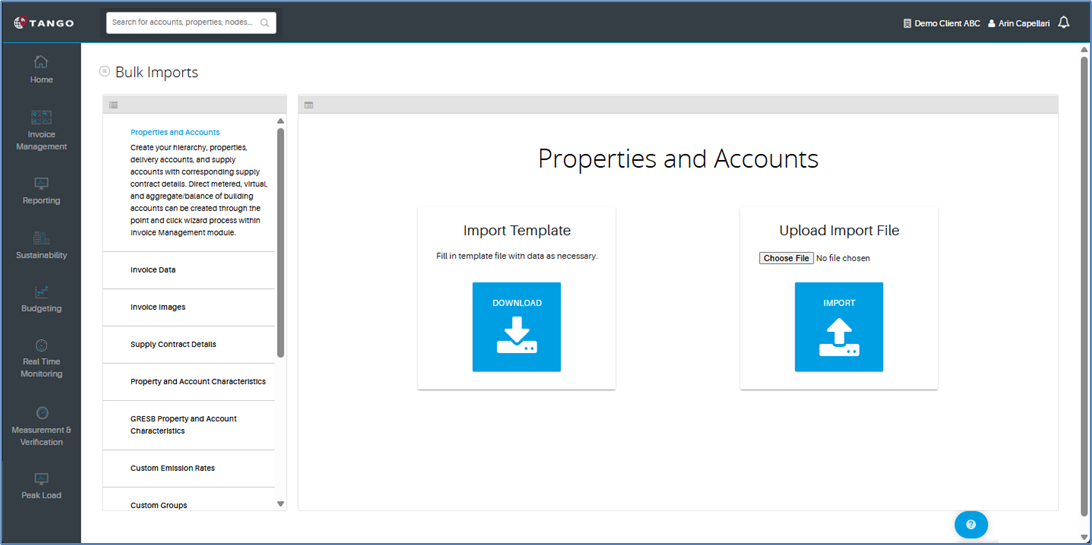
The second way is set up by using a template that you can download, complete, and then import into Tango E&S. The template is in the Imports section, which is located in the menu under your name on the upper right-hand corner of the screen.
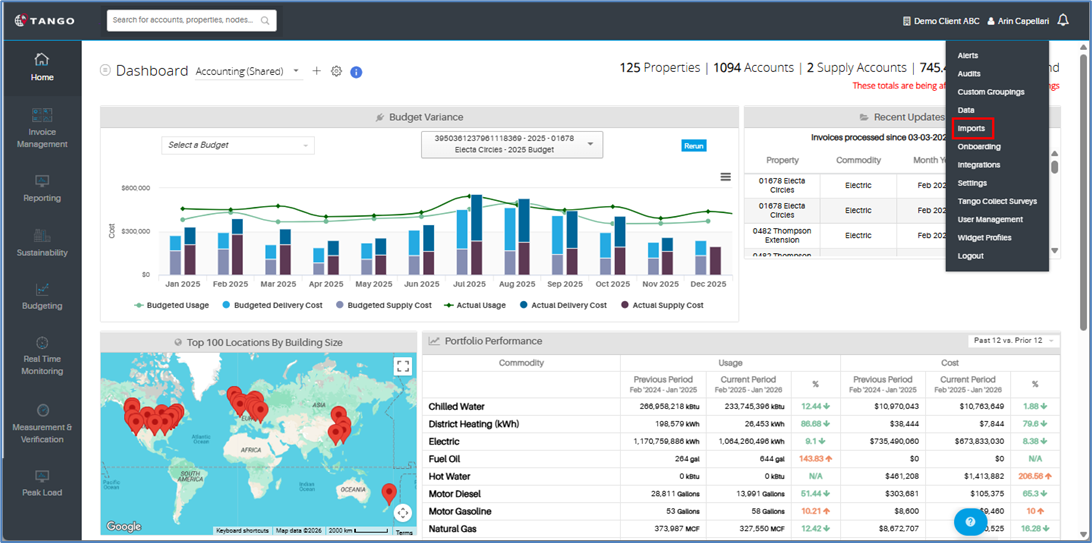
Once downloaded and completed, the template can be uploaded directly into Tango E&S. Shortly after being imported, you will receive an email indicating if each line was successfully imported.
Was this article helpful?
That’s Great!
Thank you for your feedback
Sorry! We couldn't be helpful
Thank you for your feedback
Feedback sent
We appreciate your effort and will try to fix the article