Table of Contents
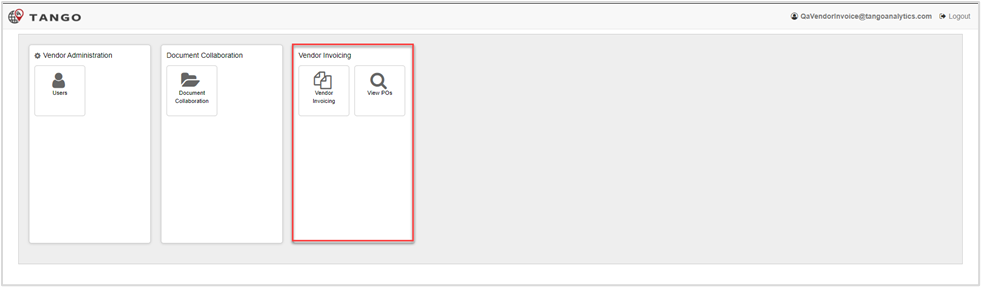
Vendor invoicing is a process that can be enabled for the vendor to create, submit, and manage Invoices against their Purchase Orders for a Project.
Vendor Invoicing Menu
New Invoice
-
Pop up a new Vendor Invoice record
New View/Model in Edge
Draft Invoices
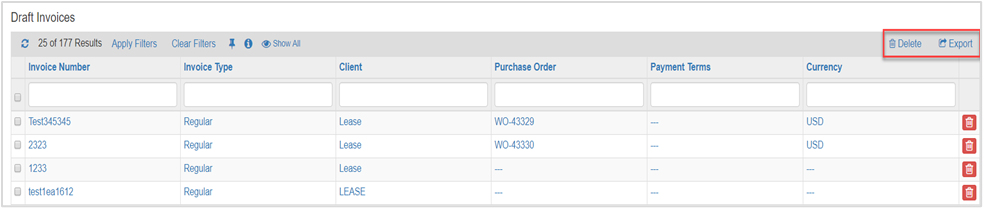
The draft invoices section of the vendor invoice owner portal provides an overview of all Vendor Invoices that have been initiated with initial data but have not yet been submitted to the core.
Information for the Invoice Number, Invoice Type, Client, Purchase Order, Payment Terms and Currency are available through this list.
From this section the user can:
Refresh Draft Vendor Invoice Information.
Apply and Clear Sorting Filters
Export and Download Draft Vendor Invoices into XLS Format. (standard report export functionality)
Pending Approval
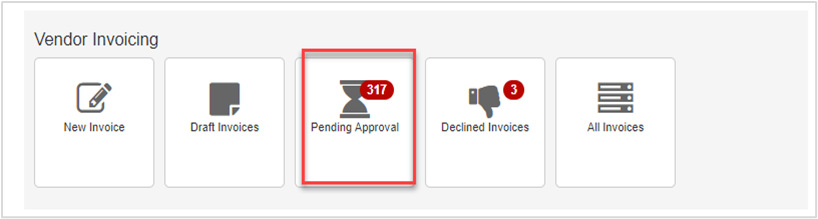
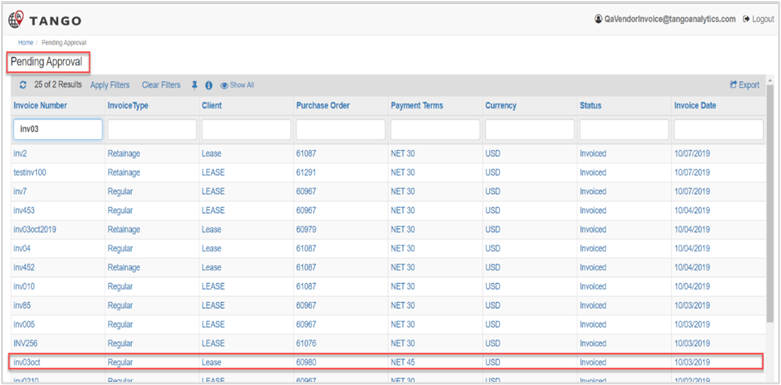
The Pending Invoices section of the vendor invoice owner portal provides an overview of all vendor invoices that have been submitted to the core with completed data but have not yet been approved by the Facility Manager.
Information for the Invoice Number, Invoice Type, Client, Purchase Order, Payment Terms, Currency, Status, and Invoice Date are available through this list.
From this section the user can:
Refresh Vendor Invoice Information
Apply and Clear Sorting Filters
Export and download pending approval vendor invoices into .xls format

Declined Invoices
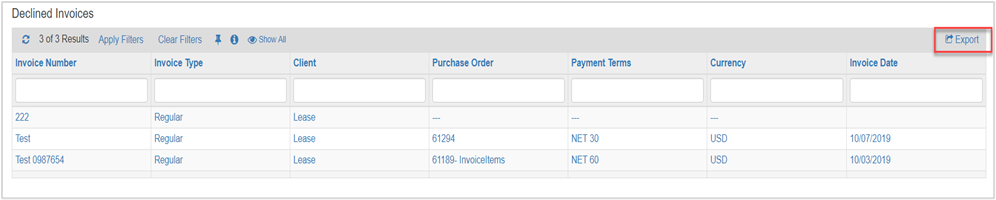
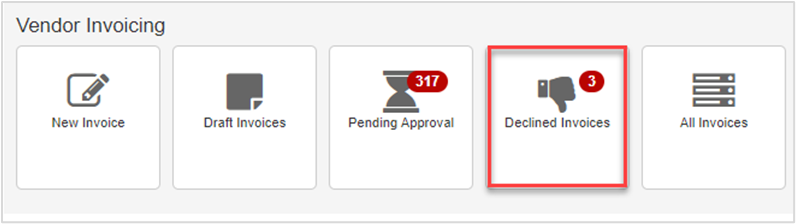
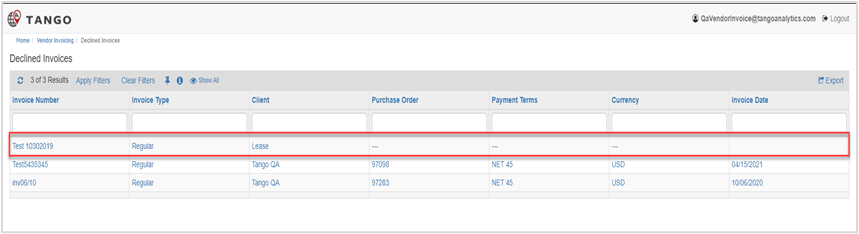
The Declined Invoices section of the vendor invoice owner portal provides an overview of all Vendor Invoices that have been declined by the Facility Manager.
Opens a report that shows all vendor invoices in Declined status
Information for the invoice number, invoice date, client, purchase order, payment terms, currency, and invoice date are available through this list.
From this section the user can:
Refresh declined vendor invoice information
Apply and clear sorting filters
Export and download declined vendor invoices into .xls format
All Invoices
The All Invoices section of the vendor invoice owner portal provides an overview of all Vendor Invoices that have been in Draft, Invoiced, Invoice Completed, Invoice Declined and Cancelled status.
Information for the Invoice Number, Invoice Type, Client, Purchase Order, Purchase Terms, Currency, Status, and Invoice Date are available through this list.
From this section the user can:
Refresh Vendor Invoice Information
Apply and clear sorting filters
Export and download vendor invoices into .xls format

Vendor Invoice Record
This section will review the process for the internal end user for adding and completing a Draft Vendor Invoice to be approved by the Facility Manager.
Creating a New Vendor Invoice
We can create a new Vendor Invoice by clicking the New Invoice tile in the Vendor Invoicing menu. This tile will navigate to the vendor invoice processing view. 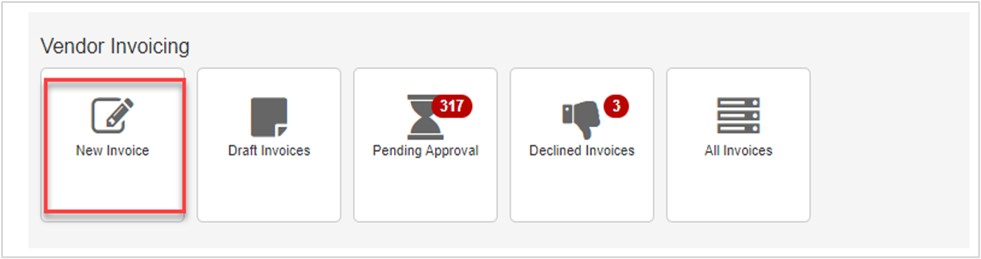
Vendor Invoice creation view
Once a vendor invoice record is created the Vendor Invoice page displays. 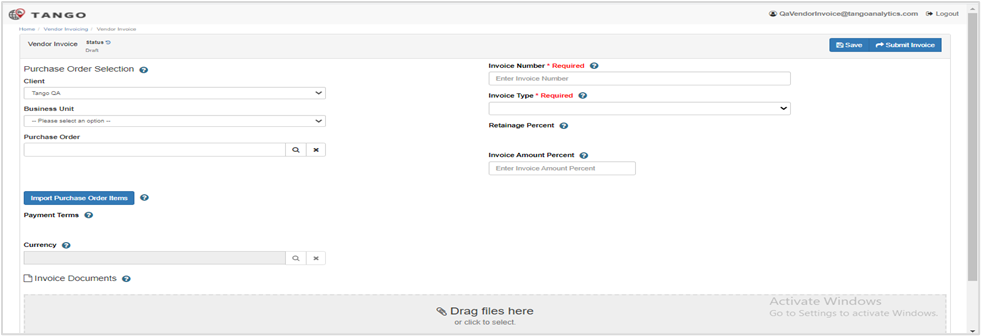
Enter the following information
Invoice Number: Enter a number for the Vendor Invoice record (Free text field).
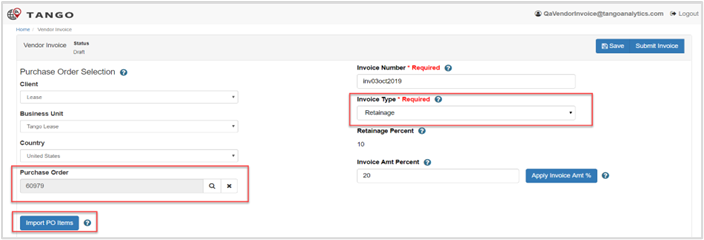
Invoice Type: The user can select two types, Regular or Retainage.
Client: Select the appropriate client's name from the dropdown.
If the vendor only has one option for selecting Client, this field will be automatically populated.
Business Unit: Select the business unit associated with the selected client from the dropdown.
If the vendor only has one option for selecting Business Unit, this field will be automatically populated.
Country: Select the appropriate that associated with the business unit from the dropdown.
If the vendor only has one option for selecting Country this field will be automatically populated.
Purchase Order: Select the Purchase Order from the list associated with the Client, Business Unit and Country.
Retainage Percentage: Automatically popup the field when the user selects the Purchase Order.
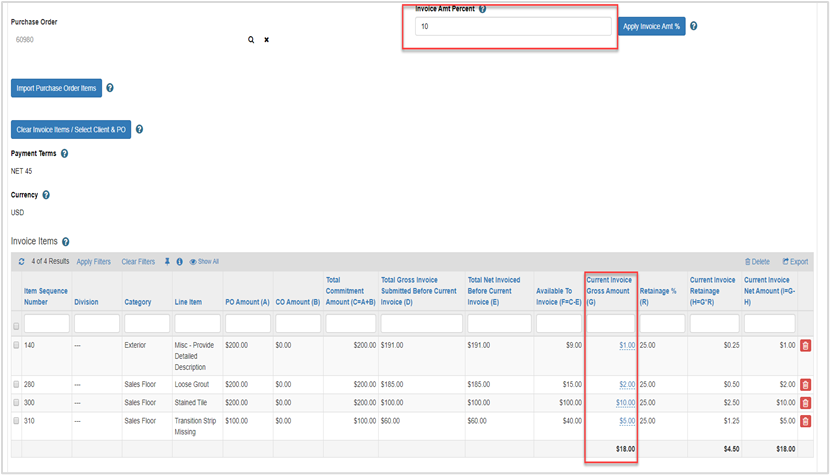
Invoice Amt Percent: This field populates a percentage to automatically update all invoice items with the ‘Apply Invoice Amt %’ button.
Apply Invoice Amt %: By clicking this button user can update all the invoice items to overwrite field: Current Invoice Gross Amt (G) = Total Commitment Amt (C) * (Invoice Amt Percent/100).
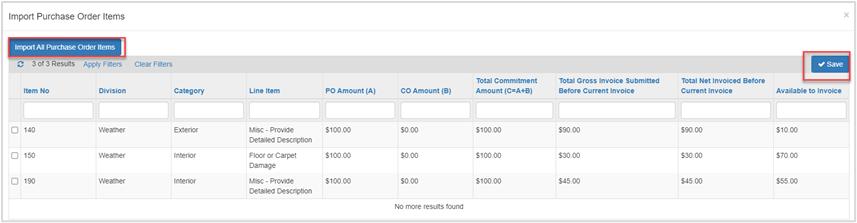
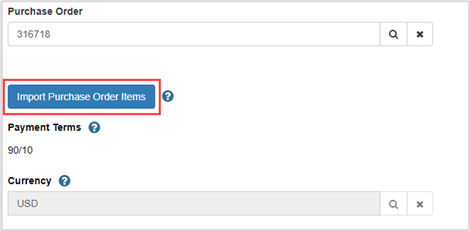
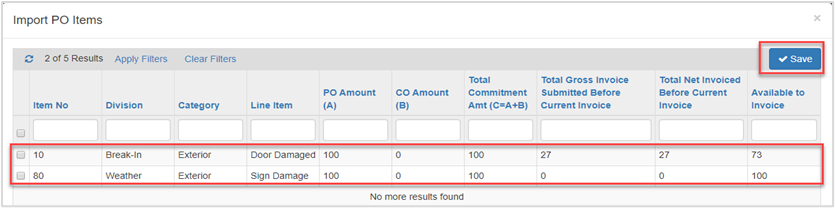
Import PO Items: This button displays a list of available PO items from the selected Purchase Order. Only PO items with a positive Available To Invoice amount will be available.
Payment Terms: Data is imported from PO selected from the platform.
Currency: Data is imported from PO selected from the platform.
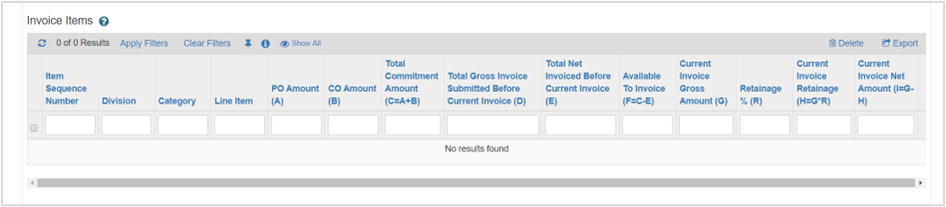
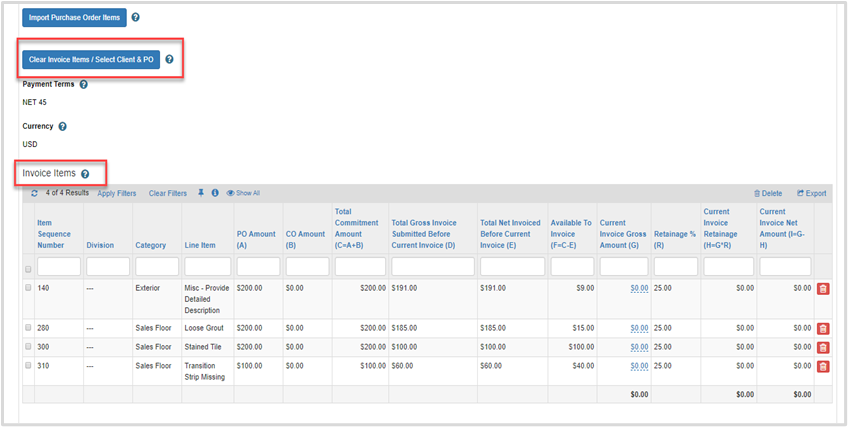
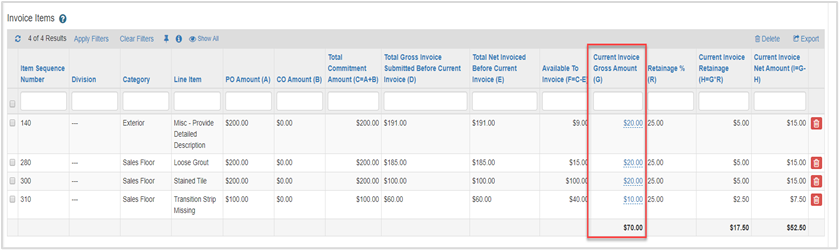
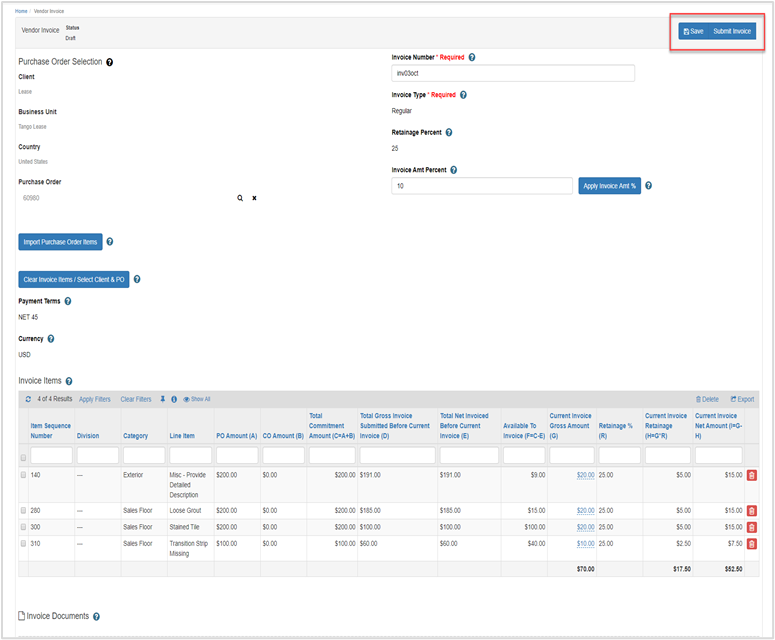
Invoice Items: This report displays Invoice Items for each Purchase Order Item Imported. The vendor will enter the Current Invoice Gross Amt (G) for each invoiced item.
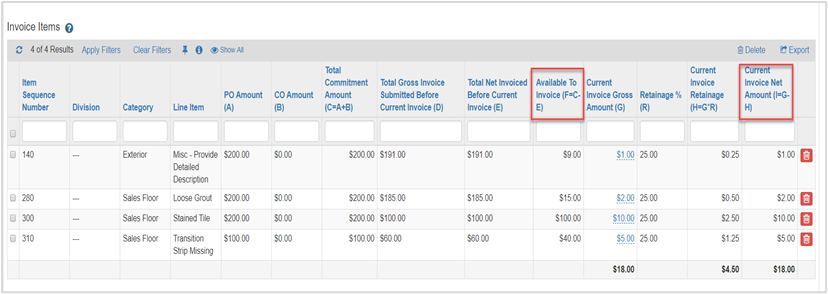
Note: Current Invoice Net Amt (I) can’t be greater than Available to Invoice (F). This validates upon submitting.
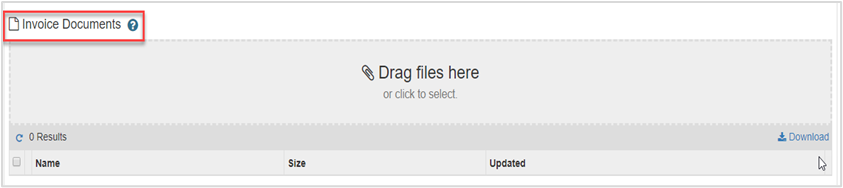
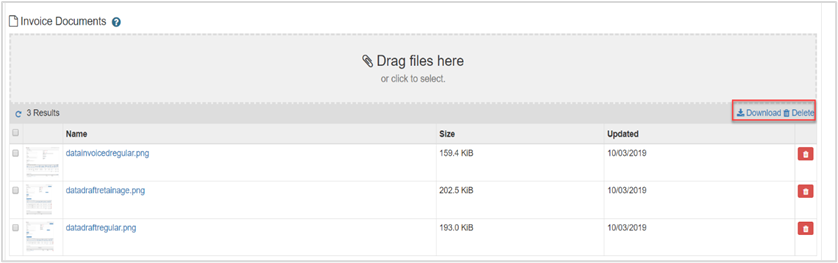
Invoice Documents: The user can attach invoice documents here. Documents are required before submitting the invoice.
Draft Vendor Invoice – Regular
| Step | Action |
|---|---|
| 1. |
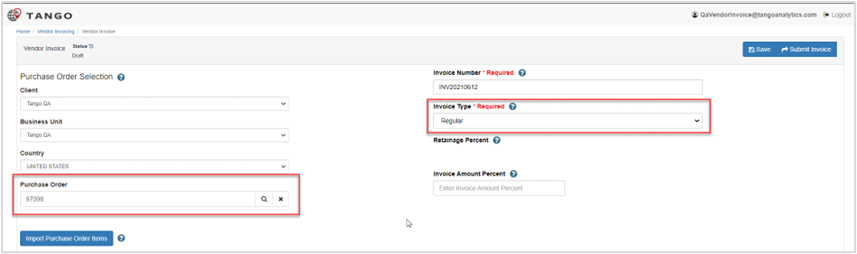
Click New Invoice and add the required fields and in that select the Invoice Type as Regular. |
| 2. |
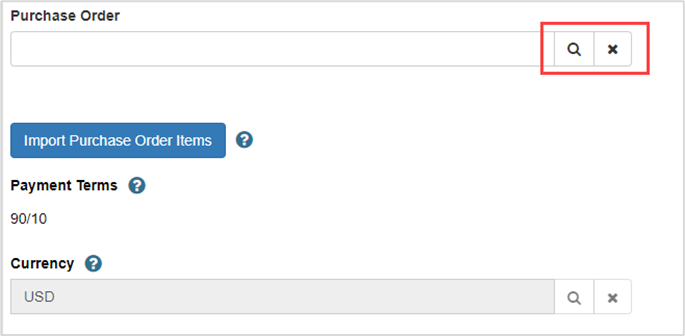
Click the magnifying glass in the Purchase Order field. Click the green arrow to select the appropriate PO from the list. |
| 3. |
Click Import Purchase Order Items, then click to select PO item(s), else select Import All PO items. Click Save. The selected PO Items display in the Invoice Items report. |
| 4. |
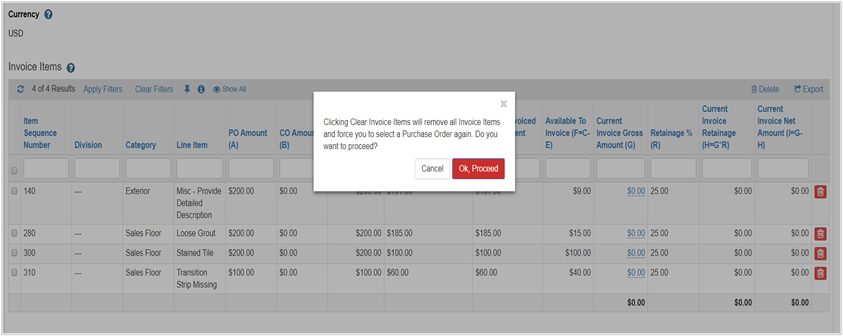
Click Clear Invoice Items / Select Client & PO, as applicable, then click Ok, Proceed on the pop-up. The Invoice Items report is cleared. |
| 5. |
In the Invoice Items report, the user can enter the Current Invoice Net Amount (I) for each items and it should not be greater than the Available to Invoice (F). |
| 6. |
The user can use the “Invoice Amt Percent” field to make changes in the “Current Invoice Gross Amount” in the ‘Invoice Items’ report. |
| 7. |
If the user clicks the “Apply Invoice Amt %” button, the “Current Invoice Gross Amount (G)” in the report updates based on the Percentage amount. Calculation is G = C*(Invoice Amt Percent/100) |
| 8. |
The user can add file attachments in the Invoice Documents section. |
| 9. |
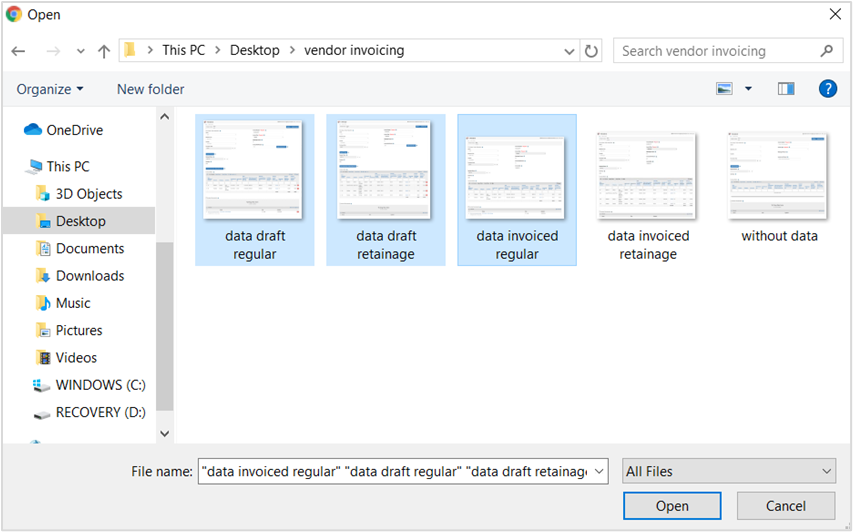
The user can drag and drop files here or click here to select the files. |
| 10. |
Optional: Click Delete on the record row. Choose a record row, then click Download. |
| 11. |
After the amounts are entered, the vendor can submit the invoice record to core by clicking Submit Invoice. The status is set to Invoiced and the record is visible in the Pending Approval tile in Projects. |

Draft Vendor Invoice - Retainage
The process for a retainage invoice type is similar to a regular type of invoice. The only change is how the Retainage % (R) and the Current Invoice Retainage (H) are set to 0 for Retainage Invoices.
| Step | Action |
|---|---|
| 1. |
|
| 2. |
Click the magnifying glass on the Purchase Order field, then click the green arrow on a Purchase Order row. |
| 3. |
After selecting the PO, click Import Purchase Order Items. Select the PO item(s) then click Save.
The selected PO Items are visible in the Invoice Items report. Note that when Invoice Type = Retainage, the Retainage % (R) and therefore the Current Invoice Retainage (H) are set to 0. This also means that the Current Invoice Net Amount (I) will match the Currency Invoice Gross Amount (G), which is validated against Available to Invoice (F), just like for a Regular Invoice Type. |

Submitted Vendor Invoice
| Step | Action |
|---|---|
| 1. |
Click Pending Approval. |
| 2. |
Click the invoice row with a status Invoiced. The following is initiated:
|
Declined Vendor Invoice
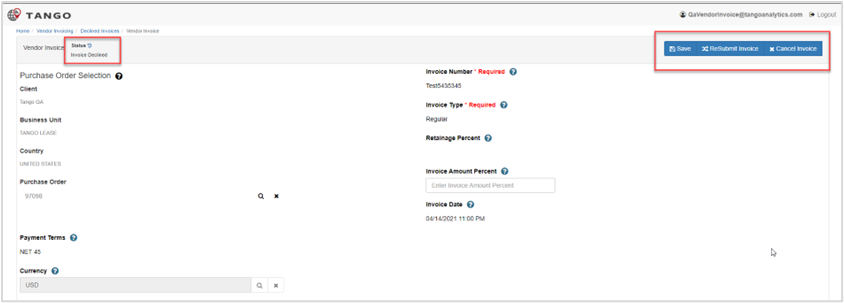
If the invoice is rejected, the vendor can either correct and resubmit or cancel the invoice.
| Step | Action |
|---|---|
| 1. |
Click Declined Invoices. |
| 2. |
Click to open the declined invoice row. |
| 3. |
Correct or complete any fields, then click Resubmit Invoice. Optionally, click Cancel Invoice. |
Was this article helpful?
That’s Great!
Thank you for your feedback
Sorry! We couldn't be helpful
Thank you for your feedback
Feedback sent
We appreciate your effort and will try to fix the article